
Créer une forme de pinceau feuille avec Photoshop Extended CS6. Le blog demandé n'existe pas.
Le blog demandé : n'existe pas. Si vous le désirez, vous pouvez créer ce blog . Vous allez être redirigé vers le portail OverBlog dans une dizaine de secondes. Vous allez être redirigé vers le portail Erog dans une dizaine de secondes. The blog you requested does not exist. How to Make a Beautiful Spring Butterfly Scenery - Photoshop Tutorial. Step 1 Open new PSD fileSize: 1500X1640pxResolution: 100Color: white Name: spring Step 2 Before sketching we are going to create a group folder by clicking on the (create a new group) icon from the layers window.
Step 3 Double click on the groupe1 folder and change the name to sketch. Step 4 Now create a new layer in the sketch folder (Layer --> new - layer) 1 - Set the foreground color to # 0202ff 2-Click Brush tool(B), change Size to7px Hardness 0%, Opacity 89%, Flow 92%. ( We will be using the same brush in all steps with different opacity and size).
Step 5. How To Make A Digital Painting Of A Rose From Scratch - Photoshop Tutorial. Photoshop Tutorials - Photoshop Effects - Tutorial Park. Create a Fantasy Landscape Using Digital Painting Techniques. In this tutorial we will explain how to create a fantasy landscape using digital painting techniques.
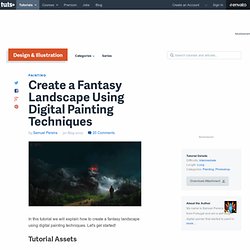
Let's get started! Tutorial Assets The following assets were used during the production of this tutorial. Editor's note: The brush sets linked below are not necessarily the brushes that were used in this tutorial. The brushes below were recommended by the author. Step 1 - Sketching. Advanced Glow Effects. In this tutorial, we're going to create some really sharp-looking glow effects using a combination of layer styles, the Pen Tool and Color Blending.

The end effect is quite stunning and hopefully you'll pick up some tips you didn't know before. As with pretty much every tutorial I've ever written, we begin with a radial gradient. This one is pretty harsh and goes from a reddish brown color to black. Here are the exact color codes: Foreground color - #922f00 Background color - #000000 In this tutorial, we actually need a pretty intense center, so what we'll do is duplicate the layer we just made and set the one above to a blending mode of Color Dodge. Now in our glow effect, it helps to have a nice textured background. Then go to Filter > Render > Clouds. Now set the opacity of your layer to Overlay and 30% transparency. So go to Filter > Sketch > Chrome and use default settings of 4 and 7 for detail and smoothness respectively.
Photoshop Tutorials. Second Picture is devoted to Photoshop Tutorials 3D Tutorials Photography Tutorials Photography Composition Web Design Tutorials.
Not Today Design Blog: Create A Typographic Image With Photoshop. This is my first tutorial I'm writing and I'm basing it on a little project I did a long time ago, so bare with me.
I'm going to be showing you how to create the image below, using Adobe Photoshop CS5. This is a very simple and easy to follow tutorial and it doesn't require many resources. Resources Old Paper TextureFutura Medium BT Font Beer Bottle Silhouette Step One Open a new 1275 x 1800 document in Photoshop and set the DPI to 300 as seen in the screen capture below. Reader Tutorial: Typography Wallpaper in Photoshop. We have accepted some tutorials from readers and we think it's really good to open the blog, so anyone can share their skills with the community.
Because of that, we will start the "Reader Tutorial" series. If you have or want to write a tutorial and publish it here on Abduzeedo, just send it via email to us. Thank you very much and enjoy our first tutorial from Jonathan Connolly. Hey guys this is Creative Volition, an advertising and design agency based out of South Florida. Patriotic Text Using Displacement Masks. Step 1 Lets jump right in and get our document set up.
Create a new document by choosing File>New from the Main Menu. My working file for this lesson will be 540px x 300px at 72ppi. If you’re following along at home I suggest you start with something similar so that the Layer Styles we apply later will work for you without any adjustment. Before we even get into the text lets change the background color. Step 2 Set your foreground color to #CAC9C9 which is a nice light gray the press the T key to switch to the Type tool. Set a nice large font size and type your text onto the stage.
How to Create Inset Typography in Photoshop. By Jacob Gube In this beginning-level design tutorial, I’ll show you how to apply a beautiful and super-easy text treatment in Photoshop: the inset text effect.

It’s also often called the letterpress effect because it looks similar to text created by a Letterpress printer. Final Result Here’s a preview of what we’re about to create. Creating the Photoshop document 1 Let’s start with the basics: setting up the Photoshop document. Styling the Background Layer 2 We’ll add a Gradient Overlay layer style onto the default Background layer. 3 Double-click on the Background layer’s thumbnail in the Layers Panel to open up the Layer Styles dialog box.
Create a Baseball-Inspired Text Effect in Photoshop. Applying texture to a text effect can be a lot of fun.
In this tutorial we will explain how to create a baseball-inspired text effect using layer styles, patterns, and brushes. Let's get started! The following assets were used during the production of this tutorial. Create a new document that is 1024 x 645 px. You can use any other values for the Height and Width depending on the text you are going to create. Download the Grass Texture 1, and place it on top of your "Background" layer, then resize it as needed. Rename the layer to "Grass Texture". The grass colors are a bit dark and desaturated. Go to Image > Adjustments > Levels, and change the Highlights value to 226. Create the text using the font Merkin. Press the Ctrl/Cmd key and click the text layer's icon to create a selection. Text In Stitches. Introduction Over the years as a graphic designer I’ve accumulated a wealth of custom brushes, shapes and actions that I keep carefully organized and labeled for future use.
The brush set I’ll be sharing with you today has been in my collection for probably five of six years and every once in a while I’ll find a good reason to load it into my brushes palette. If you’ve never done that before, don’t worry, I’ll walk you through it as we go. If you’re playing along at home you should download the brush set before we get started.