
Cheap 2-Way Bluetooth Connection Between Arduino and PC. In the guide, I will explain how I managed to send data back and forth between a PC and Arduino via a cheap Bluetooth HC-05 transceiver, which can be found for less than $10 on ebay with the breakout board.
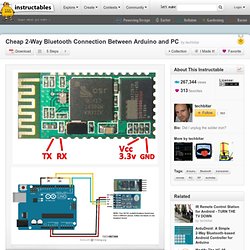
The version I have used in this project does not have a breakout board so it's little cheaper but more difficult to solder. I strongly recommend buying the module with the breakout board. This Bluetooth transceiver basically acts as a generic serial COM port. The PC to Arduino Bluetooth serial connection can be useful in many applications such as controlling servos, motors, and writing to LCDs. Modify The HC-05 Bluetooth Module Defaults Using AT Commands. UPDATES September 4, 2013: Featured on Hackaday.com September 1, 2013: Featured on DangerousPrototypes.com In this guide, I will explain how to use Arduino to change the settings of the ubiquitous HC-05 Bluetooth module using the AT command set.
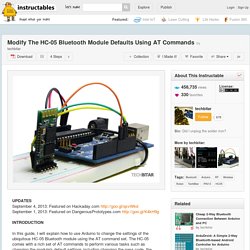
The HC-05 comes with a rich set of AT commands to perform various tasks such as changing the module's default settings including changing the pass code, the device name, and the baud rate. But the process of switching the HC-05 into AT command mode for first time users of the module is not straight forward and the docs takes short cuts. There are a couple of ways to do this. I have picked the one I think is the easiest I will do my best to illustrate the process in simple to follow steps. The HC-05 Bluetooth module and its siblings are by far the most popular and inexpensive Bluetooth modules used for RF communications by microcontroller hackers. GSM Modem with Arduino UNO. How to send an SMS using GSM Modem connected to Arduino UNO Components Required: 1.
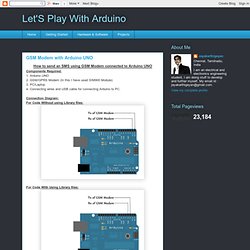
Arduino UNO 2. Getting started with Arduino! – Chapter Zero. Hello world!
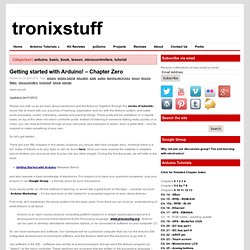
Updated 24/11/2012 Please join with us as we learn about electronics and the Arduino! Together through this series of tutorials I would like to share with you a journey of learning, exploration and fun with the Arduino system, and make some enjoyable, useful, interesting, useless and practical things. These posts will be published on a regular basis, on top of the other non-micro controller posts. Instead of listening to someone talking really quickly on a video, you can read and follow through at your own pace, see examples in action, learn a great deal – and be inspired to make something of your own.
Audio - Using a microphone with an Arduino. µSpeech. The uSpeech library provides an interface for voice recognition using the Arduino.
It currently produces phonemes, often the library will produce junk phonemes. Please bare with it for the time being. A noise removal function is underway. Minimum Requirements The library is quite intensive on the processor. Features. An Arduino With Better Speech Recognition Than Siri. The lowly Arduino, an 8-bit AVR microcontroller with a pitiful amount of RAM, terribly small Flash storage space, and effectively no peripherals to speak of, has better speech recognition capabilities than your Android or iDevice.

Eighty percent accuracy, compared to Siri’s sixty.Here’s the video to prove it. This uSpeech library created by [Arjo Chakravarty] uses a Goertzel algorithm to turn input from a microphone connected to one of the Arduino’s analog pins into phonemes. From there, it’s relatively easy to turn these captured phonemes into function calls for lighting a LED, turning a servo, or even replicating the Siri, the modern-day version of the Microsoft paperclip. There is one caveat for the uSpeech library: it will only respond to predefined phrases and not normal speech.
Still, that’s an extremely impressive accomplishment for a simple microcontroller. This isn’t the first time we’ve seen [Arjo]’s uSpeech library, but it is the first time we’ve seen it in action. Video below. Speech Recognition with Arduino. Bluetooth 4.0 for Arduino. UPDATE: 4/22/14 -- Tried to Correct formating :| UPDATE: 4/2/14 -- Corrected information and linked the new breakout board, v.9.9 Also, this fellow is working on open-source firmware for the HM-10.
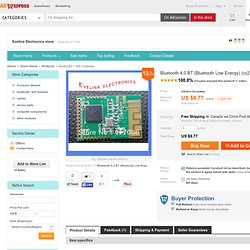
UPDATE (2/514): I split this post, since it's getting a little sluggish. I've updated the breakout board version v.9.9, have instructions for updating the firmware, and added some research notes on a pseudo-Star-Network. How to Create an Arduino Compatible Bluetooth 4.0 Module. Buy Bluetooth 4.0 BT (Bluetooth Low Energy) (cc2541) Module from Reliable bluetooth transceiver module suppliers on Evelina Electronics store. Bluetooth 4.0 BT (Bluetooth Low Energy) (cc2541) Module (IPAD, IPHONE, etc) and the controller (such as blood press, weight scale, toy).
ATtiny Bitsy Spider. UPDATE: Added BOM corrections. (Sorry for floating.) Ok. Here's a finished board I've been working on for a bit. In essence, it is a BLE node board. [Pundit demo] Authors Index. Android USB Host + Arduino: How to communicate without rooting your Android Tablet or Phone. Intro In the past two posts we have explained the basics of USB communication with the Arduino Uno (also applicable for Arduino Mega).

In this post we’ll put everything together and show you how to communicate between your Android application and the Arduino using nothing but the Android USB host API. Remember, this approach has nothing to do with Android ADK! Unlike Android ADK, your Android device will act as the USB host, while your Arduino board will act as the USB device. Creating a Serial to USB driver using the Android USB-Host API.
Lately we have received many concerns about using the serial interface on Android (Honeycomb with USB-Host).
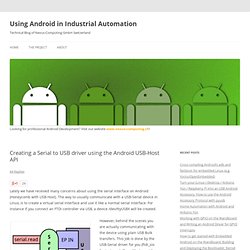
The way to usually communicate with a USB-Serial device in Linux, is to create a virtual serial interface and use it like a normal serial interface. For instance if you connect an FTDI controller via USB, a device /dev/ttyUSBX will be created. Spinettaro's Blog - Where is the wow: Android & Arduino: LEDS control. Hi all, last week I have bought an OTG cable so I can interface my Android devices (Galaxy Nexus, Xoom) with the Arduino board.
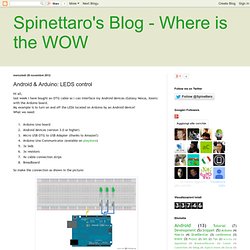
My example is to turn on and off the LEDs located on Arduino by an Android device! What we need:Arduino Uno boardAndroid devices (version 3.0 or higher)Micro USB OTG to USB Adapter (thanks to Amazon!) USB data transfer between Android and Arduino (MicroBridge mode) Jeppsson/Arduino-Communicator. 452/USBHIDTerminal. Using USB Bluetooth dongle on Arduino to connect to Android phone. Arduino connected to Nexus S Since Kristian’s release of SPP service for USB Host 2.0 library I got many e-mails with questions about Bluetooth serial communications in general and using the SPP class in particular.
Weekend project: DIY USB on-the-go from old cables. USB on-the-go cables are handy as heck with Android devices. They're a specially wired cable that allows the same USB port you use to charge or communicate with a computer to be used to connect USB peripherals right to your tablet or phone. That means things like game controllers, mice or keyboards, USB thumb drives, or even USB hard drives if you have access to an older model one with a separate power supply. There are no set and fast rules about what USB gadgets you can and can't use, or if you'll need root to do anything with them but in general "standard" Android devices won't allow you to mount a USB thumb drive without being rooted and having a way to send the commands to mount the device, and Samsung devices running Android 4.0 or higher will.
Most devices running Ice Cream Sandwich or higher will recognize game controllers, mice, or keyboards. For more information about your particular device, head into the forums and ask the hackers -- they know everything in there. Cheap Accelerometer with the Wii Nunchuck. As you’re probably well aware, the wiimote and nunchuck have a vast array of sensors built into them. Instead of buying pre-assembled breakout board for $35, or attempting to solder a tiny surface mount accelerometer, learn to exploit the features of the Wii Nunchuck and have a fully assembled accelerometer, joystick, and pushbuttons for just $12.50 shipped (on ebay). Why use the nunchuck insead of the actual WiiMote? Wiimotes can be about $40 and have a lot of extra features you wont need at the moment. Plus, the nunchuck has a cable which can easily be plugged into the Arduino. Touch Sensitive Switch.
Turn a pencil drawing into a capacitive sensor for Arduino. Capacitive Touch Arduino Lamp. EDIT: I made another one of these, and hacked an ikea lamp with it. You can see the 'ible overe HERE The Problem It is late night, and your cellphone rings. You can't see where it is, you blindly grope around your nightstand, trying in vain to find that illusive switch that will illuminate your side of the bed. You clumsily turn on the lamp, locate your cellphone...and you miss the call. Raspberry Pi and Arduino via GPIO UART. Dr. Monk's DIY Electronics Blog: Raspberry Pi and Arduino. Note. There is now a followup to this post here. The Raspberry Pi is creating quite a storm of interest. Peripherals - How to attach an Arduino. Arduinos usually appear as USB serial devices. Arduino and Raspberry Pi communicating over 2.4GHz with cheap nRF24L01+ modules.
I've had a lot of fun over the past year messing with wireless comms. Main Page - Firmata. Rwaldron/johnny-five.