
Arduino and Apple HomeKit Integration - Control Your Home From Siri! IoT Is Here: 6 Steps. Disabling auto reset on the Arduino Due. Autoreset disable jumper(modified 16u2 firmware) This post is about a simple modification to the firmware of the atmega16u2 on the Arduino Due board, that makes it possible to disable auto reset on the Due’s programming USB port.
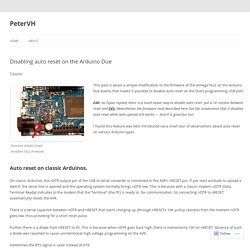
Edit: as Topaz replied, there is a much easier way to disable auto reset: put a 1K resistor between reset and 3V3. Seeeduino Lotus - ATMega328 Board with Grove Interface - Seeed. Seeeduino Lotus is an ATmega328 Microcontroller development board.

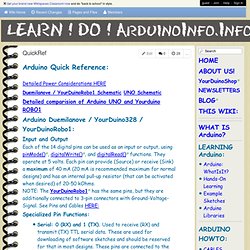
It is a combination of Seeeduino and Base Shield. It uses Atmel ATMEGA328P-MU and CH340. ATMEGA328P-MU is a high performance, low power 8-Bit AVR Microcontroller. CH340 is an USB bus converter chip that can realize an USB to serial interface. Seeeduino Lotus has 14 digital input/output (6 of which can output PWM) and 7 analog input/output, a micro USB connection, an ICSP header, 12 Grove connections, a reset button. Adafruit/LPD8806. QuickRef. Detailed Power Considerations HERE Duemilanove / YourDuinoRobo1 Schematic UNO Schematic Detailed comparision of Arduino UNO and Yourduino ROBO1 Arduino Duemilanove / YourDuino328 / YourDuinoRobo1: Input and Output Each of the 14 digital pins can be used as an input or output, using pinMode(), digitalWrite(), and digitalRead() functions.
Python - Send arduino sensor data to server with GPRS shield and AT commands. Arduino and RS485 (ENGLISH VERSION) I2C small LCD board. This is a breadboard friendly, 2.54mm pitch, I2C controlled 8x2 characters LCD board for 5V microcontroller.It has the pull-up resistors for I2C bus in it.
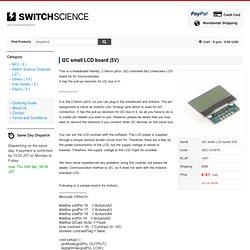
It is the 2.54mm pitch, so you can plug in the breadboard and Arduino. The pin assignment is same as Arduino Uno “Analog” pins which is used for I2C connection. It has the pull-up resistors for I2C bus in it, so all you have to do is to solder pin header you want to use. However, please be aware that you may want to remove the resistors if you connect other I2C devices on the same bus. Configuring NetBeans to use as an Arduino IDE - Alan's Ramblings. As I've said in an earlier post, I very quickly found the Arduino IDE to be way too primitive for serious use, so I decided to switch to using NetBeans as an alternative.
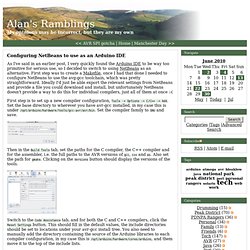
First step was to create a Makefile, once I had that done I needed to configure NetBeans to use the avg-gcc toolchain, which was pretty straightforward. Ideally I'd just be able export the relevant settings from NetBeans and provide a file you could download and install, but unfortunately NetBeans doesn't provide a way to do this for individual compilers, just all of them at once :-( NiekProductions. NewPing Library: HC-SR04, SRF05, SRF06, DYP-ME007, Parallax PING))) - v1.5. NewPing Library Project Homepage Background:When I first received an ultrasonic sensor I was not happy with how poorly it performed.
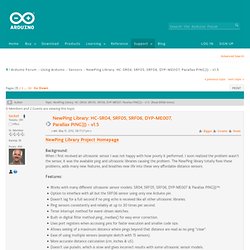
I soon realized the problem wasn't the sensor, it was the available ping and ultrasonic libraries causing the problem. The NewPing library totally fixes these problems, adds many new features, and breathes new life into these very affordable distance sensors. Features: Download:Download NewPing v1.5. The RRRRRRRRRRBBA, a $3 Arduino. 3.
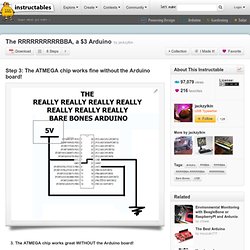
The ATMEGA chip works great WITHOUT the Arduino board! Arduinos that have been pre-loaded with the "Lilypad" bootloader firmware, instead of the standard Diecimila or Uno firmware, have a very special property: after you program such an Arduino with your own code, you can then take the $3 ATMEGA168 chip out of the programmer board, supply 5V power to it (such as the power from a USB bus or cell phone charger), and it will still work the same and do the same amazing things that your $30 Arduino does, all by its lonesome!
You only need the Arduino board to program the chip -- after that, the chip can fly solo! 3DConnexion with USB Host Shield 2.0 · Issue #19 · felis/USB_Host_Shield_2.0. Arduino Wireless SD Shield. Descrizione La Arduino Wireless SD Shield è una shield ideata per facilitare l'utilizzo di moduli per la comunicazione wireless.
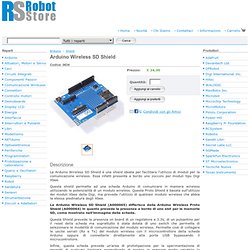
Essa infatti presenta a bordo uno zoccolo per moduli tipo Digi Xbee. Questa shield permette ad una scheda Arduino di comunicare in maniera wireless utilizzando le potenzialità di un modulo wireless. Teensy 3.0 - 32 bit ARM Cortex-M4, usable in Arduino and C by Paul Stoffregen. Paul's Technical Projects. Sdfatlib - A FAT16/FAT32 Arduino library for SD/SDHC cards. I2C (TWI) - onRequest not working. Welcome To AVRbeginners.net!
Overview Some AVRs, such as the mega8, have a built-in hardware I²C interface (Atmel calls it TWI, "Two-Wire Interface").
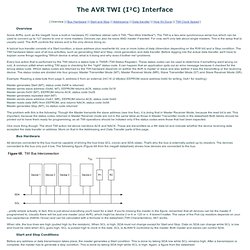
The TWI is a two-wire synchronous serial bus which can be used to connect up to 127 slaves to one or more masters. Devices can also be slave AND master if wanted. For now, we'll only talk about single masters. This is the setup that is usually used: The AVR controls the slaves and is the only device doing so. A typical bus transfer consists of a Start condtion, a slave address plus read/write bit, one or more bytes of data (direnction depending on the R/W bit) and a Stop condition.
Arduino RGB Matrix LED Driver shield - Geeetech Wiki. Introduction The Colorduino is a RGB LED matrix driver platform basis on ATMega 328P.

This design is to make user easily modify or write the firmware of Colorduino by Arduino IDE. Colorsduino pairs the M54564 with a single DM163 constant current driver. By using the DM163, the Colors shield gains three 8+6-bit channels of hardware PWM control of the LED’s freeing up the MCU from having to implement it in software. This gives the ATmega more CPU bandwidth for performing other tasks. Arduino Eclipse Development Environment for Mac OS X. This is a short guide on how to setup Eclipse for Mac OS X Lion (10.7) for use with Arduino in a relatively short amount of time.
Using this guide, Eclipse can be setup to program and download code onto Arduino microcontrollers in about 15 minutes by using the Arduino Eclipse Plugin. Initial Steps To begin, download the following: Installing Eclipse on Mac OS X is quite simple: extract the Eclipse package to the /Applications/ folder or another convenient location. Ardupilot Mega, microSD and MP3 Shield. This is a Arduino-compatible autopilot board designed by Chris Anderson and Jordi Muñoz of DIY Drones using the ATMega1280.
This board was used to win the annual autonomous vehicle competition put on by SparkFun. ArduPilot is a fully programmable autopilot that requires a GPS module and infrared XY and Z sensors to create a functioning Unmanned Aerial Vehicle (UAV). The autopilot handles both stabilization and navigation, eliminating the need for a separate stabilization system. It also supports a “fly-by-wire” mode that can stabilize an aircraft when flying manually under RC control, making it easier and safer to fly. Firmware is already loaded, but the autopilot software must be downloaded and loaded onto the board by the user.
6DOF Arduino: Compass & Accelerometer. MediaTek - ardupilot - Arduino-based autopilot with GPS. Reloading or updating your MediaTek GPS firmware This is a pretty simple process, which just involves connecting your GPS module to your PC and running a desktop utility. Step 1: Connecting your GPS To do this, you'll need a FTDI cable and a way to connect it to the GPS module. Support Pages - Triaxial MEMS gyroscopes inertial measurement units (IMU) I2C Tutorial. Using the I2C Bus Judging from my emails, it is quite clear that the I2C bus can be very confusing for the newcomer. I have lots of examples on using the I2C bus on the website, but many of these are using high level controllers and do not show the detail of what is actually happening on the bus. This short article therefore tries to de-mystify the I2C bus, I hope it doesn't have the opposite effect!
The physical I2C bus This is just two wires, called SCL and SDA. SCL is the clock line. The value of the resistors is not critical. Masters and Slaves The devices on the I2C bus are either masters or slaves. Complete Control Of An Arduino Via Serial - Tutorials. Playground - Mathematica. It's very easy to have Mathematica send data through the serial port, where Arduino and Mathematica can be linked. There is this wonderful Mathematica package by Rob Raguet-Schofield called SerialIO that probably uses MathLink technology to provide Mathematica functions that can read, write and poll the serial port of your PC. It has not only the MS-Windows version, but also the Linux and the MacOS version as well. This can be a bit tricky to get working on MacOS.
See this blog post. In addiction to using the "SerialIO" package, you can access the serial port in another way on MS-Windows PC, provided that you have installed Microsoft .NET framework 2.0 or higher.
Arduino PPM generator. Arduino transmitter project - proof of concept. USBtoPPM generator for PC based control applications. Hi Everyone, CompuFly v2.0 USBtoPPM Converter - FLYTRON. eFlightWorks Manual, (C) MileHighWings 2006...2007. In order to start using interface with a flight simulator, you have to take the following steps: Before calibrating the interface, create a new airplane model in your transmitter (even if you are going to fly a heli) with all the default parameters and call it SIMULATOR. Every time you use your transmitter with a simulator, switch it to this model. Playground - InterfacingWithHardware. Accelerometer, Gyro and IMU Buying Guide. Accelerometer, Gyro and IMU Buying Guide Accelerometers and gyros are becoming increasingly popular in consumer electronics, so maybe it’s time you added them to your project! Scrolling through SparkFun’s sensors category reveals a huge list of these sensors that might be perfect for your next project, if only you knew what they did, and which one best fit your project.