
Arduino Low Power - How To Run ATmega328P For a Year On Coin Cell Battery. An Arduino Uno runs less than one day on a 9 V battery because it uses about 45 mA current.
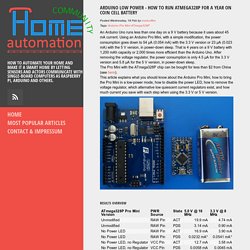
Using an Arduino Pro Mini, with a simple modification, the power consumption goes down to 54 μA (0.054 mA) with the 3.3 V version or 23 μA (0.023 mA) with the 5 V version, in power-down sleep. That is 4 years on a 9 V battery with 1,200 mAh capacity or 2,000 times more efficient than the Arduino Uno. After removing the voltage regulator, the power consumption is only 4.5 μA for the 3.3 V version and 5.8 μA for the 5 V version, in power-down sleep. The Pro Mini with the ATmega328P chip can be bought for less than $2 from China (see here). This article explains what you should know about the Arduino Pro Mini, how to bring the Pro Mini in a low-power mode, how to disable the power LED, how to remove the voltage regulator, which alternative low quiescent current regulators exist, and how much current you save with each step when using the 3.3 V or 5 V version. Results Overview ATmega328P Datasheet. Home · bblanchon/ArduinoJson Wiki.
ToBreadboard. Learning Examples | Foundations | Hacking | Links This tutorial explains how to migrate from an Arduino board to a standalone microcontroller on a breadboard.

It's similar to this tutorial, but uses an Arduino board to program the ATmega on the breadboard. Unless you choose to use the minimal configuration described at the end of this tutorial, you'll need four components (besides the Arduino, ATmega328, and breadboard): a 16 MHz crystal, a 10k resistor, and two 18 to 22 picofarad (ceramic) capacitors. 8MHz internal oscillator: success! This isn't a cry for help, it's a success story.
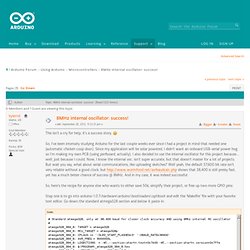
So, I've been intensely studying Arduino for the last couple weeks ever since I had a project in mind that needed one (automatic chicken coop door). Since my application will be solar powered, I didn't want an onboard USB-serial power hog so I'm making my own PCB (using perfboard, actually). I also decided to use the internal oscillator for this project because... well, just because I could. Now, I know the internal osc. isn't super accurate, but that doesn't matter for a lot of projects. But wait you say, what about serial communications, like uploading sketches? So, here's the recipe for anyone else who wants to either save 50¢, simplify their project, or free up two more GPIO pins: Step one is to go into arduino-1.0.1\hardware\arduino\bootloaders\optiboot and edit the 'Makefile' file with your favorite text editor.
(To get these fuse settings, I used. Arduino analog measurements. Last Modification: December 3, 2013 An Arduino has a number of analog inputs, which enables us to measure parameters in the analog domain.
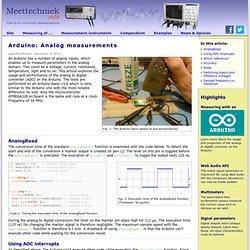
This could be a voltage, current, resistance, temperature, light and so on. This article explores the usage and performance of the analog to digital converter (ADC) on the Arduino. The tests are performed on an Arduino Nano v3.0 which is very similar to the Arduino Uno with the most notable difference its size. Also the microcontroller ATMEGA328 on board is the same and runs at a clock frequency of 16 MHz. AnalogRead The conversion time of the standard analogRead() function is examined with the code below. Interrupt-Driven Analog Conversion With an ATMega328p - Glenn Sweeney. Using the Analog To Digital Converter. Using the Analog To Digital Converter.
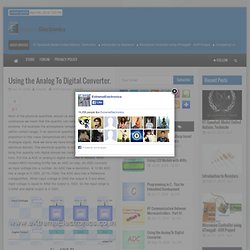
Sep 18, 2008 Avinash AVR Tutorials 138 Most of the physical quantities around us are continuous. By continuous we mean that the quantity can take any value between two extreme. For example the atmospheric temperature can take any value (within certain range). If an electrical quantity is made to vary directly in proportion to this value (temperature etc) then what we have is Analogue signal. Inbuilt ADC of AVR Now you know the basics of ADC let us see how we can use the inbuilt ADC of AVR MCU. Robot Platform. This tutorial is strictly with Atmega8 as a reference.
However, the same concept can be used across most AVR devices. Atmega8 features 10 bit ADC and provides 6 analog pins; meaning you can connect up to 6 different analog devices to microcontroller (TQFP and QFN/MLF package has additional 2 input pins). Separate reference voltage pins AVcc and Aref are provided and voltagein AVcc must not differ more than ± 0.3V from Vcc.Aref is voltage reference pin which can be optionally used if we need external voltage reference. AVROutput from ADC can either be left adjusted, or right adjusted (we will see what it is in later discussions). ADC can be set to either free running mode where it continuously takes samples and provides conversion or just a single convert & stop mode.
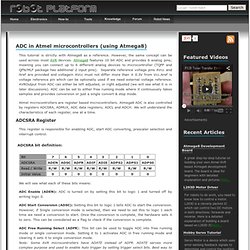
Atmel microcontrollers are register based microcontrollers. ADCSRA Register This register is responsible for enabling ADC, start ADC converting, prescaler selection and interrupt control. ADCSRA bit definition:
8Mhz. Programmer. Battery etc. Temperature.