Auto bed-leveling for the Makerfarm Prusa i3 – Part 3: Final setup « Zennmaster's world… Now that you’ve got the hardware assembled and Marlin enabled and installed, it’s time to put it all together: The first thing you’ll want to do is set up your servo extend/retract angles.
Do that by sending the following command in Pronterface: This command is telling the printer to extend servo 0 (P0) to an angle of 160 degrees (S160). If everything is installed correctly, you should see the servo arm swing down. Unless you are very lucky, this will probably not be the angle you want. After you’ve determined your extension angle, repeat the process to find your retraction angle (the position for the switch when it’s retracted). After you’ve found your angles, switch between them a few times just to make sure.
Once you’re sure, return to your Marlin Configuration.h file, and enter your angles in the following line: #define SERVO_ENDSTOP_ANGLES {0,0, 0,0, 70,0} // X,Y,Z Axis Extend and Retract angles Enter your values in the third pair, which coresponds to the Z-axis endstop. Bed Auto Leveling. Automatic bed leveling and z offset howto (Level 2/3) (Page 1) — Hacks & Mods — SoliForum - 3D Printing Community. This is a guide to setup the automatic bed leveling feature on a Solidoodle.

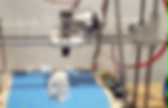
You will need to replace your extruder, solder some headers on your motherboard and recompile the firmware. If you this is outside your comfort zone, I am afraid this guide is not for you. Moreover, it will only work with a Printrboard or a Sanguinololu with an ATMega1284p (or a RAMPS). If you have an original solidoodle motherboard with an ATMega644, you will need to replace the chip (it's 10$ on ebay). The idea behind automatic bed leveling is that the Z-endstop is mounted on the extruder carriage, so that the distance between the extruder and the bed can be probed in multiple points. The feature is available in the newest Marlin firmware. Part 1: hardwareAs you see in the video, the Z probe is attached to a small servo motor that can move it up and down. Options. You might also want to look at Resources .

Perhaps some or all of that page should be merged into this page. (Discuss) This page attempts to make some sense, in general, of how all the pieces fit together to create a RepRap. However, if you want to skip all this stuff and get straight to getting your hands dirty then your best bet is to take a look at The incomplete RepRap beginner's guide and the build instructions category. In addition to those guides, you may also want to take a look at the links under the Models section below. RepRap Component Structure. That being said, to get a higher-level overview, we must start with discussing the different models of RepRaps, then go on to the four main components of a RepRap: Downloading. File:Haeckel1.JPG. Graber 3D Printer Laser Cut Parts Kits. The GRABER 3D printer kit by Twelvepro Co is an easy to assemble, fast building lasercut 3D printer kit.
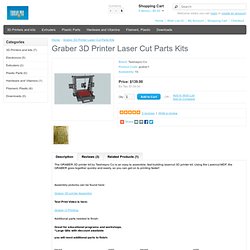
Using the Lasercut MDF, the GRABER goes together quickly and easily, so you can get on to printing faster! Assembly pictures can be found here: Graber 3D printer Assembly Test Print Video is here: Graber i3 Printing Additional parts needed to finish: Great for educational programs and workshops. You will need additional parts to finish: Tim Timmy on 19/04/2014 "Excellent customer service, I couldn't expect better, with reliable, recommended products" - Ibi E, a customer who bought a Graber i3 chris williams on 24/10/2013 this is an awesome project and is easy to use and build Simon Smith on 28/06/2013 Great kit, easy to build. Showing 1 to 3 of 3 (1 Pages) Your Name: Your Review: Note: HTML is not translated! Rating: Bad Good.