
Arduino. Turn your Arduino into a 4 voice wavetable synth with only a few components... Arduino Audio Output. DAC stands for "digital to analog converter.
" Arduino Audio Input. If you've ever recorded audio on your computer, you may have seen it represented as a waveform like the one in fig 1.

If you zoom in on this wave (as in fig 2) you will see that the shape is made of thousands of tiny oscillations back and forth. This is called an audio signal and when we are dealing with audio signals in electronics, these oscillations represent oscillating voltages over time. When we look at an audio signal with an oscilloscope, we see a similar picture (fig 3). Notice how the audio signal in fig 3 oscillates around a center voltage of 0V; this is typical of audio signals. The amplitude of an audio signal is the distance between its center voltage and its high or low peak. Min voltage = Center Voltage - Amplitude Min voltage = 2.5V - 2.5V = 0V Max Voltage = Center Voltage + Amplitude Max Voltage = 2.5V + 2.5V = 5V Fig 4 shows the signal coming straight out of the microphone on an oscilloscope. Lo-fi Arduino Guitar Pedal. Arduino Midi Foot Pedal. If you're like me and play in a 3 piece band (bass, drums, guitar), you know sometimes it would be great to add a little "oomph" to your songs by triggering a stereo sample and really fill out the sound.
Arduino MIDI controller - techshop using scarff boarduino. Tom Scarff is an expert in this field.

He supported me on my previous midi project, "a midi controlled, pneumatically operated, fire breathing dinosaur named Lunarsaurus which I showed at Maker Faire. So I turned to him for this project and found that he already had a kit (called a boarduino) ready to go. The Boarduino is interesting because of its size. Free sources for Infrared LEDs and photo transistors. This instructable can be accessed at the author's website - If you link to this instructable from another website, please include a link to the Neat Information website. The project described in this article requires basic electronics skills and is provided for information purposes.
Do not attempt to replicate it or use it for any purpose unless you've got the proper knowledge and skills. It’s easy to recover infrared LEDs and photo transistors from junk electronics you can obtain for free. Old remote controls, VCRs, and broken DVD players are excellent sources. Am loop antenna, used to listen to electronic "noise" This instructable will teach you how to hear the sound of electronic devices.
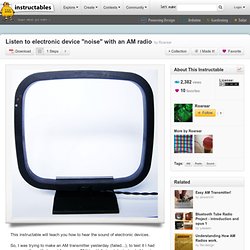
So, I was trying to make an AM transmitter yesterday (failed...), to test it I had my am radio on it's lowest frequency, 531khz. Unfortunately, instead of hearing music from my transmitter, I heard just static and a squelchy sound at random intervals. After a while, I realised that the squelch was in sync with my laptop. This made me curious, so I put my phone in the am loop antenna, and there was nothing, then I turned the screen on, and suddenly my room was full of white noise from the "sound" of the screen.
(probably the sound of the inverter for the back light) I investigated further, and realised that anything electronic could be heard if close enough to the antenna. Arduino-Square with Color LCD. • To install the Color-LCD library copy and paste the entire “ColorLCDShield” folder into the Arduino Library folder o Win: My Documents\Arduino\libraries\ o OS X: ~/Documents/Arduino/libraries/ • Start the Arduino software and open the BSQ-ColorLCD sketch. Turn Your Arduino Into an ISP. There are a few instances in which it is neccesary to program microcontrollers without a bootloader.
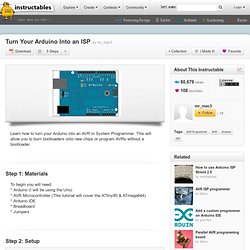
For example, if have run out of storage on a chip you can get an additional 2KB when you program without a bootloader. Another example, the one I will show you how to do, is to program chips that have no serial capabilities and therefore cannot use a bootloader. Wireless Wii Nunchuck controlled Arduino. Use a completely unmodified wireless Wii Nunchuck as a control system for any Arduino based project.
No added radio transmitter/receiver pairs etc. This instructable does assume some experience with the Arduino microcontroller. The radio receiver that comes with the wireless 'chuck is connected to an Arduino which then reads data from the 'chuck. Introducing the Wixel USB Wireless Module. EDIT: I've entered this into the makerbot contest , so please vote if you liked it.
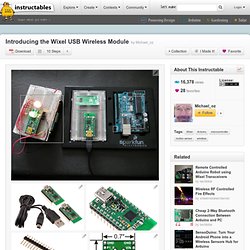
What am I 'making' you ask, hopefully ideas and desire to create. :] /EDIT I have been playing with a Arduino microcontroller and robotics bits and pieces for a while now. I'm still designing my first robot and wanted a two-way wireless capability, but until now they were either too expensive , or too basic . BUT NOW I HAVE THE SOLUTION: The Pololu Wixel programable USB wireless module! Arduino Wireless SD Shield Tutorial. The wireless SD shield supports Xbee modules.
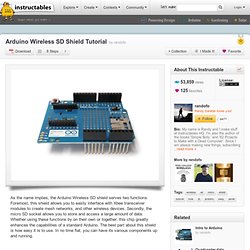
These modules allow for easy wireless serial communication. A standard module has the range of 100 - 300 feet. It also boasts a micro SD socket. This can easily be interfaced with the Arduino SD library. Unfortunately, this library does not come bundled with the Arduino development environment, so you will have to set it up yourself. The shield also boasts a perfboard grid for prototyping your own circuit, and a micro switch for toggling between the USB port and micro SD port. Make your Arduino project wireless in minutes, with the Wireless Inventors Shield. Video Make your Arduino project wireless in minutes, with the Wireless Inventors Shield The inventors shield uses a wireless pipe, which is a special wireless RF module that allows you to easily and reliably, send and receive error-free wireless data between two or more Arduino boards.
It's Long Range – distances up to 500 feet (150 meter). It’s Error Free – built-in forward error correction and data recovery, you only ever receive cleaned and CRC verified data. It’s Simple To Use – anything you input, is wirelessly transmitted, then cleanly outputted for you on the other end. It’s Immune To Noise – your data inside the wireless pipe is protected from the elements outside such as interferences like WiFi, Bluetooth, Zigbee, cordless phones, cellular phones, all types of servo and motor noise, etc.
Clone a Remote with Arduino. I recently needed to use the Arduino to control a stereo system, so rather than hack open the remote and wire into it, I decided to simply clone the signal. This was incredibly easy to do. Basically, I read the signal from the remote with a 38khz receiver, and then played it back with an IR LED. To start, I went to the IR Sensor Tutorial on Adafruit.com and loaded the following script onto my Arduino: Controlling an Arduino Board Using an Infrared Remote Control. Androino! Control an Arduino from your Android device using a cheap bluetooth module. Android talks to Arduino. How to control TV functions using Analog input and Arduino. DIY Shrimp Microcontroller Replicates an Arduino Uno at One-Fifth the Price.
The focus of the @ShrimpingIt work is about an accessible device which helps learners explore circuit construction and microcontroller programming whilst reaching working prototypes very rapidly.
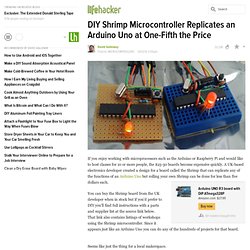
Our most basic Arduino substitute (once you've removed the UART) is more like one tenth of the cost of an Arduino! The Arduino community provides a huge repository of examples of working prototypes. However the Uno is not as accessible as the @ShrimpingIt circuit from a price point of view, as well as obfuscating some of the fundamentals - e.g. hard to trace how the microcontroller is actually attached, and what does what. It's fortunate, and no coincidence, that building your Shrimp teaches you some of the fundamentals of electronics prototyping, such as the use of a breadboard, what a capacitor is, etc. etc. and exposes the details of what the microcontroller pins do. Arduino. IKEA RGB Led Strip Hack - openPicus Wiki. Introduction. Curriculum. Palm Arduino Kit. UPDATE: Read about the first journey of Palm Arduino Kit, here! I do travel many times a year, sometime I went with family, took relatives, friends, to places in US, for days, may be for weeks, even for a month, when I traveling aboard to visit my family once a year.
Previously, I left my Arduino project(s) untouched for the duration of the traveling. And most of the time, after i got back, I had to start the project over, because I was already forgot where it was left off. Arduino.