
NRF24L01 Radio 2.4GHz Transmitter Receiver On Arduino. Charles W. | May 4, 2014 NRF24L01 is a 2.4GHz wireless radio frequency module that can be used to transmit and receive data.
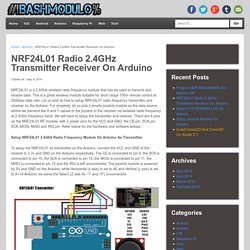
This is a great wireless module suitable for short range 100m remote control at 250kbps data rate. Let us look at how to setup NRF24L01 radio frequency transmitter and receiver on the Arduino. For simplicity, let us pick a simple joystick module as the data source where we transmit the X and Y values of the joystick to the receiver via wireless radio frequency at 2.4GHz frequency band. We will have to setup the transmitter and receiver. Setup NRF24L01 2.4GHz Radio Frequency Module On Arduino As Transmitter To setup the NRF24L01 as transmitter on the Arduino, connect the VCC and GND of the module to 3.3v and GND on the Arduino respectively.
Our intention is to have the A0 and A1 analog pins to collect the X and Y values of the joystick, and send the data wirelessly via NRF24L01 module. NRF24L01 Transmitter Sketch const uint64_t pipe = 0xE8E8F0F0E1LL; int joystick[2]; Getting Started with nRF24L01+ on Arduino. Nordic’s nRF24L01+ 2.4GHz RF radios are a great way to communicate wirelessly between Arduino’s.
They’re cheap, and powerful. Unfortunately, they can be a little daunting to beginners to get started. Today, I want to make it easy for total beginners to get up and running on nRF24L01+ radios quickly and easily. Stuff we need First, we have to go shopping. Cheap Arduino Wireless Communications. I was looking for a way to handle wireless communications between two Arduino boards.

Other options like Xbee or Bluetooth were going to cost $50 to over $100. Then I found a cheap RF transmitter and receiver at Sparkfun. The total cost is only $9! Here are a few limitations to RF solution: Communications is only one way. The advantages are that it is cheap and it is pretty easy to use. Below are some images showing how I hooked up the receiver and transmitter to two different Arduino boards. Here’s a picture of the my actual bread boarded circuit. Since the receiver is constantly picking up random noise I add a few extra bytes to every data packet.
I broke the Arduino code into two files. I did all of my initial testing without any of these improvement and everything worked fine with these devices inside the same room. Add an antenna. I got a lot of help from the transmitter/receiver data sheets, and from this article. I’ll mention an even cheaper idea I had while doing this. Permalink. 5$ Arduino WiFi Module!? ESP8266 mini Tutorial/Review.