
Retouche portrait et images - Tuto gratuit Photoshop en Français. Detourer des cheveux proprement - Tuto Photoshop en Français. Retouche photo - Ombres et lumière - Tuto photoshop gratuit Français. Beautifully Detailed Illustrations by Terry Fan. The Perfect Lie in Photoshop. Tutorial: Ultimate Makeup. Every photographer who makes portraits or takes photographs of people, be it a wedding or event photographer, at some point in time encounters a need to retouch the photograph - to make people look better.
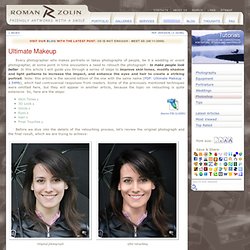
In this article I will guide you through a series of steps to improve skin tones, modify shadow and light patterns to increase the impact, and enhance the eyes and hair to create a striking portrait. Note: this article is the second edition of the one with the same name (PDF: Ultimate Makeup - 2.54Mb), which had controversial responses from readers. Some of the previously mentioned techniques were omitted here, but they will appear in another article, because the topic on retouching is quite extensive. So, here are the steps: Before we dive into the details of the retouching process, let's review the original photograph and the final result, which we are trying to achieve: Original photograph After retouching As you see the original photograph is more like a snap shot, which it is.
Smile. You are a Good Dentist. First choose your Magic Wand tool, lasso tool (or any other selection tool) to put a selection around your teeth.

To refine your selection, go to Quick Mask mode and use your Paintbrush tool to modify the mask. Now that you have a refined mask, feather the selection radius by 2 pixels (Select > Feather) to give a nice blended edge. First remove the yellowing (Layer > New Adjustment Layer > Hue/Saturation). Select Ok. When the Hue/Saturation dialog box appears, from the Edit pop-up menu, choose Yellows.
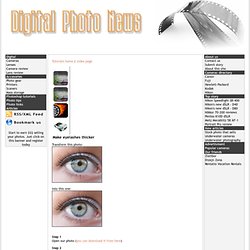
There are two ways to brighten the teeth. First Method -> Now from the Edit pop-up menu, choose Master and drag the Lightness slider to the right to brighten the teeth. In the end I would like to say that I tried to make the teeth’s better and not make them unrealistic. Digital Photo News - Your view in digital photography. Tutorials home | Index page Make eyelashes thicker Transform this photo: Into this one: Step 1 Open our photo (you can download it from here) Step 2 We will have to different layers for upper and lower eyelash because they are dissimilar and we are going to use two different methods for each of them.
Tutorials >> Enhancing Iris Color. Beauty Retouching. Beauty Retouching Photoshop 911 calls are numerous wanting to know how to remove blemishes from photos, give skin the fashion magazine look, or just how to get that certain glamorous fashion look.
Well, when so many people wanted the same advice we asked The Glitter Guru! To help us out. Of course she did. Last month we discovered Marija Matijasec, an incredibly talented photo retoucher from Vinica, Croatia. With Marija Matijasec Beauty retouching is one of the most demanding parts of photo manipulation. Retouching a Studio Portrait. Retouching a Studio PortraitReviewed by Denny Tang on Oct 17Rating: Before and After Retouching a Studio Portrait Photoshop Tutorial Retouching the background Here is the original image.

As a photo it looks fine but it looks flat and boring. Creating the mask The first step is to isolate the model from the background. I then use the color range tool (Select > Color Range) to select the areas that were hard to extract using the extract tool. Now we have a mask in it’s own layer. Thermal Photo Effect. Learn how to convert your photos into Thermal Photo Effect.Step 1: First open any image.
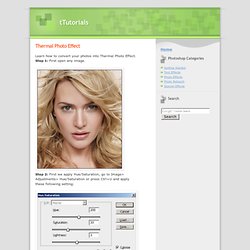
Step 2: First we apply Hue/Saturation, go to Image> Adjustments> Hue/Saturation or press Ctrl+U and apply these following setting: Step 3: Duplicate the layer by pressing Ctrl+J and go to Filter> Blur> Gaussian Blur and apply these settings: Step 4: Set the layer blending mode to 'Overlay'. Step 5: Merge the layers together by pressing Ctrl+E. Photoshop Tutorials - Age Progression. Disclaimer: None of the given Photoshop Tutorials are written by me.
They are all taken from various sources on the Internet and I compiled some of them for you. Hope you understand. More are in the line. Enhance eyes and make them stand out in photoshop tutorial. Best Photoshop tutorials - Retouch A Girl with Lighting Focus. Photo Retouching. Contrast LayersReviewed by Denny Tang on Sep 11Rating: In this page, we’ll create the two contrast adjustment layers.
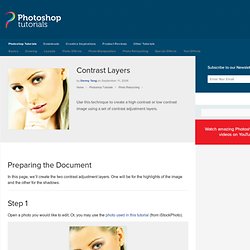
One will be for the highlights of the image and the other for the shadows. Airbrushing - Natural Smooth Skin. Update: Check out our new tutorial!
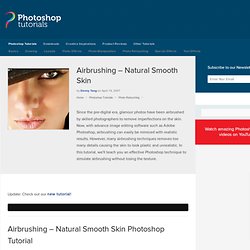
Step 1 First, go to the File menu and select Open to open a photo you would like to edit. Because we will be working with fine details, it is important that the image is a high resolution so that the details of the skin can be seen. The image I used is a high resolution 10 megapixel image with plenty of skin detail. Basic Photo Editing Tutorial by `TheTragicTruth-Of-Me on deviantART. The Making of Mystic. In this tutorial Nik Ainley walks us through the process of making a spectacular image.
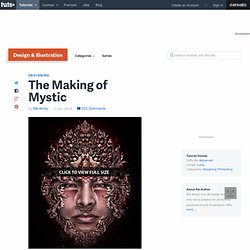
This tutorial focuses on the big picture steps taken to create this image. You'll learn some incredible techniques in this tutorial, and get a view into how Nik creates beautiful photo-manipulation based images. Let's check it out. Introduction. Photoshop Effects: Adding Light Streaks To A Photo. Written by Steve Patterson. In this Photoshop Effects tutorial, we’re going to look at how to add colorful streaks of light to a photo.
You’ve probably seen these light streaks used in ads for everything from shampoo to cellphones, and in fact they were used most recently in a cool ad for a new cellphone from Sprint and Samsung. Embellir un visage Tutoriel Photoshop Creabar. Tutoriaux photoshop > Retouche Photo > Embellir un visage Les photos ne sont généralement pas parfaites, notamment celles concernant les visages. Il est alors parfois nécessaire d'améliorer les photos pour gommer les imperfections et ainsi embellir la photo. Avant tout commencement dupliquez votre calque (manipulation à faire avant chaque début de retouche). Etape 1 : Gommer les imperfections Si le portrait à traiter arbore un gros problème de peau comme de l'acné, il faut premièrement utiliser l'outil "tampon de duplication" , pour employer cet outil il faut sélectionner un point qui servira à la duplication (alt + clic) si possible sur une partie de peau nette aux alentour de l'imperfection à gommer.
Effet Dramatique Tutoriel Photoshop Creabar. How to Create a Simple Face Text Portrait in Photoshop. How to Apply Textures to Uneven Surfaces. Applying texture to a flat surface, or flatly applying a texture across a whole image (as a means to age it or degrade it) is simple stuff. Realistically applying a texture to an uneven surface is much more hands-on (more so than simply overlaying a texture and changing the Blending mode). Video Tutorial.