
Tutorials. Pattern Creation from instruction sheet - for fashion dolls. *You will need accurate doll measurements to do this - if you are uncertain as to how take these measurements, check out the measuring/fitting page NOTE: Book recommended for beginning sewers.
It contains a lot of basic sewing/fitting techniques, terms, basic fabric/thread information, hints on buying a sewing machine/serger, etc. "Mother Pletsch's Painless Sewing - Fourth Edition" and can be ordered on the Palmer/Pletsch website (click here). 1. Start with the pattern instruction sheet and find the picture of the pattern pieces (it will look like the picture left above). For this tutorial I am using a pattern with princess seams. 2. 3. 4. I use the bust measurement to determine the percentage of enlargement for a bodice - I can more easily change the shoulder, body length, armhole size and waist. 5.
Formula example for enlargement: Larger number (7.75) is divided by smaller number (2.875) = 2.69 Move decimal point two places to the right to get 269% as enlargement percentage. Resizing A Pattern. Just when I thought I was too busy for anything except complaining about being so busy…I came up with a little tutorial sort of thing!
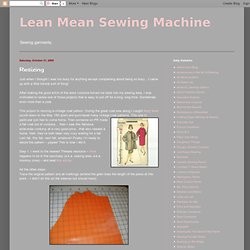
After making the good witch of the west costume forced me back into my sewing area, I was motivated to tackle one of those projects that is easy to put off for a long, long time. Sometimes, even more than a year. This project is resizing a vintage coat pattern. During the great coat sew along I caught Marji fever (scroll down to the May 15th post) and purchased many vintage coat patterns. This one in particular just had to come home. Then someone on PR made a fall coat out of corduroy… then I saw this fabulous wide-wale corduroy at a very good price…that also needed a home.
Step 1: I went to the nearest Threads resource – mine happens to be in the sanctuary (a.k.a. sewing area, a.k.a mommy zone) – and read this article. Draw cutting lines to divide the piece into segments where the adjustments will be made. So that’s it. Pattern-making. DIY Sewing Mannequin Tutorial. Tutorial: Invisible Seams, The Hidden Stitch. To close up a seam without showing any stitches you can use the hidden stitch, sometimes it is also called a ladder stitch.
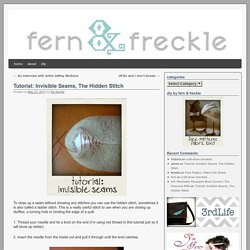
This is a really useful stitch to use when you are closing up stuffies, a turning hole or binding the edge of a quilt. 1. Thread your needle and tie a knot on the end (I’m using red thread in this tutorial just so it will show up better) 2. Insert the needle from the inside out and pull it through until the knot catches. Measuring & Fitting Doll Clothes Patterns. NOTE: Book recommended for beginning sewers.
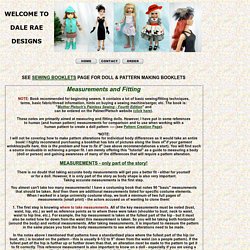
It contains a lot of basic sewing/fitting techniques, terms, basic fabric/thread information, hints on buying a sewing machine/serger, etc. The book is: "Mother Pletsch's Painless Sewing - Fourth Edition" and can be ordered on the Palmer/Pletsch website (click here). These notes are primarily aimed at measuring and fitting dolls. However, I have put in some references to human (and human pattern) measurements for comparison and to use when working with a human pattern to create a doll pattern ---- (see Pattern Creation Page). *NOTE: I will not be covering how to make pattern alterations for individual body differences as it would take an entire book!
MEASUREMENTS - only part of the story! There is no doubt that taking accurate body measurements will get you a better fit - either for yourself or for a doll. You almost can't take too many measurements!