
Untitled. Six Tuts On Light And Shade, Part I, Sunny Afternoon. This tutorial series is intended to be used with mental ray for Autodesk Maya 8.5.
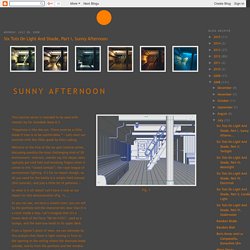
“Happiness is like the sun: There must be a little shade if man is to be comfortable.” - Let's start our exercise with this little quote by Otto Ludwig. Welcome to the first of the six-part tutorial series, discussing possibly the most challenging kind of 3D environment: interiors. mental ray (for Maya) users typically get cold feet and sweating fingers when it comes to this “closed combat”; the royal league of environment lighting. It’s for no reason though, as all you need for the battle is a simple field manual (this tutorial), and just a little bit of patience... So what is it all about? Let’s have a look at our object for this demonstration (Fig. 1) ...
As you can see, we have a closed room; you can tell by the porthole and the characteristic door that it is a room inside a ship. Mitsuba - physically based renderer. Create A Stylized Car In Maya: The Complete Workflow – Part 1. Today we're launching an exciting new tutorial series focused on stylized vehicle creation in Maya.
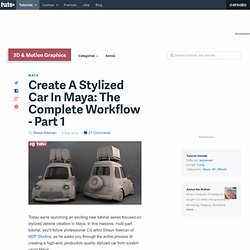
In this massive, multi-part tutorial, you'll follow professional CG artist Shaun Keenan of MZP Studios, as he walks you through the entire process of creating a high-end, production quality stylized car from scratch using Maya. Through out the series you'll gain valuable insights into the tools and techniques used by professional artists, while working your way to a fully realized model. In later lessons you'll learn how to add detail and construct the car's interior.
A topic rarely covered in car modeling tutorials. Whether you're a beginner creating your first car, or an experienced artist just looking to brush up, this series is a must watch. In part one, you'll start blocking out the car body. Additional Files/ Plugins: Introduction Note: Click the 'Box' icon to view the tutorial in full-screen HD.Download: Video(s) can be downloaded from the 'Tutorial Details' section above.
Autodesk Maya Tutorials. MEL tutorials, 3D Modeling, animation, texturing, rendering. Access Denied. Antony Ward ~ Freelance Graphic Artist » Removing Alpha Shadows in Maya. Removing Alpha Shadows in Maya This is a small tip, but one I used to suffer from a long time ago…Who knew the solution was so simple?

When using textures with alpha channels Maya can get confused about which areas are actually transparent when rendered. Below is a single plane textured with an alpha channel, as you can see the whole plane is casting a shadow onto the box, rather than just logo. • To solve this simply open the Connection Editor by going to Window > General Editors > Connection Editor. • In the left hand side select and add the file node which points to the texture. • In the right select and add the actual shader node. • Now connect the outAlpha attribute from the file node to the shadowAttenuation attribute on the shader. • Now when you render the only shadow you will see will be cast from the opaque areas of the texture page.
How to create lava using Maya particles and Realflow - Maya Video Tutorial. Render Passes in Maya and Compositing in Nuke Maya Tutorial in Free Tutorials - Simply Maya 3D. How To Render Wireframes With Ambient Occlusion In Maya, Using Mentalray. More often than not, students come to me asking for a good method of creating wireframe renders, so in this tutorial I'm going to explain two different methods of achieving a wireframe render with Ambient Occlusion in Maya using Mentalray.
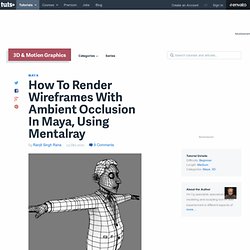
Step 1 This is the model I'll be using to create the Wireframe render with Ambient Occlusion. Step 2 Since I'm going to be using Mentalray for this tutorial, make sure it's loaded in Maya. If it's not, go to Window>Settings/Preferences>Plugin Manager. Step 3 From the Plugin Manager window, check the 'Loaded' and 'Auto load' options for "Mayatomr.mll", to enable it. Step 4 Now open up "Hypershade", by going to Window>Rendering Editors>Hypershade. Step 5 Click on the 'Surface Shader' as shown in the image below. SOUP / Particle and Goal. → Facial Rigging ← Tutorial: Cel Shading in Maya with Christophe Desse.
Curve Rendering - Free Misc Applications Downloads for Maya. Mental ray rendering fur with passes. Whatewer you use- maya fur, or shave and haircut - rules and workflow will be the same. 1) NEVER USE RAYTRACE WITH FUR!
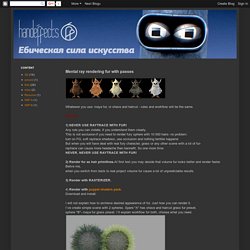
Any rule you can violate, if you understand them clearly. This is not exclusion-if you need to render fury sphere with 10 000 hairs- no problem: turn on FG, soft raytrace shadows, use occlusion and nothing terrible happend. But when you will have deal with real fury character, grass or any other scene with a lot of fur- raytrace can cause more headache then bennefit.
So one more time:NEVER, NEVER USE RAYTRACE WITH FUR! 3) Render with RASTERIZER. 4) Render with puppet shaders pack. I will not explain how to archieve desired appearence of fur. Now set render type of your fur to hair primitives. In render globals Set primary render to Rasterizer and turn off raytracing. Now shading of fur defined by shave an fur inside engines. Homepage. Maya jiggle. Maya Tutorials Index - Maya Tutorials - Simply Maya 3D Training. Maya mel. What is Mel?

As you might have guessed by the title, Mel means Maya Embedded Launguage. Mel is a scripting launguage. This means that you can type a Mel command and execute that command as soon as you hit enter. This differs from a compiled language, a compiled language would require you convert your code into commands the computer understands, and example of this would be a language such as C.
Since Mel is a scripting language, it makes Mel extremely fast to use. Where do we write Mel? Before we dive into Mel lets familiarize with the different areas we can write Mel in. CommandlineThis is located in the lower right corner of your screen Script editorWindows / General Editors / Script Editor Command ShellWindows / General Editors / Command Shell ShelvesThis is located near the top of your screen Script Fileslocated in your Maya scripts folder. Welcome to www.everything4maya.com - your free source for video tutorials, downloads, 3D news and everything else you might need for Autodesk Maya.