
Creative Crash : High Quality 3D Models, Scripts, Plugins and More! : "Rapid Rig: Basic" for Maya - Free Character Scripts. PoseMAN (Pose manager) - Free Animation Scripts. Extended Duplicate Options - Free Utility / External Scripts. AdvancedSkeleton - Free Animation Scripts / Plugins Feature Requests for Maya. ShotView - Free Animation Scripts. Finally I updated this for maya 2011.
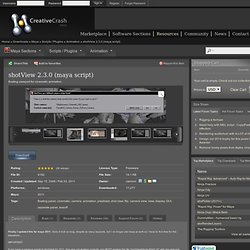
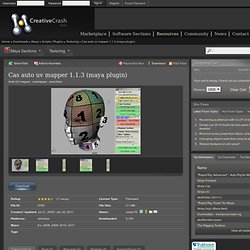
Sorry it took so long, despite so many requests, but I no longer use maya at work so I have to find time for this elsewhere... Cas auto uv mapper - Free Texturing Scripts. Cas auto uv mapper version 1.13 Please note that this version of the tool only works with the following Maya versions: 8.5 Sp1 2008 , 2008 extension1 , 2008 extension2 2008 x64, 2008 extension1 x64, 2008 extension2 x64, 2009 , 2009 service pack 1 , 2009 service pack 1a 2009 x64, 2009 service pack 1 x64, 2009 service pack 1a x64 2011 . 2011 x64 , 2011 hotfix 3 , 2011x64 hotfix 3 Update 1.13 Updated for Maya 2011 hotfix 3 , 2011x64 hotfix 3Fixed minot bugs If you want extra UV snapshot functions to work properly, remember to go to my site and then download + install extra pywin32 package.
Maya Animator Kit: MGtools pro - Animation Scripts / Plugins for Maya. MG-SelectionSet.

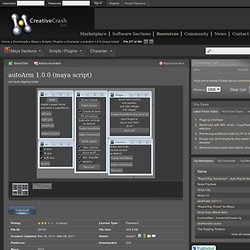
Save selection as MGselectonset then you use it whatever you want ,sets are external .set files which you can share with different maya. Create and manager a set are much easier than maya shelf.In MGtools 2.0 ,a member list was added in UI to show you the current set members. An isolation feature is added as well , and some bug fixed. Snap feature. Tf_smoothSkinWeight - Free Character Scripts. AutoArm - Free Character Scripts. AutoArm.mel features:
UVDeluxe - Free Texturing Scripts. CG:SKEELOGY - Muskeelar. Introduction Muskeelar is the implementation of a research paper that Dr.
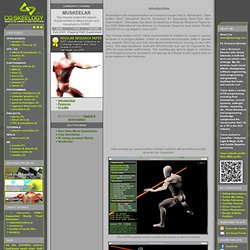
Ashraf and I have written titled “Simplified Muscle Dynamics for Appealing Real-TIme Skin Deformation”. The paper has been accepted as a Regular Research Paper for the 2007 International Conference on Computer Graphics and Virtual Reality (CGVR’07) in Las Vegas in June 2007. A Comprehensive Look at Hard Surface Modeling for Video Games. Sculpt and paint a tree troll in Mudbox. 3D World is the best-selling international magazine for CG artists, covering the fields of animation, VFX, games, illustration and architecture.

Our team of CG artists and professionals provide analysis of latest trends in the market, artistic and technical advice, impartial product reviews, and exclusive behind-the-scenes articles on the making of key projects in this fast-paced industry. The Top Ten Tips of Texturing. One way to create dirt has already been covered, and that's photo overlays.

Those are great for general wear and tear on your texture. If you want small specific details, you'll need to use other techniques. Maya FAQ: How do I get shadows? - maya blog: maya tutorials and maya information: 3D CG labo. There is no shadows.
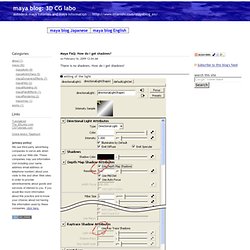
How do I get shadows? Setting of the light First of all, you should set the shadow to the light. Turn onUse Depth Map Shadows orUse Ray Trace Shadows They are turned off in the default. settings of the Render Stats In Render Stats of the attributes of a object, there are Casts Shadows and Receive Shadows attributes. Daniil Alikov 3D artist - Making of "Still life with black pepper" Create a switchable IK/FK character rig in Maya. 3D World is the best-selling international magazine for CG artists, covering the fields of animation, VFX, games, illustration and architecture.

Our team of CG artists and professionals provide analysis of latest trends in the market, artistic and technical advice, impartial product reviews, and exclusive behind-the-scenes articles on the making of key projects in this fast-paced industry. Mozilla Firefox. “Rigging a basic fish for Maya” By Kiel Figgins www.3dfiggins.com Introduction In a number of recent projects, I've been tasked with animating ambient fish.
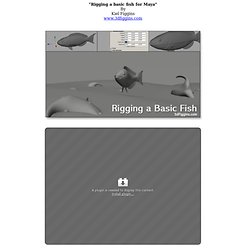
Typically these fish are for background elements or adding little details to puddles or ponds. Navigate. We will start with the legs as they can be the toughest part and make the most trouble for you if you get them wrong. I am going to assume that you answered "yes" to the question about having the feet lock to the ground or not. This is the most common way to rig a character. About the only time that I might not want to have the feet locking to a ground plane is if the character only swims or flies.
PEN Productions / Bella Sara. Bella Sara Dyanmic Wing Rig For the Bella Sara project by Eyeball NYC in New York, PEN Productions was asked to create a wing rig for an existing horse. It is always a challenge to create feathers that react well with all the deformations that a wing can achieve. The two dynamic curves are being driven by flex and drive all the feathers. This simplifies the dynamics solve down to just control points for the spines. How to create a working piston using Maya. Build a Reusable Light Rig in Maya. Daniil Alikov 3D artist - Making of "Still life with black pepper" Softimage.
3D animator/ modeler/rigger. Blake Character Rig Overview. Blend shapes. Victor Vinyals Character Character Rig Animation Reel. Tutorials for visual effects artists, concept designers, sculptors and comic book illustrators and traditional artists using Maya, ZBrush, 3ds Max, Photoshop and Painter as well as traditional drawing and painting. Digital Environment Workflow. About the Image Challenge Online communities have proven to be an amazing resource for artists. The Gnomon Workshop has had the unique opportunity to inspire, motivate and train artists from all walks of life and all around the globe, and our forum is a great place for you to share your work with other artists who have a passion for learning and community.
Every month we create a new challenge based on specific themes. Our judges select four winners from the 2D Concept and 3D Concept categories (8 total), who will receive up to 25 Gnomon Workshop DVDs (winners get to choose of course)! What criteria are used to pick the winner? The winners are chosen based on our judges' personal criteria, however we often award prizes to artists whose CONCEPTS or IDEAS are excellent, regardless of technical execution. Eric Hanson. Digital Production The Gnomon Workshop offers the most comprehensive set of Digital Production tutorials anywhere. The broad scope of the tutorials contained in this section range from foundational understanding of the software tools all the way to the professional application of these tools and concepts used by artists working in the film and game industries.
Entertainment Design The Gnomon Workshop is widely regarded as the global leader in training tutorials for the designer working in the entertainment industry. Home. Digital-Tutors's videos.