
MaKey MaKey Piano-2 on Scratch. Firefly Experiments. Domaine de Boisbuchet. There has been a lot of talk about the Internet of Things, but what would happen if we would use internet to connected objects in nature?
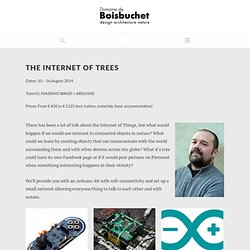
What could we learn by creating objects that can communicate with the world surrounding them and with other devices across the globe? What if a tree could have its own Facebook page or if it would post pictures on Pinterest when something interesting happens in their vicinity? We’ll provide you with an Arduino-kit with wifi-connectivity and set up a small network allowing everyone/thing to talk to each other and with nature.
Massimo Banzi is the co-founder of the Arduino project. He is an Interaction Designer, Educator and Open Source Hardware advocate. Massimo started the first FabLab in Italy which led to the creation of Officine Arduino, a FabLab/Makerspace based in Torino. He spent 4 years at the Interaction Design Institue Ivrea as Associate Professor. Before joining IDII he was CTO for the Seat Ventures incubator. Homepage : www.massimobanzi.com. Massimo Banzi. (photo by David Cuartielles) Massimo Banzi is the co-founder of the Arduino project.

He is an Interaction Designer, Educator and Open Source Hardware advocate. He has worked as a consultant for clients such as: Prada, Artemide, Persol, Whirlpool, V&A Museum and Adidas. Massimo started the first FabLab in Italy which led to the creation of Officine Arduino, a FabLab/Makerspace based in Torino. He spent 4 years at the Interaction Design Institue Ivrea as Associate Professor. Before joining IDII he was CTO for the Seat Ventures incubator. BeagleBoard. The BeagleBoard is a low-power open-source hardware single-board computer produced by Texas Instruments in association with Digi-Key and Newark element14.
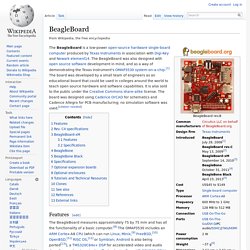
The BeagleBoard was also designed with open source software development in mind, and as a way of demonstrating the Texas Instrument's OMAP3530 system-on-a-chip.[7] The board was developed by a small team of engineers as an educational board that could be used in colleges around the world to teach open source hardware and software capabilities. It is also sold to the public under the Creative Commons share-alike license. The board was designed using Cadence OrCAD for schematics and Cadence Allegro for PCB manufacturing; no simulation software was used.
[citation needed] Features[edit] Www.lembarque.com/fichiers/cms/EM_022_025.pdf. BeagleBone. What is BeagleBone?
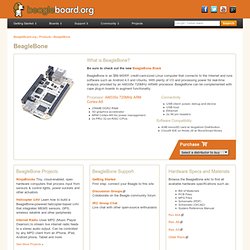
Be sure to check out the new BeagleBone Black BeagleBone is an $89 MSRP, credit-card-sized Linux computer that connects to the Internet and runs software such as Android 4.0 and Ubuntu. Tuto Arduino. Bildr. Code.org. Nicolaschaton2. 7 Tutorials To Start Working With Kinect and Arduino. Sometimes is hard to find what you need especially when you’re interested to build a robot based on Kinect sensor.
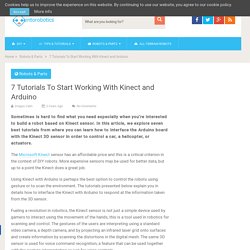
In this article, we explore seven best tutorials from where you can learn how to interface the Arduino board with the Kinect 3D sensor in order to control a car, a helicopter, or actuators. The Microsoft Kinect sensor has an affordable price and this is a critical criterion in the context of DIY robots. More expensive sensors may be used for better data, but up to a point the Kinect does a great job. Using Kinect with Arduino is perhaps the best option to control the robots using gesture or to scan the environment. The tutorials presented below explain you in details how to interface the Kinect with Arduino to respond at the information taken from the 3D sensor.
Fueling a revolution in robotics, the Kinect sensor is not just a simple device used by gamers to interact using the movement of the hands, this is a tool used in robotics for scanning and control. Fourre tout Numerik. Animer une premiere séquence Arduino avec des enfants. De Wikidebrouillard.
Ardubloks. Cette page Web requiert un navigateur compatible JavaScript.
Industruino : Un arduino en boitier industriel pour des applications de domotique. Industruino est un projet réalisé par deux designers résidants à Pékin.
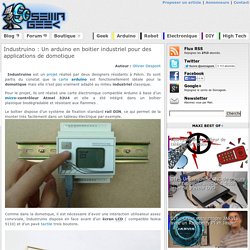
Ils sont partis du constat que la carte arduino est fonctionellement idéale pour la domotique mais elle n’est pas vraiment adapté au milieu industriel classique. Pour le projet, ils ont réalisé une carte électronique compatible Arduino à base d’un micro-contrôleur Atmel 32U4 et elle a été intégré dans un boîtier plastique biodégradable et résistant aux flammes . Le boîtier dispose d’un système de fixation standard rail DIN, ce qui permet de la monter très facilement dans un tableau électrique par exemple. Comme dans la domotique, il est nécessaire d’avoir une interaction utilisateur assez conviviale, Industruino dispose en face avant d’un écran LCD ( compatible Nokia 5110) et d’un pavé tactile trois boutons. Au niveau connectique, on retrouve de chaque coté du boîtier des borniers à vis, robustes et facilement exploitable.
Arduino 3-axis Mini Lazer Paper-Cutter. Updated : 16/3 Add step 4, about using the stage.

Updated : 18/3 Add photos (cutting vinyl adhesive sheet) Updated : 19/3 Add step 5, acting as pen plotter Updated : 20/3 Add laser engraving video (Wood) and photo Updated : 22/3 Add 2 drawings to show the structures of machine, also visit this link. +++++++++++++++++++ I read many posts and now I had finished my first mini Lazer Cutter. The design is simple and reliable ( u can see the video ) It is using Arduino Duemilanove + GRBL (0.8c) + 100mW blue/ violet lazer with external battery power supply (5V) Drawing program is inkscape + gcodetools, gcode sender is Unversai G Code Sender I want to share with u but it is really difficult for me to explain it in english...
I just want to share some experiences, or, may be u can ask me... Also, most of the technical things (especially about GRBL) u can find in the following articles. Arduino. Entrée Bouton. De MCHobby Wiki.

Le Groupe Informatique Médias: Back to Tools The original FabScan was developed by Francis Engelmann in his Bachelor's thesis (cost of materials: 150 Euros). FabScan 100 further reduced material cost so that you could build one for just 100 Euros. FabScan Cube then featured an improved housing, as a result of a student group working on interactive assembly. FabScan Pi is the latest version. Arduino & Raspberry Notepad. Light-Bot. S4A. Achat direct (site officiel)
Didier Voisin. Arduino. MOOC Fabrication Numérique – Communauté – Google+ Fritzing. Thierry Monnot :CNC, imprimante 3D, DIY et autre bricolages… Beau soleil aujourd’hui !! Je suis allé faire un tour de moto à la Pointe du Roselier pour y retrouver mes potes de planeurs qui faisaient joujou avec le vent… J’y ai retrouvé avec grand plaisir Yann, un pote que je n’avais pas vu depuis longtemps… Quand nous volions et construisions ensemble, il avait pondu un petit poème sur les mérites comparés de la construction manuelle " à la serpe " et numérique que nous pratiquions avec bonheur mon pote Ronan et moi. Je ne résiste pas a l’envie de vous le faire lire. Je vous laisse imaginer lequel des deux je suis Deux compères, fort épris de machines volantes, Avaient, pour les construire, des façons différentes.
Index. Arduino pour bien commencer en électronique et en programmation. Bienvenue à toutes et à tous pour un tutoriel sur l'électronique et l'informatique ensemble ! Depuis que l’électronique existe, sa croissance est fulgurante et continue encore aujourd’hui. Si bien que faire de l’électronique est devenu accessible à toutes personnes en ayant l’envie. Mais, le manque de cours simples sur le net ou en libraire empêche la satisfaction des futurs électroniciens amateurs ou professionnels et parfois empêche certains génies à se révéler ( ).
C’est pourquoi je souhaite intervenir contre cette insuffisance et écris ce cours sur l’électronique et la programmation. Ce que nous allons apprendre aujourd'hui est un mélange d'électronique et de programmation. Nous allons, dans un premier temps, voir ce qu'est l'électronique et la programmation. Plan du cours Je vais détailler un peu le plan du cours. Apprentissage des bases Le cours est composé de façon à ce que les bases essentielles soient regroupées dans les premières parties.