
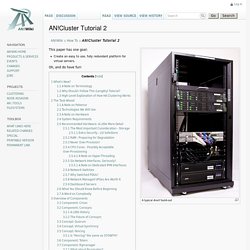
AN!Cluster Tutorial 2 - AN!Wiki. A typical Anvil!
Build-out This paper has one goal: Create an easy to use, fully redundant platform for virtual servers. Oh, and do have fun! In the last two years, we've learned a lot about how to make an even more solid high-availability platform. Many refinements to the cluster stack that protect against corner cases seen over the last two years. A Note on Terminology In this tutorial, we will use the following terms: Anvil! Why Should I Follow This (Lengthy) Tutorial? Following this tutorial is not the lightest undertaking. In either case, when finished, you will have the following benefits: Totally open source. Ask your local VMware or Microsoft Hyper-V sales person what they'd charge for all this. :) High-Level Explanation of How HA Clustering Works Before digging into the details, it might help to start with a high-level explanation of how HA clustering works. Corosync uses the totem protocol for "heartbeat"-like monitoring of the other node's health.
A Note on Patience A Note on Hardware. 2-Node Red Hat KVM Cluster Tutorial - Archive - AN!Wiki. This paper has one goal; Creating a 2-node, high-availability cluster hosting KVM virtual machines using RHCS "stable 3" with DRBD and clustered LVM for synchronizing storage data.
This is an updated version of the earlier Red Hat Cluster Service 2 Tutorial Tutorial. You will find much in common with that tutorial if you've previously followed that document. Please don't skip large sections though. There are some differences that are subtle but important. Grab a coffee, put on some nice music and settle in for some geekly fun. Before we start, let's take a few minutes to discuss clustering and its complexities. Technologies We Will Use Red Hat Enterprise Linux 6 (EL6); You can use a derivative like CentOS v6.
A Note on Hardware In this tutorial, I will make reference to specific hardware components and devices. A Note on Patience When someone wants to become a pilot, they can't jump into a plane and try to take off. You must have patience. Coming back to earth: Prerequisites Focus and Goal. WTi 13460C IPS-800/1600 Power Board. Wti ips-800. Proxmox VE 3.3 2-node cluster with GlusterFS. This article covers setup of simple and cost-effective 2-node Proxmox VE cluster featuring locally installed GlusterFS as shared filesystem for cluster VMs.

Through this solution is not intended for mission critical or enterprise needs, its ease and ability to run on bargain priced hardware makes it interesting for non-profit organisations, labs or clustering enthusiasts. This HOWTO implies you have 2 freshly installed Proxmox VE 3.3 nodes:pve-node-01 (IPv4 10.10.0.1) and pve-node-02 (IPv4 10.10.0.2) connected to the 10.10.0.0/16 private network. Keep in mind that your actual setup may differ and you may need to change some of commands in this HOWTO to suit your needs. Please keep in mind: OpenVZ works miserably on GlusterFS, so you must use KVM! NB! First of all, install GlusterFS server:apt-get install glusterfs-server NB! Create Proxmox VE cluster: Only on pve-node-01: pvecm create pve-cluster Only on pve-node-02: pvecm add 10.10.0.1 Edit cluster.conf in a tricky Proxmox way. OK! NB! #!