
Clearing Up The Confusion Of The Lightroom Quick Collection (Or Not) The Lightroom Quick Collection is a smart way to gather together a group images from any of your folders in a Catalog without changing the location of the original images.
It is essential to the process of maintaining an organized library. Whenever you start a new project within Lightroom, a book, slideshow, etc., it makes sense to create a Quick Collection of selected images and then save it. Quick Collections are temporary. Collections are saved Quick Collections. And so, with that confusing comment in mind, I’ve tried to make particular note of those issues that have confounded some my students. PW141 - Lightroom 3 Quicktips - Picture Packages. Lightroom keyboard shortcuts cheat sheet. 5 Lightroom Develop Module Secrets Revealed. When you’re new to Lightroom, some features of the program aren’t immediately apparent, or easily discoverable.
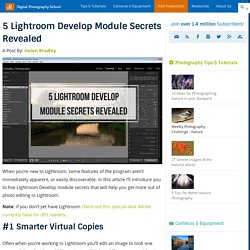
In this article I’ll introduce you to five Lightroom Develop module secrets that will help you get more out of photo editing in Lightroom. Note: if you don’t yet have Lightroom check out this special deal Adobe currently have for dPS readers. #1 Smarter Virtual Copies Often when you’re working in Lightroom you’ll edit an image to look one way, and then decide you’d like to try to edit it in a different way – without losing your work. The trouble is, that once an image has been edited, any virtual copy that you create will use the current look of the image as its starting point. You can, however, use the Reset button at the foot of the right panel of the Develop module. So far, so good. Notice the History panel is opened, and a state other than the current one is chosen to make the Virtual Copy. #2 Comparing Before and After So far, so good. . #3 Reverse Engineer Presets. High Dynamic Range Imaging within Lightroom CC.
Jeff Schewe on Making a Digital Print. This chapter is from the book Unlike Photoshop, Lightroom is built on the concept of modularity.
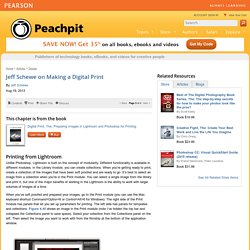
Different functionality is available in different modules. How To Up Scale Your Images For Very Large Prints In Lightroom. How To Up Scale Your Images For Very Large Prints In Lightroom. Master the Lightroom 5 Print Module. LightroomCC/6-01 Introduction - Luminous Landscape. PLUG-IN: Show Focus Point Lightroom Plug-In. A while back I wrote a post on some features I’d love to see, but I really didn’t think would make it in to Lightroom.
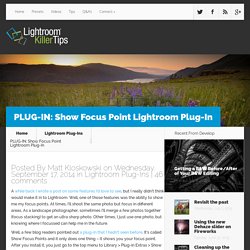
Well, one of those features was the ability to show me my focus points. At times, I’ll shoot the same photo but focus in different areas. As a landscape photographer, sometimes I’ll merge a few photos together (focus stacking) to get an ultra sharp photo. Other times, I just use one photo, but knowing where I focussed can help me in the future. Well, a few blog readers pointed out a plug-in that I hadn’t seen before. It’s not incredibly elegant, but it opens a window that does the trick and gives you lots of focus information, including showing you the focus points. Here’s the link to download it. Using the White Balance Tool in Adobe Photoshop Lightroom 4 > White Balance tool. The Temp and Tint sliders in the White Balance tools (WB) section can be used to precisely adjust the white balance of a photograph.
With these you can color-correct most images or, if you prefer, apply alternative white balances to your photos. The White Balance tool is located near the top of the Basic panel. You can activate the tool by clicking on it or by using the to activate the White Balance tool and continue clicking with the tool until you find the right setting. OktoberNewsletterZwartwit. Tutorial: 6 Steps For Sharpening In Lightroom. Although all images are going to have slightly different sharpening needs, a regular workflow for sharpening will help you optimize your images consistently.
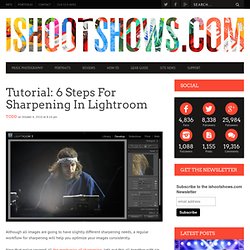
Now that we’ve covered all the mechanics of sharpening, let’s put this all together with six simple steps for sharpening in Adobe Lightroom. Starting With Lightroom’s Defaults – 25-1-25-0: Lightroom’s default sharpening for images is as follows: Amount: 25Radius: 1Detail: 25Masking: 0 These are fairly conservative settings that are broad enough to work for most images in adding clarity and revealing detail.
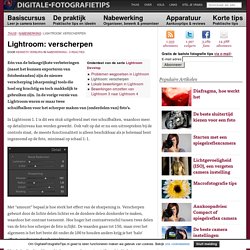
Sharpening Workflow Example: In this sharpening exercise, we’ll take this shot of Girl Talk at The Bamboozle 2010. This image was made with the Nikon D3 and Nikon 70-200mm f/2.8 – here are the details: ISO 4001/1000f/4200mm Thanks to lens performance and the relatively low ISO, there’s plenty of detail to look at in this show of Girl Talk – perfect for a little sharpening tutorial. Lightroom: verscherpen. Eén van de belangrijkste verbeteringen (naast het kunnen exporteren van fotobestanden) zijn de nieuwe verscherping (sharpening) tools die heel erg krachtig en toch makkelijk te gebruiken zijn.
Lightroom 5 beta: Upright. OktoberNewsletterZwartwit. How to Easily Improve Your Skies in Adobe Lightroom. The following two tabs change content below.
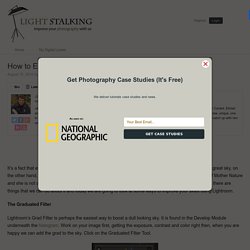
Jason Row is a British born travel photographer now living in Ukraine. His images have been licensed to companies such as Cunard, Ethiad and Virgin Atlantic as well as multiple newspapers and magazines. He is also the founder of Learn Photography Direct, the new, unique, one to one photographic tutoring service. He maintains a travel stock photography site at Jason Row Photography You can also catch up with him on Facebook at Facebook/TheOdessaFiles It’s a fact that even the most beautifully composed image will fall apart if it includes a dull, lifeless sky. 10 Lightroom shortcuts & clickables you don’t know about. Although it looks simplistic at first glance, Lightroom is such a powerfully deep editing program.
There are layers upon layers of powerful options and almost endless editing capabilities. There are even plug-ins out there (like this one) for editing with layers in Lightroom just like you do in Photoshop. You can get the most out of your experience with LR by learning some of the keyboard shortcuts and clickables which you may not already know exist. Here are my 10 favourites: {Keyboard shortcuts} Before/After - To toggle back and forth between your before and after while you’re editing, hit the \ {backspace} key. Lightroom Video: The Ultimate Trick for Working With Skies.
Lightroom Video: The Ultimate Trick for Working With Skies Home » Lightroom Videos » Lightroom Video: The Ultimate Trick for Working With Skies Posted By Matt K on Sep 20, 2013 | 12 comments.
A New HDR Feature in Lightroom 4.1. Using Lightroom Brushes to Soften Skin. One really powerful part of Lightroom is the brushes feature. Brushes give you the ability to effect only a part of the image by brushing on a mask that you can apply effects to. This is just like creating masks in Photoshop. LR/Enfuse - Blend Multiple Exposures Together in Adobe Lightroom. LR/Enfuse is a Lightroom plugin that allows you to blend multiple exposures together directly from within Lightroom by using the open source Enfuse application. With LR/Enfuse you can: Blend images of different exposures together in order to create a natural looking image with a greater dynamic range. High Dynamic Range Software and Techniques. Digital cameras have a come a long way in the past ten years, and now a RAW file from a full frame camera can have a 12 stop exposure range.
(Though it is in reality actually rather more difficult to extract the full range). There are many situations when this will not be enough, resulting in blown highlights and shadows dominated by noise. Combining several exposures in post processing will recover the highlight and shadow detail. In the early days of digital, this was little more than making an exposure for the sky, and another for the ground and merging them in Photoshop – often with mixed results. The launch of HDR software like Photomatix and the features progressively added to Photoshop have made this somewhat easier – no need for masks or manual blending.
Recently I have been carrying out an extensive test of Photomatix against various competitors that use the “Enfuse” open source algorithms to fuse multi-exposure images to give a more natural look than the classic “HDR”. N.b. Creating HDR Images Directly in Lightroom. Julieanne Kost's Blog. I’m excited to announce that Lightroom mobile now includes the ability to capture raw, high dynamic range (HDR) images! In the Lightroom mobile app, tap the camera icon and then choose HDR from the drop down at the bottom of the screen. Lightroom mobile automatically analyzes the scene to determine the appropriate spread of exposure values over three shots (most other apps only average two exposures). Then, Lightroom automatically aligns, de-ghosts, and tone maps the image, creating a 16-bit floating point DNG file which can then be edited as desired. The resulting DNG file offers a much larger dynamic range than a singe raw file while maintaining all other advantages of a raw file such as higher bit-depth per color, lack of JPEG compression, and the ability to address white balance after capture with no loss of information!
Although, HDR files are larger, I believe the superior image quality and greater editing flexibility are well worth the increase in file size. Lightroom Killer Tips. Mastering Tone & Dynamic Range with Lightroom.