
How to Make Your Photos Shine Using Clarity, Sharpening, and Dehaze in Lightroom. The goal of any photographer is to make each and every photo stand out from the crowd.

Making an image that pops is something that we all strive to achieve, but it’s not always easy to do. Luckily, there are tools at our disposal in Adobe Lightroom that can go a long way to help us achieve an image that we can be proud of, and that catches the attention of the viewer. What are these tools? They are many and varied, but there are three central processing techniques that can make your images transcend the average, and reach the potential you intended. They are Clarity, Sharpness, and Dehaze. These three tools are deceptively simple and subtle. Clarity The clarity slider has been around virtually since the inception of Lightroom. Tips for Using the Clarity Slider Don’t add too much. Clarity applied at +30, viewing at 1:1 Clarity slider taken too far, viewed at 1:1 (100%) Sharpness The art of sharpening an image can often make or break the composition.
Make use of the radius slider. Dehaze After. How to Stick With Good Habits Every Day by Using the "Paper Clip Strategy" In 1993, a bank in Abbotsford, Canada hired a 23-year-old stock broker named Trent Dyrsmid.

Dyrsmid was a rookie so nobody at the firm expected too much of his performance. Moreover, Abbotsford was still a relatively small suburb back then, tucked away in the shadow of nearby Vancouver where most of the big business deals were being made. The first popular email services like AOL and Hotmail wouldn’t arrive for another two or three years. Geography still played a large role in business success and Abbotsford wasn’t exactly the home of blockbuster deals. And yet, despite his disadvantages, Dyrsmid made immediate progress as a stock broker thanks to a simple and relentless habit that he used each day. On his desk, he placed two jars. “Every morning I would start with 120 paper clips in one jar and I would keep dialing the phone until I had moved them all to the second jar.”
And that was it. 120 calls per day. Within 18 months, Dyrsmid’s book of business grew to $5 million in assets. All You Need to Know to Process a RAW File in Lightroom. If you’re new to processing a RAW file, or you don’t particularly know what you’re doing, then this tutorial is for you.

I’ll run through everything you need to know when processing your image. The mystery behind all those sliders will be a mystery no more! If you haven’t yet made the switch from JPEG to RAW, then make sure to read “Why You Should Be Shooting in RAW” too! Importing On opening Lightroom, you’ll need to import your RAW file so you can process it. When the import box comes up, navigate to where the file is on your computer using the directory browser on the left.
So, now your image has been imported into the Library shown on the left. Develop Module. Lightroom Learning_2015. The Ultimate Lightroom Keyboard Shortcut Tool. Over on GitHub (a popular place for sharing code, and projects), just posted a web-based Lightroom Shortcut app.
I have to say it’s pretty cool as a learning tool. Basically, you can load up any module in Lightroom, set your keyboard style (Mac, PC), and it’ll show you exactly what keys are used for each feature. Plus, it even has a Search feature at the bottom which works really well. I typed in the word “Pick” and it came up with any place the word “pick” was used as a shortcut in Lightroom.
Heck, I even learned a keyboard shortcut I didn’t know while doing it. Another feature I stumbled on while trying to take a screen capture is that if you press a modifier key (like Command, Control, Shift, etc…), the keyboard automatically changes to show you what keys do with that modifier key selected. Why Lightroom Users Should Seriously Consider Adding Photoshop Elements To Their Workflow.
Most Lightroom users find themselves occasionally needing to step outside of its non-destructive workflow and use a “pixel pushing” (i.e. destructive) editor to finish processing a photo.
The obvious choice for that task is Photoshop. But do you really need all that power if 99% of your work has already been done in Lightroom? Unless you are a full time photographer the answer is likely no. I’m an amateur photographer and find that Photoshop’s cutdown version – Photoshop Elements – meets all of my needs and there is no compelling reason to move to the full version. But there is one compelling reason to choose Photoshop Elements over Photoshop. Its large enough in the US, but internationally the price difference between Photoshop Elements and Photoshop is remarkable. Photoshop vs Photoshop Elements A recent post at Lightroom Secrets compared the features of Photoshop and Photoshop Elements to help users understand the incremental benefit of buying the full version. Bottom line? 6 of Lightroom's Hidden Treasures. A Post By: Navan Viswa Lightroom is very popular for post-processing lately.
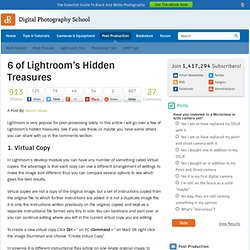
In this article I will go over a few of Lightroom’s hidden treasures. See if you use these, or maybe you have some others you can share with us in the comments section. 1. Virtual Copy In Lightroom’s develop module you can have any number of something called Virtual copies. Virtual copies are not a copy of the original image, but a set of instructions copied from the original file, to which further instructions are added. To create a new virtual copy Click Ctrl + ‘ on PC (Command + ‘ on Mac) OR right click the image thumbnail and choose “Create Virtual Copy” In essence it is different instructional files acting on one single original image, to produce different images as per the different processing strategies you apply (you then need to export each to create separate final files).
This screen shot from filmstrip shows the Virtual Copies. 2. 3. This screen shot shows the original file without Smart Preview.