
Better, More Realistic Skin Retouching in Lightroom. Adding Your Own Custom Picture Frame in Lightroom. Mornin’ everybody.
Sorry I missed posting on Friday – I was out in San Diego for my seminar, and by the time I got back to my hotel I was so beat that I called in “lame.” Have Lightroom Automatically Organize Your Collection Using "Auto Stack" Hi Gang.
If you haven’t considered using the Auto Stack command to quickly bring some order to your collections (creating pre-sorted mini-collections inside your collection), give this a quick look: [NOTE: This feature also works in Folders, where it was first introduced. Thanks to reader MattS for the reminder.] STEP ONE: Here’s a collection of photos I took a couple of years ago in Amsterdam, and although you’re only seeing 24 photos here on screen, if you kept scrolling down and scrolling down you’d see that there are actually 444 photos in this collection. These photos were shot at a handful of different locations and times.
What Auto Stack Does (this is important) The idea behind Auto Stacking by Capture time is that while you’re shooting a particular subject or location, you’ll be shooting pretty consistently, with perhaps only a few seconds, up to a minute to two between images. For example, let’s say you’re doing a portrait session. Landscape Plug-in Effect (without the plug-in) & 10 Book Winners! (Above: What you see here is a cooling/warming effect applied using the Nik Color Efex Pro 4 Bi-Color Filter, that makes the sky bluer and the ground much warmer.

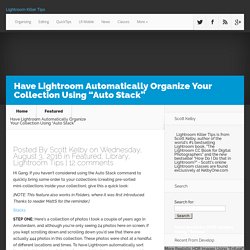
We’re going to recreate the look all in Lightroom without the plug-in). OK, sure I could post the winners at the end, so at least you’d check out the tutorial, but you know, and I know you’d just scroll to the bottom anyway, so I won’t make you scroll. The 10 winners of my new “How Do I Do That In Photoshop?” Book are: Valerie Sweeney Karla Lugo Ron Ballard Kevin Purcell David Gould Pat Crawford Christopher Allred Dan Saez Sylvia Labelle Aga Wlodarczak Congrats to all our winners (and if you didn’t win, you can pick up your copy at Amazon or Barnes & Noble). Creating White Porcelain Skin in Lightroom. Hi Gang: This is a technique I learned years ago from German Photoshop Guru Calvin Hollywood, and it’s a two-step process for changing your subject’s skin to a white porcelain look (you’ll see this look sometimes in high-end fashion photography).
While I originally learned it in Photoshop, it works perfectly here in Lightroom, too! Above: Here’s our original image. STEP ONE: Go to the HSL / Color / B & W panel and in the HSL section, click on the Saturation tab up top, and drag the Orange slider all the way to the left to -100. Hollywood Skin Effect in Lightroom.
Hi gang.

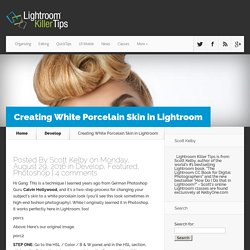
Here’s a look you see in everything from Hollywood Movie Posters to high-end portrait work, and you can do the whole thing right in Lightroom. You can see a before/after above. OK, let’s do this thing! STEP ONE: Start by increasing the Contrast Amount to +43 (as shown here). If you compare this to the original image up top, you can see this version is more contrasty, but not quite enough, so we’ll add some midtone contrast in the next step. STEP TWO: Increase the Clarity to +37, which adds midtone contrast that pulls out details, and makes the image look sharper overall. STEP THREE: Now lower the Vibrance amount to -37 (as shown here) to desaturate the skin. STEP FOUR: Lastly, let’s sharpen the living daylights out of him. OPTIONAL STEP: If you want to take this a step further, and make a high contrast B&W from it, do this: First, click the Black & White button at the top right of the Basic Panel.
Want to learn a whole bunch more Lightroom stuff? OK, I’m still in Iceland. Best, How To Clearly See Spots or Sensor Dust In Your Image. Hi gang: Happy Monday — OK, that’s enough chatty stuff, let’s get to work!
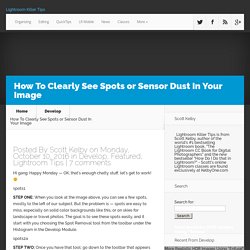
STEP ONE: When you look at the image above, you can see a few spots, mostly to the left of our subject. But the problem is — spots are easy to miss, especially on solid color backgrounds like this, or on skies for landscape or travel photos. The goal is to see these spots easily, and it start with you choosing the Spot Removal tool from the toolbar under the Histogram in the Develop Module. STEP TWO: Once you have that tool; go down to the toolbar that appears below your image (if you don’t see that gray toolbar, press the letter “t” on your keyboard to make it visible). Now, turn on the checkbox for “Visualize Spots” (as shown here), and it inverses the image and the spots suddenly stand out like a sore thumb. Lightroom Killer Tips - Lightroom Presets, Videos, Tips and News.
Adobe Photoshop Lightroom. Photoshop Lightroom. Lightroom for mobile now available on iOS 2.1 The latest version brings you iPad Pro support; shoot-through presets that let you preview the look before you capture the photo; an enhanced Tone Curve tool; Split Tone adjustments; the ability to launch the in-app camera with a swipe; 3D Touch support on iPhone 6s and 6s Plus; and more.

Get the app for iPhone Get the app for iPad Now it's free! Get Lightroom for mobile on Android 1.4 Get free access to Lightroom editing capabilities for as long as you’d like on your Android smartphone or tablet — no need for a Creative Cloud subscription or trial! Adobe Photoshop Lightroom. Pobierz darmową wersję próbną programu do fotografii cyfrowej.