
Best ways to power a Arduino according to your need. In this post I will describe what is the best way to power a Arduino according to your needs.
Of course according to your needs, the way you power your Arduino system, is very important. Partageons notre créativité. Auto Power Off Arduino - Simple circuit - educ8s.tv - Watch Learn Build. In this video we are going to see how to make Arduino power off itself with the help of a simple circuit!
Let’s start! If you have watched some of my previous videos you will know that I like my projects to have minimal power consumption so that we can use them with batteries for a long period of time. One of the biggest disadvantages of the Arduino boards is that they need a lot of current even when in idle state. This Arduino Uno board for example needs about 40mA when idle and about 20mA if we put the Atmega chip to sleep.
That’s a lot of power, so, it will deplete any battery in a few days. HOW TO GET WHAT YOU WANT. Also see: Connections >> Solderability Tests There are a range of different conductive fabrics available.

Some of the most frequently used conductive fabrics, tend to be the most available. LessEMF is a retail company that stocks a great range of conductive fabrics for electro magnetic field shielding. It seems like some of their fabrics are manufactured by Shieldex, but LessEMF renames the fabrics for their own sales and so it is unclear which ones are really the same. Construire sa matrice de led 10x10 pour l'utiliser avec une carte Arduino. Dans ce billet, je vais développer les différentes étapes dans la réalisation d'une matrice de diode 10x10 pour une utilisation avec des tensions de 5V (Il faudra prévoir une/des résistances dans le circuit qui contrôleras les transistors).
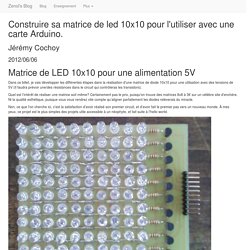
Quel est l’intérêt de réaliser une matrice soit même? Certainement pas le prix, puisqu'on trouve des matrices 8x8 à 3€ sur un célèbre site d'enchère. Ni la qualité esthétique, puisque vous vous rendrez vite compte qu’aligner parfaitement les diodes relèverais du miracle. Non, ce que l'on cherche ici, c'est la satisfaction d'avoir réalisé son premier circuit, et d'avoir fait le premier pas vers un nouveau monde. À mes yeux, ce projet est le plus simples des projets utile accessible à un néophyte, et fait suite à l'hello world. Je vous fourni le projet Eagle contenant schéma et PCB, pour que vous puissiez imprimer le PCB ou simplement modifier le design ; led_matrix.7z.
Giant 128×64 LED matrix display. As you would have allready guessed from previous projects, I really love LEDs !
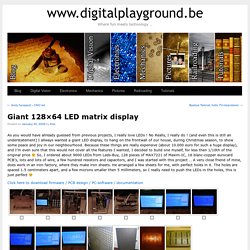
No Really, I really do ! (and even this is still an understatement) I allways wanted a giant LED display, to hang on the frontwall of our house, during Christmas season, to show some peace and joy in our neighbourhood. Because these things are really expensive (about 10.000 euro for such a huge display), and I’m even sure that this would not cover all the features I wanted, I decided to build one myself, for less then 1/10th of the original price So, I ordered about 9000 LEDs from Leds-Buy, 128 pieces of MAX7221 of Maxim-IC, 16 blanc-copper eurocard PCB’s, lots and lots of wire, a few hundred resistors and capacitors, and I was started with this project … A very close friend of mine, does work in an iron factory, where they make iron sheets. He arranged a few sheets for me, with perfect holes in it. Concevez des matrices de LED. Mise en veille totale de la carte arduino. Comprendre les capteurs : Le capteur d'ultrasons - Le Site du NXT. Introduction Dans cette seconde partie du tutoriel consacrée aux capteurs, nous allons étudier le capteur d'ultrasons.
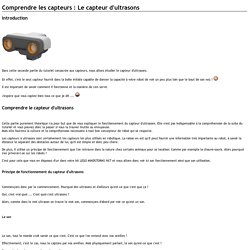
En effet, c'est le seul capteur fournit dans la boîte initiale capable de donner la capacité à votre robot de voir un peu plus loin que le bout de son nez ! Il est important de savoir comment il fonctionne et la manière de s'en servir. J'espère que vous captez bien tous ce que je dit .... Codebender. Examples. 1.
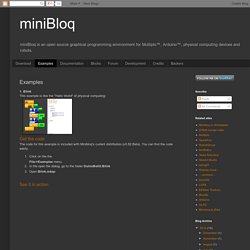
Blink This example is like the "Hello World" of physical computing: Get the code The code for this example is included with Minibloq's current distribution (v0.82.Beta). You can find the code easily:Click on the theFile->Examples menu.In the open file dialog, go to the folder DuinoBot\0.BlinkOpen Blink.mbqc See it in action2. Buzzer (random notes) The code for this example is included with Minibloq's current distribution (v0.82.Beta).
Parts list 1x 5 to 9V (small) buzzer without oscillator.1x Breadboard.1x Arduino™ compatible board.Cables.See it in action 3. Seeed Studio. EMF Detector - Aaron ALAI. // Aaron ALAI EMF Detector April 22nd 2009 VERSION 1.0// aaronalai1@gmail.com// *future note, put in averaging function to average val which should result in a more// smooth response from the led.
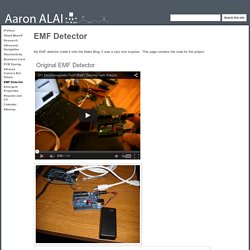
I will give you a hint on how to make an averaging function;// it involves the use of an array int inPin = 5; // analog 5 int val = 0; // where to store info from analog 5int pin11 = 11; // output of red led void setup() { Serial.begin(9600); } WeIO - The Web of Things Platform - The Web of Things for Creators. MicroControleur Hobby - MC Hobby sprl. The AirBoard: Sketch Internet-of-Things, fast! by AirThings. Setting up with Arduino IDE. Chances are, you picked up a Trinket because it is programmable with the Arduino IDE.
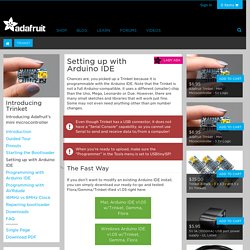
Note that the Trinket is not a full Arduino-compatible, it uses a different (smaller) chip than the Uno, Mega, Leonardo or Due. However, there are many small sketches and libraries that will work just fine. Some may not even need anything other than pin number changes. Even though Trinket has a USB connector, it does not have a "Serial Console" capability, so you cannot use Serial to send and receive data to/from a computer! When you're ready to upload, make sure the "Programmer" in the Tools menu is set to USBtinyISP!
If you don't want to modify an existing Arduino IDE install, you can simply download our ready-to-go and tested Flora/Gemma/Trinket-ified v1.05 right here: On Windows machines, be sure to extract the contents of the zip file. Mac OSX. DIY Arduino Beacons as an alternative to iBeacons. Apple created a lot of interest in the IoT scene with the introduction of iBeacons.
However, Apple placed restrictions such that generic BLE devices could not be used as iBeacons. Home. Punch Through Design. DIY Arduino Beacons as an alternative to iBeacons. Open source IoT toolkit. Setting up with Arduino IDE. Milestone 312 - Version 4.47.5 du 14 septembre 2012 - CERTAM. Présentation MILESTONE 312 est un appareil multifonctions de très petite taille conçu spécifiquement pour les personnes ayant un handicap visuel.
Il convient plutôt à ceux habitués à manipuler des matériels technologiques et possédants une certaine dextérité, notamment pour l’exécution de commandes nécessitant des combinaisons avec plusieurs touches. L’utilisation du Milestone est principalement orientée vers des fonctions audio et comprend : Un enregistreur vocal, tant pour la prise de notes rapides que pour des enregistrements de conférences, de cours, de spectacles, de concerts.
Il est également possible d'effectuer des enregistrements à partir d'une source externe telle qu'un microphone ou une source audio. En option, des modules supplémentaires sont disponibles auprès de son distributeur : Notons que, en Suisse, pays où est fabriqué MILESTONE 312, d’autres applications spécifiques ont été ou sont expérimentées, telles PAVIP Pharma, PAVIP Transport, PAVIP Audio Guide (cf. La-rfid-au-service-des-aveugles-et. Heart-rate beats per minute for Arduino, lickety-split.