
Paper Craft. FIESTA mini flags. For english summary, see end of post.
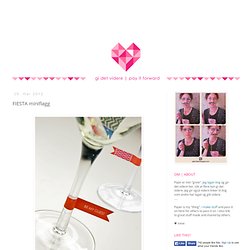
Det er ikke alltid så mye som skal til! En liten detalj kan virkelig gjøre en festlig forskjell - som disse anvendelige miniflaggene til å feste på stetter, sugerør og annet (for eksempel mat/cupcake-flagg). MERK: Flaggene er ment for gøy/pynt! Fargen vil flyte utover dersom flaggene blir fuktige, og fargeflekker på fingre (og barnetøy?) Kan forekomme. Slik gjør du: Last ned pdf-filen til din maskin (link nederst i innlegget)Åpne filen og skriv inn tekst i feltene dersom du ønsker (tekstfeltene vises ikke på utskrift - kun tekst som skrives inn i dem)Skriv ut på papir (ikke for tykt)Klipp eller skjær ut flaggene med hobbyknivLegg litt lim på baksiden fra cirka midten og ut til og med den ene endenBøy flagget rundt stetten/sugerøret, plasser endene mot hverandre og klem flagget sammen fra ytterst og innover til det sitter som du ønsker.
LAST NED HER - DOWNLOAD HERE:►►►► FIESTA mini glass/straw/food flags (two color combinations x 12 flags) DIY, Crafts and ideas with Paper. Crate Paper. Do you have a favorite spot in your home?
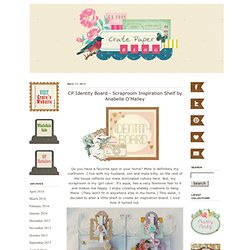
Mine is definitely my craftroom. I live with my husband, son and male kitty, so the rest of the house reflects our male dominated culture here. But, my scraproom is my 'girl cave'. It's aqua, has a very feminine feel to it and makes me happy. I enjoy creating shabby creations to hang there. Pouch: recycled paper gift bows. I found this simple tutorial for gift bows on Craftster It's a great way to make some pretty additions to your presents this Christmas and because they use recycled paper, they are ecofriendly and thrifty too!
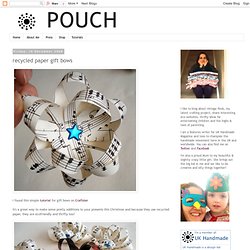
These are my first attempt, I'm pretty pleased with how they turned out. I think they differ from the ones on the tutorial as I used thinner strips and made the loops looser. All you need is some scissors, paper of your choice and shiny brads to hold them together. I used some sheets of music from a vintage book and the coloured ones are made from the glossy outer pages of magazines. I'm going to have another attempt and try and make some exactly like the tutorial ones, I think I need to cut the strips thicker! These are simple to make and a good relaxing-in-front-of-the-television activity, but be warned, they are very addictive once you start making them!
Hand Embroidered Cards. Look what I found in my desk drawer!

I made these embroidered cards so long ago and then just tucked them away in a drawer to be forgotten about. What a shame! I thought these cards would make a great DIY for the blog because they're easy and fun to make, and you probably have all the supplies on hand already. If you're anything like me you have waaaaay too many colors of embroidery floss tucked away somewhere. What you'll need: Pencil for drawing your designPiece of thick cardboardEmbroidery flossSheets of blank paperEmbroidery needle and a pin with a headBlank Card Start by drawing out your design on a piece of thin blank paper.
When I made my fruit cards, I actually used an iron-on transfer from Sublime Stitching, which is a really great book that you should all run out and buy right this very second. Now you can start poking holes along the lines using the pin with a head. Now comes the fun part! Make a gift bow from a magazine page. In gift wrap emergencies when you've got the present but need some wrapping, here's an idea for turning a magazine page into a bow.
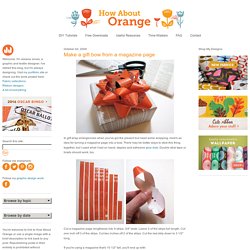
There may be better ways to stick this thing together, but I used what I had on hand: staples and adhesive glue dots. Double stick tape or brads should work, too. Cut a magazine page lengthwise into 9 strips, 3/4" wide. Leave 3 of the strips full length. Cut one inch off 3 of the strips. If you're using a magazine that's 10 1/2" tall, you'll end up with: 3 strips, 10 1/2" x 3/4" 3 strips, 9 1/2" x 3/4" 2 strips, 8 1/2" x 3/4" 1 strip, 3 1/2" x 3/4" Twist each strip to form a loop at both ends and staple it in the center.
Layer the three longest pieces on top of each other, spacing them evenly and securing each with a glue dot. Use other papers, like a map of your city. Make a garland from woven paper balls. I love paper Christmas decorations, so when I bumped into The Cheese Thief's woven paper ball tutorial, I had to give it a try.
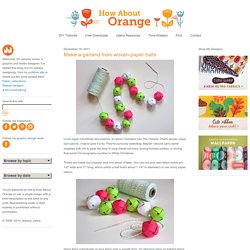
They're curiously addicting. Maybe I should carry some supplies with me to pass the time in long check-out lines, boring holiday parties, or during that weird Choreography number in White Christmas. These are made out of paper and one piece of tape. Faceted Paper Lamp. Do you remember making folded paper fortune tellers when you were in grade school?
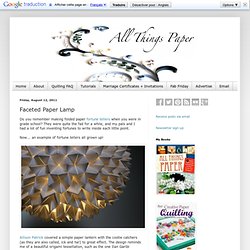
They were quite the fad for a while, and my pals and I had a lot of fun inventing fortunes to write inside each little point. Now... an example of fortune tellers all grown up! Allison Patrick covered a simple paper lantern with the cootie catchers (as they are also called, ick and ha!) To great effect. The design reminds me of a beautiful origami tessellation, such as the one Ilan Garibi created for his Cube Lamp. If folding zillions of the eye-catching triangles doesn't sound like a good time to you, Allison sells the lamp in her Etsy shop, Zipper 8 Lighting. Vintage + modern design for kids and moms. DIY: Paper Ornaments.