
C̐ͪhris Q҉͚͙uites sur Twitter : "“@hackaday: piana – musical synthesis ror the #raspberry Pi. Twitter. ProtoCam - The Raspberry Pi Camera Module Prototyping Board by Richard Saville. The ProtoCam is a prototyping board for the Raspberry Pi Model A and B, that offers a whole new way to prototype with your Raspberry Pi.
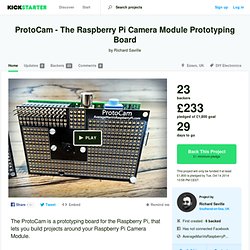
It's designed to hold your Raspberry Pi Camera Module - surrounded by prototyping area - allowing you to build fun and interesting new projects. The ProtoCam is unique - It's a prototyping board for the Raspberry Pi that mounts your Raspberry Pi Camera Module around a large area of prototyping space. You can build around your camera module, and what you build is entirely up to you! The ProtoCam is designed to help you be creative. The large area of prototyping lanes makes it easy to fit LEDs, Infra red, segment displays, sensors, buzzers and much much more - all around your Camera Module!
Examples. Fridge hacking guide: converting a fridge for fermenting beer #piday #raspberrypi @Raspberry_Pi. August 29, 2014 AT 12:00 pm The BrewPi crew created a guide on how to convert a fridge into a Raspberry Pi and Arduino controlled fermentation chamber.
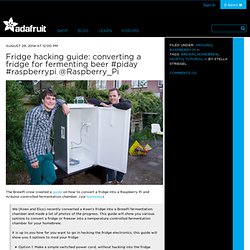
(via hackaday) We (Koen and Elco) recently converted a Koen’s fridge into a BrewPi fermentation chamber and made a lot of photos of the progress. This guide will show you various options to convert a fridge or freezer into a temperature controlled fermentation chamber for your homebrew.It is up to you how far you want to go in hacking the fridge electronics, this guide will show you 3 options to mod your fridge:Option 1: Make a simple switched power cord, without hacking into the fridge electronics.Option 2: Make a switched power cord, but also override or remove the thermostat.Option 3: Rip out the thermostat and fully integrate the SSRs into your fridge (what we did).
Read more. Stereo Audio Board for Raspberry Pi @RaspberryPi #piday #raspberrypi. Emma’s second-grade poster project. Emma is in the second grade (7-8 year olds).

And she’s already well on her way to being a fully fledged engineer. Every year, Emma’s school runs a State Board project, where each kid in the second grade is assigned a US state to make a trifold poster about. Emma’s already a Maker Faire veteran who knows how to solder and how to use a milling machine. She programs in Python, and she’s very keen on electronics; so with some help from Dad she used a Raspberry Pi to turn her poster into an all-singing, all-dancing interactive Vermont extravaganza. Here’s a great bit of video of Emma showing off her soldering skills; she’s constructing a Perma-Proto that’s used in the project. When I was Emma’s age, I was glueing fake fur, lentils and macaroni onto a large cut-out ankylosaurus. Well done Emma – we’re all really impressed by your project and your technological skills, and we hope you’ll let us know if you use a Raspberry Pi in any of your future schoolwork!
Controlling a servo motor with the Raspberry Pi #piday #raspberrypi @Raspberry_Pi. Controlling a servo motor with the Raspberry Pi #piday #raspberrypi @Raspberry_Pi Check out this great project from the most recent meeting of the Pumping Station: One workshop “NERP” (Not Exclusively Raspberry Pi), shared by Drew Fustini : During the last embedded systems meetup at my hackerspace in Chicago, Pumping Station: One , we did hands-on activity where we went through a couple of Adafruit’s wonderful tutorials.
Raspberry Pi GPIO with Python (without root) - Sirmc.net. While playing around with the raspberry pi I wanted to try out the GPIO function.
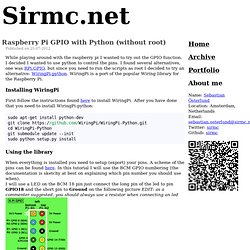
I decided I wanted to use python to control the pins. I found several alternatives, one was RPi.GPIO, but since you need to run the scripts as root I decided to try an alternative: WiringPi-python. WiringPi is a port of the popular Wiring library for the Raspberry Pi. Installing WiringPi First follow the instructions found here to install WiringPi. Sudo apt-get install python-dev git clone cd WiringPi-Python git submodule update --init sudo python setup.py install Using the library.
Section 2: GPIO. Let's start with an introduction to using the Raspberry Pi's General Purpose Input Output (GPIO) facilities.
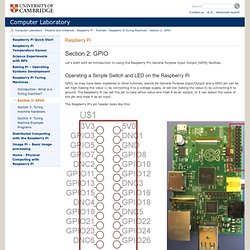
Operating a Simple Switch and LED on the Raspberry Pi GPIO, as may have been explained in other tutorials, stands for General Purpose Input/Output and a GPIO pin can be set high (taking the value 1) by connecting it to a voltage supply, or set low (taking the value 0) by connecting it to ground. The Raspberry Pi can set the pin to take either value and treat it as an output, or it can detect the value of the pin and treat it as an input. Lesson 2: LPC2148 GPIO (Basic Input and Output) > Lesson 2 - Basic Input and Output (GPIO) Getting your microcontroller to talk to the outside world and vice-versa.
In our previous tutorial (Getting Started), we installed our development software (Crossworks for ARM), setup our JTAG debugger (an Olimex ARM-USB-OCD), and ran our first program on the development board. As important as all of that is, it isn't particularly fun or exciting. In this tutorial, we'll try to do something a bit more interesting and show you the most basic method for actually making your microcontroller interact with the outside world via GPIO. GPIO, or General Purpose Input/Output, is the easiest way for you to interact with basic peripherals like buttons, LEDs, switches, and other components.
In order to get started with GPIO, you need to understand the four 'registers' that control it: IODIR, IOSET, IOCLR and IOPIN. IODIR controls the 'direction' of the GPIO pin. Let's take the Olimex LPC-P2148 board as an example. Raspberry Pi. Raspberry Pi OpenCV Pan & Tilt Face Tracker Create your own face tracking, pan and tilt camera on the Raspberry Pi!

This tutorial will demonstrate use of the OpenCV (computer vision) library to identify and track faces on the raspberry pi using two servos and a USB webcam. For the interested, I previously covered a more thorough overview of the installation of OpenCV from source here, however, I have found that the apt package is sufficient for all but the most bleeding edge of projects. This project is based on the OpenCV face tracking example that comes along with the source-based distribution. In short, it performs face detection using haar-like features to analyze the video frame, and locates any faces present within it. Using the coordinates of the rectangle vertices, my script calculates the (X,Y) position of the center of the face.
Hardware Parts needed: Assembly. Interfacing with a Wiimote - Physical Computing with Raspberry Pi. Difficulty: intermediate This tutorial will show you how to connect a Wiimote to the Pi over Bluetooth.
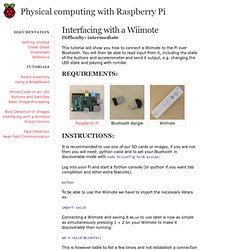
You will then be able to read input from it, including the state of the buttons and accelerometer and send it output, e.g. changing the LED state and playing with rumble. It is recommended to use one of our SD cards or images, if you are not then you will need: python-cwiid and to set your Bluetooth in discoverable mode with sudo hciconfig hci0 piscan. Log into your Pi and start a Python console (or ipython if you want tab completion and other extra features). python To be able to use the Wiimote we have to import the necessary library so: import cwiid. Basic Image Processing - Physical Computing with Raspberry Pi. Difficulty: beginner This tutorial aims to be a basic introduction to image processing with the Raspberry Pi and Python.
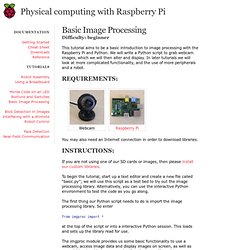
We will write a Python script to grab webcam images, which we will then alter and display. In later tutorials we will look at more complicated functionality, and the use of more peripherals and a robot. You may also need an Internet connection in order to download libraries. If you are not using one of our SD cards or images, then please install our custom libraries. To begin the tutorial, start up a text editor and create a new file called “basic.py”; we will use this script as a test bed to try out the image processing library. The first thing our Python script needs to do is import the image processing library. Robot Assembly - Physical Computing with Raspberry Pi. Difficulty: introduction This tutorial shows you how to put together the robot chassis from a kit.
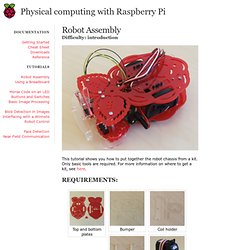
Only basic tools are required. For more information on where to get a kit, see here. Clip the battery pack retainer into the top side of the bottom plate. The bottom plate is the one with larger slots for the wheels. At each of the points marked with a cross, screw a 40mm spacer to the top side of the bottom plate using a 6mm M3 screw. S Raspberry Pi Lesson 8. Using a Servo Motor @Raspberry_Pi #raspberrypi.
January 9, 2013 AT 9:38 am Adafruit’s Raspberry Pi Lesson 8. Using a Servo Motor @ The Adafruit Learning System. This lesson describes how to control a single servo motor using Python. Servo motors are controlled by pulses of varying lengths. This requires fairly accurate timing. SNES (Super Nintendo Emulated System) Going back to the days of ITX computer case mods, I’ve had the desire to place a computer inside of a stock Super Nintendo case. Instead of the project being a simple case mod, I’ve wanted to configure the computer in such a way as to maintain a console playing experience, with the additional benefit of having a full-fledged computer under the hood.
With the Raspberry Pi, I finally found a platform suited to the project’s needs. When I came up with the concept in 2004, I had the desire to make an ITX case mod with some of the following features to make the SNES computer “feel” like a console, in no particular order: downloads.raspberrypi.org/Raspberry_Pi_Education_Manual.pdf.
Updated Instructions for Creating a Raspberry Pi Supercomputer #piday #raspberrypi @Raspberry_Pi. Matrix and 7-Segment LED Backpack with the Raspberry Pi. Adding a Real Time Clock to Raspberry Pi. 16x2 Character LCD + Keypad for Raspberry Pi. This new Adafruit plate makes it easy to use a 16x2 Character LCD. We really like the range of LCDs we stock in the shop, such as our classic blue & white as well as the fancy RGB negative and RGB positive. Unfortunately, these LCDs do require quite a few digital pins, 6 to control the LCD and then perhaps another 3 to control the RGB backlight for a total of 9 pins. That's nearly all the GPIO available on a Raspberry Pi!
With this in mind, we wanted to make it easier for people to get these LCD into their projects so we devised a Pi plate that lets you control a 16x2 Character LCD, up to 3 backlight pins AND 5 keypad pins using only the two I2C pins on the Pi! The best part is you don't really lose those two pins either, since you can stick i2c-based sensors, RTCs, etc and have them share the I2C bus. Raspberry Pi E-mail Notifier Using LEDs. Raspberry Pi’s popularity make things so easy that it is almost scary. I set forth on a simple starter project of having the raspberry pi show me when new gmail messages arrive.
After some searching it seems that lots of people are already talking about how to do this and there are some great examples. Michael over at MitchTech had the most ready to go code which I pilfered from. Adafruits Cobbler Breakout Kit makes the bread board experience even easier with the clearly labeled pins for each of raspi’s GPIOs. Adafruit's Raspberry Pi Lesson 4. GPIO Setup. To make life easy for those wishing to experiment with attaching electronics to their Pi, Adafruit have produced an extensive and extremely useful collection of code. This includes simple Python libraries for a large number of modules, including displays, sensors and PWM controllers etc.
Playing sounds and using buttons with Raspberry Pi. Adafruit's Raspberry Pi Lesson 4. GPIO Setup. The I2C bus allows multiple devices to be connected to your Raspberry Pi, each with a unique address, that can often be set by changing jumper settings on the module. First steps with the Raspberry Pi « Random Hacks. Yes, I was awake at 6am on the 29th of February and it was partially my fault that the element14 and RS components sites went down. I’m sorry. Raspberrypi. Adafruit/Adafruit-Raspberry-Pi-Python-Code. RPi Low-level peripherals. Raspberry Pi Temperature Sensor.
Basic Resistor Sensor Reading on Raspberry Pi. Raspberry Pi synth gives a softsynth dedicated hardware. Using the BMP085 with Raspberry Pi. The Raspberry Pi includes support for Python, which makes it easy to get access to a lot of low-level hardware and software stacks -- USB, TCP/IP, multiple file systems etc. This is a good thing since it means you don't need to wrap your head around all the obscure details that go along with these complex stacks or the implementation details of various serial buses: you can focus on getting your data off your sensor and into your project as quickly as possible.
Hurray for abstraction! Most sensors tend to communicate with other devices based on one of three well-defined mechanisms: I2C, SPI or good old analog output. There are dozens of other serial buses and communication protocols out there (CAN, 1-Wire, etc.), and they all have their strengths and weaknesses, but I2C, SPI and analog cover the overwhelming majority of sensors you're likely to hook up to the Pi. Command line music making. Csound music making. RPi Easy SD Card Setup. Set up a Seed Box On Raspberry PI - Raspberry Pi Tutorials / Guides / How-To's - Tutorials - Raspberry Pi Forum.
The First Step. Raspberry Pi Synthesizer. Martin's Atelier: Arduino from the command line. Dr. Monk's DIY Electronics Blog: Raspberry Pi and Arduino. Basic Image Processing - Physical Computing with Raspberry Pi. SB-Projects: Projects: Raspberry Pi. Raspberry Pi and Arduino via GPIO UART. Raspberry Pi + Arduino Polar Graph. Raspberry Pi playing with Arduino and Processing. Two way serial communication with raspberry Pi (radio project) Arduino and Raspberry Pi Serial Communication. Raspberry Pi Recipes. Arduino on Raspberry Pi. RaspberryPi @Homelabs » RaspberryPi the Arduino Development Tool. Controlling an Arduino from Raspberry Pi using Processing.
How to fix a broken SD card slot on your raspberry pi » RasPi.tv.