
Flickering free flythrough animation in Vray. Flicker free animation using Vray. Rendering an animation using indirect illumination (GI) methods that rely on caching samples are known for producing frames that flicker.
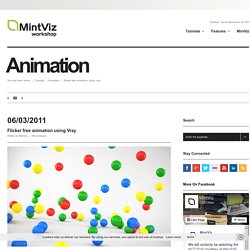
This is because the samples of each rendered frame are calculated differently, causing different lighting values per frame. To resolve this, an animation can be rendered using a pre-calculated solution where the same sample data is used for every frame. You would pre-calculate both GI methods, commonly the irradiance map and light cache, by choosing multiframe incremental mode for the irradiance map and fly-through mode for the light cache.
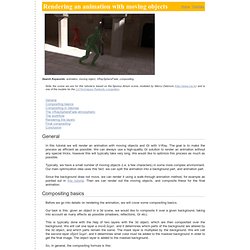
The irradiance map and light cache combination is effective if you have no moving objects within your animation. So it is advised to be used only when creating fly-through animations. If you pre-calculate a rendering solution for an object that has a set position for x, y and z. To avoid flickering frames, Vray introduced time-interpolated irradiance maps as part of SP2. The use camera path parameter Irradiance map. Vray settings for animation scene with moving objects. tutorial. Rendering an animation with moving objects. Search Keywords: animation, moving object, VRaySphereFade, compositing Note: the scene we use for this tutorial is based on the Sponza Atrium scene, modeled by Marco Dabrovic ( and is one of the models for the CGTechniques Radiosity competition.
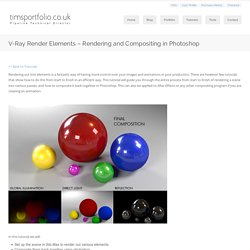
General Compositing basics Compositing in 3dsmax The VRaySphereFade atmospheric The workflow Rendering the layers Final compositing Conclusion General In this tutorial we will render an animation with moving objects and GI with V-Ray. The goal is to make the process as efficient as possible. Compositing basics Before we go into details on rendering the animation, we will cover some compositing basics. Final_image = background_layer * mask_layer + object_layer Our background layer is given, and we don't have to worry about it. Given these three renders, we can compute the mask layer and the object layer in this way: mask_layer = black / pure; object_layer = normal - black; Then, we can use the mask and object layers to composite the final image. Workflow. Rendering an animation with moving objects. V-Ray Render Elements – Rendering and Compositing in Photoshop.
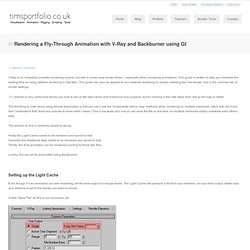
<< Back to Tutorials Rendering out into elements is a fantastic way of having more control over your images and animations in post production.
There are however few tutorials that show how to do this from start to finish in an efficient way. This tutorial will guide you through the entire process from start to finish of rendering a scene into various passes, and how to composite it back together in Photoshop. This can also be applied to After Effects or any other compositing program if you are creating an animation. Rendering a Fly-Through Animation with V-Ray and Backburner using GI. << Back to Tutorials V-Ray is an incredibly powerful rendering engine, but with it comes long render times – especially when rendering animations.
This guide is written to help you minimise the waiting time by using network rendering in 3ds Max. This guide can also be applied to non-network rendering by simply unticking the “net render” box in the common tab of render settings. This tutorial is very useful and shows you how to set up the light cache and irradiance map properly, but it’s missing a few vital steps that I will go through in detail. The first thing to note about using Global Illumination is that you can’t use the ‘incremental add to map’ methods when rendering on multiple machines. The solution to this is relatively simple to set up: Firstly the Light Cache needs to be rendered and saved to disk.
Luckily, this can all be automated using Backburner. Setting up the Light Cache Even though it’s an animation you are rendering, set the time output to a single frame.