
I2C-LTS-LC Adafruit Neopixel Digital Led strip controller « PiDome. What is it?
This device is mainly build for the PiDome Server project, but it can also be used in other situations as long as it supports I²C as the communication bus, later in this howto more about that. It is build up of three parts which make up this device: a light intensity sensora temperature sensora device for controlling the Adafruit NeoPixel Digital RGB LED strip In this Howto we are going to build this device. Parts list The following parts are used in the Fritzing drawing: Things that might can come in handy for building and problemshooting: multimeterwirecutterscrewdriver The Fritzing drawing The drawing is made using the open source Fritzing software for building you own setup from a breadboard to PCB.
The hardware I have tried to keep it very basic and simple to build so everyone can build and modify it without major changes. Power I²C-bus Then there is also a resistor next to the 10k LDR, which pulls it down to ground. Adafruit NeoPixel Digital RGB LED strip. Esp8266/Arduino. Nexus 7 and the Arduino. 433Mhtz RF communication between Arduino and Raspberry Pi: Raspberry Pi as receiver. In this post we will see how to communicate data from an Arduino to a Raspberry pi over 433Mhtz RF protocolEdit In this other post: I explain how to communicate from the Raspberry Pi to the Arduino using same method: 433Mhtz Price: Less than $85 Needed Hardware.
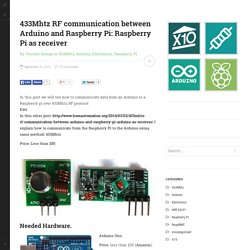
Arduino Uno Price: less than $30 (Amazon A Raspberry Pi Website: Price: less than 50$ (Amazon Mine is a B Model 433Mhz RF link kit Price: less than 5$ (<Amazon Choosing a lib for Arduino and Raspbery. Tons of lib are existing to use RF transmiter/receiver – here is 2 which are interesting I choose RCSwitch because of the Raspberry Version. Arduino. The lib is responsive for everything and it is really easy to use. Connect the emitter to the Arduino (on Pin 10) Here is the code to send message – Here we can send bytes with a common protocol hardcode in the lib. Raspberry Pi. On Raspberry Pi, the process is a little bit more complex.
Then we will need to install wiringPi. Test the build Ok, wiringPi is well installed Ok we are ready. Testing all. 433Mhtz RF communication between Arduino and Raspberry Pi: Arduino as receiver. In a previous post I explained how to communicate between Arduino and Raspberry Pi via 433Mhtz devices.
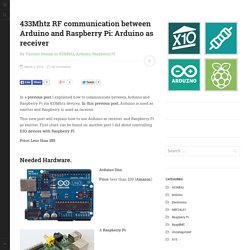
In this previous post, Arduino is used as emitter and Raspberry is used as receiver. This new post will explain how to use Arduino as receiver and Raspberry Pi as emitter. First clues can be found on another post I did about controlling D.IO devices with Raspberry PI. Price: Less than $85 Needed Hardware. How to read Keypad with Arduino and I2C. With this library and LCDI2C4Bit you can use one keypad and one lcd (and a lot more devices!
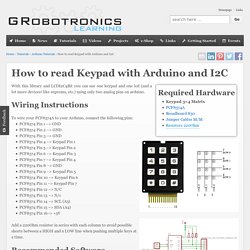
Like eeproms, etc.) using only two analog pins on arduino. Wiring Instructions. Use arduino to measure and record engine RPM. Blog Archive Engine RPM (Part 2) - Arduinoos. Part 1, 2 The previous post covered the hardware part of the engine RPM sensor, it is time to care about the software component.
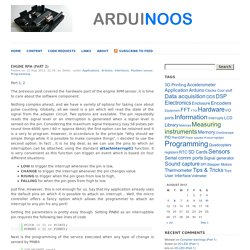
Nothing complex ahead, and we have a variety of options for taking care about pulse counting. Globally, all we need is a pin which will read the state of the signal from the adapter circuit. Two options are available: The pin repeatedly reads the signal level or an interruption is generated when a signal level is sensed on the pin.
Considering the maximum signal frequency (say 58 pulses per round time 6000 rpm / 60 = approx 6kHz), the first option can be retained and it is a very to program. LOW to trigger the interrupt whenever the pin is low,CHANGE to trigger the interrupt whenever the pin changes valueRISING to trigger when the pin goes from low to high,FALLING for when the pin goes from high to low Just fine. Setting the parameters is pretty easy though. Next is the programming of the service executed when any type of change is sensed by PINB0. Electronics for Dogs: Simple way how to use PROGMEM.