
Lexique d'Illustrator français-anglais. Détails Catégorie : Astuces Illustrator Si comme moi vous trouvez pratique d'avoir sous la main un lexique anglais-français des menus de Adobe Illustrator, en voici une version que j'ai spécialement fabriquée pour la communauté cherchant les traductions.
100 amazing Adobe Illustrator tutorials. Since its release, Adobe's Illustrator has grown to become the designer's right-hand man when it comes to creating premier vector graphics and elements.
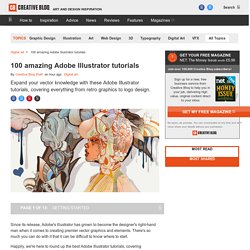
There's so much you can do with it that it can be difficult to know where to start. Happily, we're here to round up the best Adobe Illustrator tutorials, covering everything from illustration to logo design, adding depth to your typography and much more, to help you get the most from this amazing app. Jump directly to a section using this handy category guide, or just get started browsing the whole list! With so many to choose from, you're sure to find a project to inspire you, whether you're using an older version of Illustrator or are signed up to the Creative Cloud. Here goes! Design Spartan : Art digital, digital painting, webdesign, ressources, tutoriels et inspiration… 185 Best Adobe Illustrator Tutorials.
Adobe Illustrator is a vector graphics editor developed and marketed by Adobe Systems.It is in my opinion the most powerful vector software available, and whether you’re using it alone, or in a workflow with other tools such as a 3D program, Photoshop, In design, or something else, it can be a great asset to any designer’s arsenal.

Adobe Illustrator is perfect for designing logos, icons, and anything that you want to use in different sizes. In this article I have collected a huge set of Adobe Illustrator tutorials that will surely inspire you and help you take illustrator to the next level. Author : Dustin Betonio Dustin Betonio is a Translation Management graduate at University of Mindanao. His earlier career was devoted on customer service outside the information highway. Create an Abstract Geometric Background with AI & PS. Beautiful patterns can be easily created by duplicating basic shapes with a simple colour scheme.
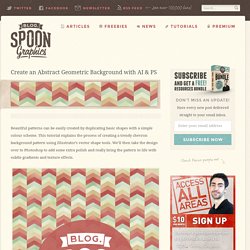
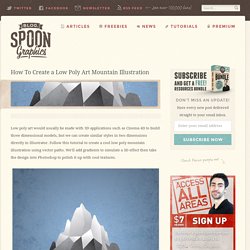
This tutorial explains the process of creating a trendy chevron background pattern using Illustrator’s vector shape tools. We’ll then take the design over to Photoshop to add some extra polish and really bring the pattern to life with subtle gradients and texture effects. Here’s the final abstract geometric background pattern we’ll be creating. How To Create a Low Poly Art Mountain Illustration. Low poly art would usually be made with 3D applications such as Cinema 4D to build three dimensional models, but we can create similar styles in two dimensions directly in Illustrator.
Sans titre. Adobe Illustrator est sans aucun doute un logiciel fondamental pour tous les graphistes.
Ce logiciel est parfait pour la création de logo, identité visuelle, brochures, flyers et même pour la création de maquettes de site internet. Il a une parfaite interaction avec Photoshop, InDesign et Dreamweaver, ce qui apporte une gamme complète pour la création graphique et numérique. Mais comme tout n’est pas parfait, il est parfois pratique d’avoir des plugins et scripts qui ajoutent des fonctionnalités inexistantes dans les versions d’origine d’Adobe. Je vous présente mon TOP 10 des scripts gratuits pour Illustrator. Je les utilise depuis des années et ils restent compatibles avec la version CC 2014. Vous pouvez les télécharger un par un ou selon vos besoins ou prendre le zip avec les 10 ici : Télécharger Scripts! 1 – Extended Select Ajoute une quinzaine de nouvelles possibilités de sélection. Creating a geometric star in Illustrator. Depending on the shape and outcome of the creation, these kind of objects can be ideal for a logo design, but in most cases they're perfect if you are looking for a colorful background.

My tutorial explains the creation of the object used in this background (see image above). Towards the end I also share some of my other experimentations to give you some ideas of what is possible. When creating these kind of objects, I hardly ever have the end result in my mind. They usually come to live after a lot of experimenting, trying out a lot of transparency effects, layers modes, rotation angles,… These creations can be very time consuming as they involve a lot of trial and error, but they're usually worth the try as you might be surprised. Create a pencil texture Scatter Brush in Illustrator. One of the things I've been playing with lately is applying textures to my illustrations in Illustrator.
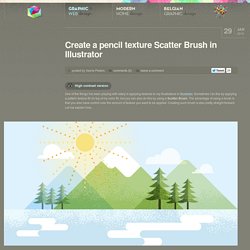
Sometimes I do this by applying a pattern texture fill on top of my color fill, but you can also do this by using a Scatter Brush. The advantage of using a brush is that you also have control over the amount of texture you want to be applied. Creating such brush is also pretty straight forward. Let me explain how… Creating seamless patterns in Illustrator. One of the frequest questions I get from readers is how you create seamless patterns in Illustrator.
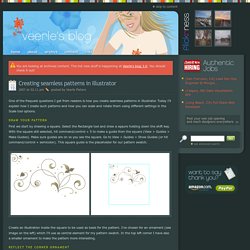
Today I’ll explain how I create such patterns and how you can scale and rotate them using different settings in the Scale tool options. Draw your pattern First we start by drawing a square. Select the Rectangle tool and draw a sqaure holding down the shift key. With the square still selected, hit command/control + 5 to make a guide from the square (View > Guides > Make Guides). Create an illustration inside the square to be used as basis for the pattern. Reflect the corner ornament You probably don't see this in the picture, but in the very top left corner I've used a quarter of a circle. First make sure Smart Guides are turned on. Reflect again and rotate the center ornament Select both corner ornaments and alt/option click in the center of the square again.
Now select the central ornament and select the Rotate tool from the toolbox. WR-usedColors [Illustrator Praxis] Free and Useful Adobe Illustrator Scripts with Scriptographer. Scriptographer is a plugin for Adobe Illustrator which makes it possible to expand the functions of this vector editor.
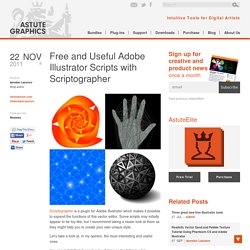
Some scripts may initially appear to be toy-like, but I recommend taking a closer look at them as they might help you to create your own unique style. Let’s take a look at, in my opinion, the most interesting and useful ones. You can install Scriptographer by clicking on the following link Scriptographer is made freely available and versions are provided for Illustrator CS through CS5 on both Windows and Mac OS.
After downloading, you can read the installation instructions General Scripts (scripts that generate or modify graphic objects) Notes: Open the Scriptographer panel , choose the object you have to transform, choose the necessary script in the Scripts list, then click on the Execute Script button (Cmd / Ctrl + E). To stop the script, click on the Stop Running Scripts button (Cmd / Ctrl +.). Free and Useful Adobe Illustrator Scripts with Scriptographer. 100 amazing Adobe Illustrator tutorials. STRAUTNIEKAS illustration portfolio.
Create a Mosaic, BBC Inspired, Text Art Effect in Adobe Illustrator. Inspiration can come from many sources. Create isometric grid-based 3D lettering. Isometric-based letters are the perfect way to reflect structure in a display typeface, as I discovered with a recent commission for a magazine feature on contemporary architecture. Taking the concept further, in this tutorial I'll guide you through the process of building a grid that will form the basis of your design and then show you how to draw, colour and light your letters to create a three-dimensional architectural scene. Once you understand the basics of this technique, you can use it to quickly and easily create stand-alone pieces or intricate repeating patterns. Click here to download the support files (2.19MB) Create a retro T-shirt design in 10 easy steps using Illustrator.
Software: Illustrator CS4 or later Project time: 1-2 hours Skills: Use the Pathfinder panel to knock out and combine shapes, Apply vector textures to shapes Download the support file here In this tutorial, I'll explain how to create a T-shirt design by creating some cool retro graphics just a few simple steps. Using Illustrator, we'll form some simple vector shapes with the Pen tool and then add textures for a retro aesthetic. We'll also use the Pathfinder panel extensively, particularly the 'Add to shape area' and 'Subtract from shape area' commands.
I'll then walk through how to add interest with a limited colour panel. Step 01 First of all, open T-shirt.ai from the support files: this will act as the background for your design. Step 02 Round off the areas where the digits join the hand by creating some curved shapes and hitting 'Subtract from shape area'. Step 03 Using the Pen, Rectangle and Ellipse tools, create a range of geometric shapes. Step 04. Typography Without Limits: 40 Fresh Adobe Illustrator Text Effects.
Wondering how to start working with Adobe Illustrator without getting overwhelmed by its endless possibilities? Then begin your acquaintance from tutorials that are aimed to fill the gaps of your knowledge. Nothing can be compared to this kind of educational material, especially when devoted graphic designers reveal their secrets and techniques. Of course, there are a considerable number of tutorials that cover everything from creating user interface templates to drawing character designs, and it is really difficult to make up your mind in which sphere to plunge in.
However if you want to slowly but surely move in this direction, you should take your first steps with tutorials concerning text effects. These, at least as a rule, resort to simpler solutions based on basic tools and standard techniques. Offset Path Effect Website: abduzeedo.comCreated by: abduzeedo. Adobe Illustrator Tutorial: Create a Detailed Lifebuoy Illustration.
May 14 2012 In the following Adobe Illustrator tutorial you will learn how to create a semi-realistic lifebuoy graphic. We’ll start with a bunch of concentric circles and some basic vector shape building techniques. Once we create the starting shapes we’ll continue with some Pathfinder options, several Warp and Gaussian Blur effects plus some basic masking techniques. For the highlights we will use some simple blending techniques along with a set of linear gradients. Finally, we’ll need a simple, dashed stroke, the Rounded Corners effect and some discrete Drop Shadows. As always, this is the final image that we’ll be creating: Add depth and texture in Illustrator. Software: Illustrator CS5 or laterProject time: 2 hoursSkills: Add depth with the Grain effect; create halftone patterns; set up a grid in Illustrator Adding extra depth to an image can be a quick process that utilises some simple tools offered by Illustrator.
Using the Grain effect you can add a retro texture, which, combined with some halftone patterns and simple brush strokes, can turn a flat-looking illustration into a rich texturised design. Over the following steps, I'll show you how. Boostez votre productivité sur Illustrator à l’aide de Scripts. Tresadenn (Philippe Cam) nous présente comment optimiser son flux de travail sur Illustrator. Les raccourcis claviers d’Illustrator couvrent la majorité des actions courantes sous ce logiciel. Mais qu’en est-il de celles que VOUS utilisez ?
Grâce à ce tutoriel, apprenez à configurer des scripts et à gagner du temps en automatisant les effets fréquemment utilisés tels que les pathfinders ou les symétries. Personnalisez cet outil en y ajoutant vos actions courantes et améliorez ainsi votre workflow ! Les scripts sont fréquemment utilisés dans Photoshop, mais ne le sont quasiment pas dans Illustrator. Illustration 3d isométrique : bases et techniques avancées. Tresadenn (Philippe Cam) présente via deux vidéos HD le processus à suivre pour réaliser des illustrations en 3d iso facilement. Le niveau de la vidéo « Les bases » est débutant. La vidéo « Mise en application » requiert un niveau intermédiaire. Les novices peuvent visualiser plusieurs fois la vidéo Les bases, ou poser leurs questions dans la partie dédiée en bas de page, avant d’entamer la seconde vidéo « Mise en application ».