
Lesezeichenverwaltung. Logo Design Tutorial (Leaf & Water Drop) Photoshop/Illustrator Tutorial - Flat Design One Page Website. Graphic Web Design (Splash) How To Create a Website Layout With Photoshop From Wireframe [Part 2] Tutorials - Page 2. Blend a photo with vectors and smudges to create a bold illustration in Photoshop. Mix photos seamlessly to create a bright, brilliant photomontage. Cool graffiti techniques in Photoshop. Create a bold purple photo-illustration. Photoshop tutorial: Create a person made of water from a photo - Digital Arts. How to design an app in Photoshop. Create a sci-fi scene in Photoshop with real 3D elements.
Create mile-high 3D type in Illustrator and composite it into your art in Photoshop. Adobe Illustrator tutorial: Create Art Deco type art. This tutorial’s featured artwork began life when Adam Pointer was commissioned by design agency Zip (zipdesign.co.uk) to produce a piece promoting the Sunday night event at the now-defunct London West End club, The End.
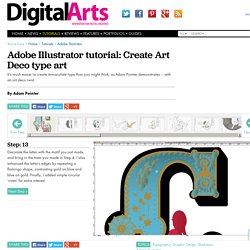
Adam recently reworked the original, and here he takes us through how he created and assembled the different elements to bring an art deco feel to type illustration. The ‘C’ detailed here appears on the first in a set of 11 flyers that together spell out the name of the event: Clandestino. The night was billed as ‘a sultry gathering for the cosmopolitan house crowd’, and the keywords for the original brief were: colourful, seductive, European, fiesta, glamorous and secretive.
Adam decided that a fun interpretation would be to put his own spin on pinup-girl imagery and have female figures interacting with giant letterforms. This Masterclass focuses on his process, which he says is about creating, selecting and positioning elements without resorting to any great wizardry. How to Create a Lustrous Electric Guitar - Tuts+ Design & Illustration Tutorial.
Create a Realistic 3D Old Western Badge in Illustrator and Photoshop CS6. The 3D features within Photoshop are becoming more and more useful with every release, and you would be wise to start learning the basics now.
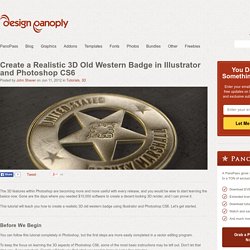
Gone are the days where you needed $10,000 software to create a decent looking 3D render, and I can prove it. This tutorial will teach you how to create a realistic 3D old western badge using Illustrator and Photoshop CS6. Let's get started. Before We Begin You can follow this tutorial completely in Photoshop, but the first steps are more easily completed in a vector editing program. To keep the focus on learning the 3D aspects of Photoshop CS6, some of the most basic instructions may be left out. This tutorial assumes that you have basic knowledge of Photoshop and Illustrator, including working with vector shapes, the Pathfinder palette, and type on a path. Important: The 3D workspace within Photoshop CS6 still has some bugs and can crash randomly. What We Will Be Making Step 1 You should have something similar to the image below. Create a skull out of type. Adobe Illustrator tutorial: Create a 3D creature in Illustrator.
Create Two Colorful Children's Book Illustrations in Illustrator. Mwah! Create a Fabulous Semi Realistic Lipstick in Adobe Illustrator - Tuts+ Design & Illustration Tutorial. Adobe Illustrator tutorial: How to make objects look 3D in Illustrator. How to Create a Detailed Goldfish Couple with Adobe Illustrator. Design.tutsplus. In this tutorial we will demonstrate how to customize a typeface in Illustrator and then use Photoshop to create a stunning vintage detailed typographic design.
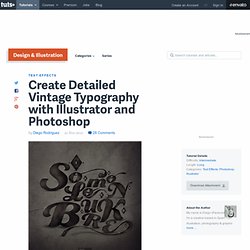
Let's get started! Tutorial Assets The following assets were used during the production of this tutorial: Before We Begin Before we start this tutorial, It's important to have a bit knowledge and experience in Adobe Illustrator. Step 1 First, open Adobe Illustrator and create a new document 1000x1000px, RGB, 300ppi. Step 2 By selecting the Type Tool (T), we will select the font for our text. Step 3 Once we decided what letters we are going to put together, we proceed to write our text. Step 4 Now let's start creating our composition. Step 5 Repeating the first action of our previous step, we proceed to isolate our text again (if we are not on the Isolation Mode, right-click over the type > Isolate Selected Group).
After selecting our first letter, we choose the Eraser Tool (Shift + E). Illustrator and Photoshop Tutorials Roundup – February 2013. Drawing City Portrait Using Adobe Illustrator Tutorial. Create Two Colorful Children's Book Illustrations in Illustrator - Tuts+ Design & Illustration Tutorial. Create a 50's Ad Poster in Illustrator. It seems that the 50s are back, not just in advertising and design, but also on clothes, TV shows, and elsewhere.
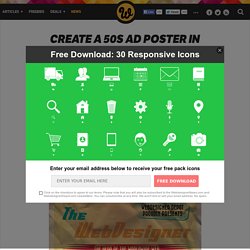
I honestly think this is one of the most interesting and creative eras for advertisement; some ads are really memorable and funny. So, inspired by that I decided to make a tutorial on how make a retro poster for a web designer. After reading the tutorial, you can download the Illustrator source file at the end of the post for reference.
I hope you guys like it and please be sure to share your results and questions with us in the comments…. Here’s a full preview of the poster that we will be creating: Step 1 Let’s start by opening Adobe Illustrator. When designing a poster/flyer, I like to place some guides on the edges. So, first you should download this texture we’re going to use on the background, you can get it at CG Textures. Step 2 The next thing you should do is to download the Flyboy BB font; you can get it here.