
VECTOR. Free Stock Vector Art & Illustrations, EPS, AI, SVG, CDR, PSD. Vector ornaments & patterns. Illustrator CS6's new Pattern tool. Adobe Illustrator * 3D-objecten maken. Opmerking: 3D-gereedschappen zijn niet afhankelijk van de Perspectiefraster-gereedschappen en 3D-objecten worden behandeld net als alle andere objecten in perspectief. 3D-objecten maken Met 3D-effecten kunt u driedimensionale (3D) objecten maken van tweedimensionale (2D) illustraties.
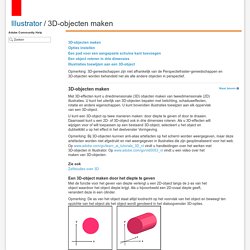
U kunt het uiterlijk van 3D-objecten bepalen met belichting, schaduweffecten, rotatie en andere eigenschappen. U kunt bovendien illustraties toewijzen aan elk oppervlak van een 3D-object. U kunt een 3D-object op twee manieren maken: door diepte te geven of door te draaien. Opmerking: Bij 3D-objecten kunnen anti-alias artefacten op het scherm worden weergegeven, maar deze artefacten worden niet afgedrukt en niet weergegeven in illustraties die zijn geoptimaliseerd voor het web. Op www.adobe.com/go/learn_ai_tutorials_3D_nl vindt u handleidingen over het werken met 3D-objecten in Illustrator. Adobe Illustrator in 3D. Let’s tap into some of the 3D features of Adobe Illustrator.
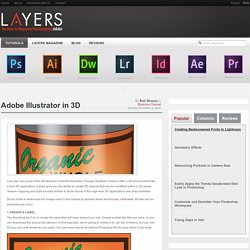
Though Illustrator doesn’t offer a 3D environment like a true 3D application, it does give you the ability to create 3D objects that can be modified within a 3D space. Texture mapping and light sources similar to those found in the high-end 3D applications are also available. [If you’d like to download the image used in this tutorial to practice these techniques, click here. All files are for personal use only.] 1 CREATE A LABEL The first thing we’ll do is create the label that will wrap around our can. 2 MAKE A SYMBOL Once your label art is complete, select all the elements by pressing Command-A (PC: Ctrl-A). 3 DRAW THE CAN Now let the fun begin. 4 GIVE THE CAN SHAPE With your can selected, go to Effect>3D>Revolve. 5 AFFIX THE LABEL Now we’re ready to apply the label. 6 POSITION THE LABEL Drag your label over the white surface shown in the box. Free: Illustrator isometric grid templates Download Free Vector Files: Silhouettes, Outlines, Cutouts, Shapes.
70 Awesome Illustrator Tutorials That Every Designer Should See. Welcome to day 2 of tutorial week on Designrfix.
Today we have assembled a stunning collection of some of the latest and most creative Illustrator tutorials from around the Web. I am confident that these 70 awesome Illustrator tutorials will guide you in creating some of the most amazing Illustrations for your next project. Hope you like them and tune in tomorrow for the next installment of tutorials! Want more articles from tutorial week? Check out some of my previous posts: 100 Photoshop CS6 Tutorials The Great Gatsby Art Deco Style in Illustrator and Photoshop [adsense]
Cool Typography with the Blend Tool in Illustrator. I have written some Illustrator tutorials in which I've used the Blend Tool to create swirls and other shapes, but I have never used it to create a text effect.
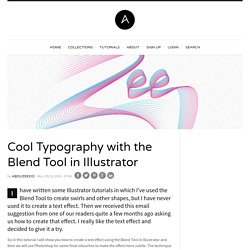
Then we received this email suggestion from one of our readers quite a few months ago asking us how to create that effect. I really like the text effect and decided to give it a try. So in this tutorial I will show you how to create a text effect using the Blend Tool in Illustrator and then we will use Photoshop for some final retouches to make the effect more subtle. The technique is very simple and it won't take more than 30 minutes to achieve the same effect.
Step 1 Open Illustrator and create a new document. With the Pen Tool (P) create a Z with just a few points. Step 2 Duplicate the Z and move it down a little bit. Step 3 Select the Blend Tool (W), then click on one of the segments and then on the other to create the blend object. Step 4 Step 5 Step 6. Free vectors, photos and PSD Downloads. How to Create Your Own Vector Pack - and sell it! So you’ve seen all the crazy vector packs we sell over at the Arsenal.
Today I’m going to teach you how to create your own stock vector pack and show you how you can sell it online with Gumroad! Come up with a theme Before you start coming up with a stock vector pack, you have to think about what would be useful for other designers. What can you make that will save them time? What are you skilled at making? Option 1: Live Tracing Photos Note: You shouldn’t work with photos you do not have permission to use. The first option is the easiest. For example, take this texture for instance. Open up your texture photo in Photoshop and desaturate it by pressing Ctrl+Shift+U. This is getting close to be able to vectorize. Then copy/paste or place the image into Adobe Illustrator and click the “Live Trace” button in the upper toolbar.
Then click the “Expand” button. This is the final texture: Here is an example of how the vectorized texture will look once applied to background: Illustrator.