
Symbol Crotchet Patterns: Doily patterns. As promised, here are two doily (symbol crotchet) patterns which can be completed in an hour (without interruption)I liked the way the completed doily looked and is ideal for placing it in the centre of a coffee table.
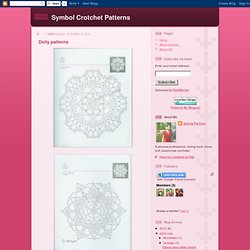
Though I did finish it in between tea breaks and taking care of my daughter's sudden demands ! So get started ! Olga's Home and Garden Blog: Pineapples Big and Small. I can’t help it!
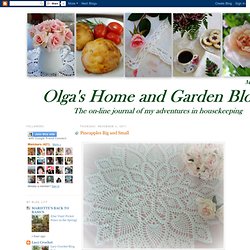
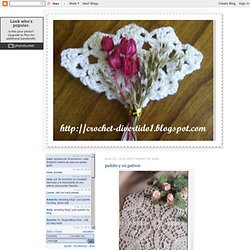
I love crocheting doilies! Here is another one that I recently crocheted. By the way, thank you so much for your sweet comments on my previous one. I enjoyed reading (and rereading) them. Some of you even encouraged me to open an Etsy shop. It was fun to crochet this pineapple doily, and I am very happy with the way it turned out. Today, I’m joining Jami at An Oregon Cottage for Well-Made Wednesday, a link party to share handmade items and ideas on handmade gifts. I am also joining Home Sweet Home Friday @The Charm of Home,Show and Tell Friday @ My Romantic Home,Potpourri Friday @ 2805. Crochet-divertido1: pañito y su patron. Este pañito lo saqué de la web,para quienes me han pedido pañitos tejidos..me disculpo pero no he tenido tiempo de tejer por estos dias ,asi que recurro a la web.pronto tendre tiempo y cumplire con sus pedidos,.cariños a todas.
Crochet. Amanda mccavour. Glitter Beginnings was a collaborative show that I did with artist Adriana McNeely in the Harbourfront Centre Vatrines.
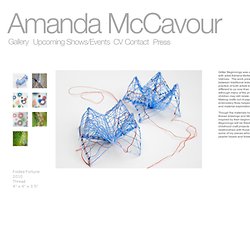
The work presented explored the connection between traditional kids-craft and the current craft practice of both artists today. Craft means something different to us now than it did when they were younger, although many of the processes and materials used as children may still relate in some way to our current work. Making crafts out of paper, glitter, glue, plastic beads and embroidery floss helped spark an early interest for idea and material exploration. Though the materials have shifted, McCavour's intricate thread drawings and McNeely's fine jewellery are inspired by their beginnings with Arts and Crafts.
Glitter Beginnings will be filled with favourite imagery of childhood craft projects emphasizing the artists’ close relationships with those formative activities. Crochet Concupiscence for Creative Crochet Art and Crafting. Taller de ganchillo XXL con Gloria Fontseca. ¿Os acordáis del taller de ganchillo XXL que hicimos en julio pasado en Mallorca con Gloria Fontseca?
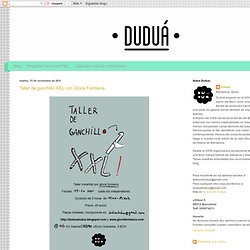
Pues por petición popular traemos a Gloria este fin de semana 19 y 20 de noviembre a Barcelona, especialmente desde Palma para impartir dos talleres de ganchillo XXL en Cosmo!! Y quizá te estás preguntando... que es el ganchillo XXL? Gloria, una aficionada y artista del ganchillo y el tricot decidió hace ya un tiempo encargarle a Rafel, un carpintero de Manacor, unas agujas de madera de tamaño extragrande y probar de ganchillear con materiales más gruesos como la cuerda o tiras de algodón. El resultado fue grandes cestos, tapetes gigantes, taburetes... Trabajar con ganchillos tan grandes es distinto a lo habitual y tiene sus trucos. Taburete de Gloria. Información práctica: Grupo A: Sábado 19 de noviembre de 12h a 15hGrupo B: Domingo 20 de 16h a 19h.La clase es una sesión de 3 horas, elige el día que te vaya mejor.Precio: 45 euros.
Artistes textiles. COMO TEJER GORRO BOINA EN GANCHILLO PARTE 1 DE 3. Bufanda enrollada. Solo se tejen 6 hileras y el largo depende del número de cadenetas que monten...
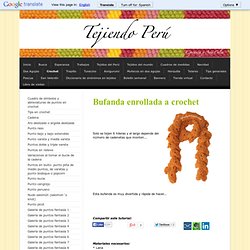
Esta bufanda es muy divertida y rápida de hacer... Materiales necesarios: * Lana * crochet de 6.5mm de grosor * tijeras * aguja lanera Instrucciones: Para calcular el largo de la bufanda montar el número de cadenas o cadenetas necesarios para lograr el largo deseado. Nota: En el caso de la bufanda del video monté 100 cadenetas y quedó de 1.20 de largo. . * montar la cantidad de cadenetas necesarias para lograr el largo deseado * Hilera 1: levantar una cadena y tejer todo la hilera en medios puntos o puntos bajos * Hilera 2: levantar 3 cadenas y tejer toda la hilera en puntos enteros, altos o varetas * Hilera 3: levantar 3 cadenas (que sería la primera vareta), hacer una cadena más y tejer una vareta picando en la siguiente cadena de la hilera anterior.