

Tissue Holder Tutorial. Here is a tutorial for making a cover/pouch for a Kleenex pocket pack.
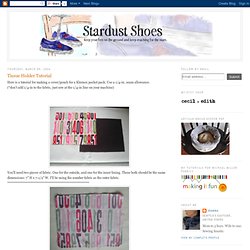
Use a 1/4-in. seam allowance. (*don't add 1/4-in to the fabric, just sew at the 1/4-in line on your machine) You'll need two pieces of fabric. One for the outside, and one for the inner lining. These both should be the same dimensions: 7" H x 7-1/2" W. Place the fabric right sides together and sew around the edges leaving a 2 inch opening for turning on the bottom edge.
Turn it right side out and iron. With the outer fabric facing you, fold it in half vertically to create a center crease. Fold the left side over so that it just overlaps the right side. Sew the ends down, making sure to reinforce the outer edges as well as the overlap. Turn it right side out, insert the tissues, and there you have it!
Oh, and if you do end up making one, send me a link to the picture, because I would loooove to see it! Wallet. Wallet Tutorial See also the instructions I uploaded to BurdaStyle (they are the same, just in a different format).
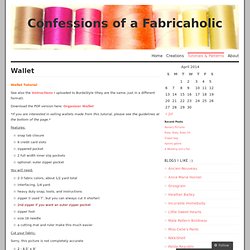
Download the PDF version here: Organizer Wallet *If you are interested in selling wallets made from this tutorial, please see the guidelines at the bottom of the page.* Features: snap tab closure6 credit card slotszippered pocket2 full width inner slip pocketsoptional: outer zipper pocket You will need: 2-3 fabric colors, about 1/2 yard totalinterfacing, 1/4 yardheavy duty snap, tools, and instructionszipper (I used 7″, but you can always cut it shorter)2nd zipper if you want an outer zipper pocketzipper footsize 16 needlea cutting mat and ruler make this much easier Cut your fabric: Sorry, this picture is not completely accurate 2 - 8.5″ x 9″6 - 8.5″ x 4.5″1 – 8.5″ x 4″1 – 8.5″ x 3.5″ (not pictured)1 – 8.5″ x 3″2 - 2.5″ x 5″ for snap tab (not pictured)1- 8.5″ x 8″ if you would like an outer zippered pocket. Mega Credit Card Wallet. Receive Weekly Updates On Everything Creative Powered by OptinMonster.
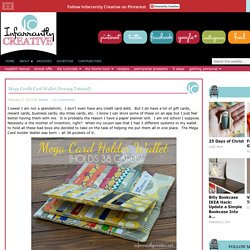
Wallet tutorial. Here’s the tutorial for these wallets!
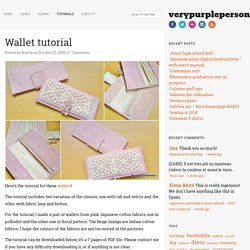
The tutorial includes two variation of the closure, one with tab and velcro and the other with fabric loop and button. For the tutorial, I made a pair of wallets from pink Japanese cotton fabrics, one in polkadot and the other one in floral pattern. The beige linings are Indian cotton fabrics. I hope the colours of the fabrics are not too muted in the pictures. The tutorial can be downloaded below, it’s a 7 pages of PDF file. I hope you enjoy this tutorial and make your own version. Disclaimer: You may use the finished products for both personal and commercial use (craft shops or markets only – no mass production). Click to download: Have you made something from my tutorials? Related Mini wallet tutorial Yay I finished it! October 8, 2009 In "bags and purses" Boy's wallet The last time I made a wallet for Sidra was three years ago when he was still in kindergarten. July 27, 2011 Wallets!
October 6, 2009. Two pocket, ultra slim fabric card case. A few weeks ago, I went to Dallas for the wedding of a friend of mine from college, and unsurprisingly, the reception ended up doubling as a mini college reunion.
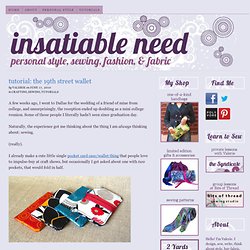
Some of those people I literally hadn’t seen since graduation day. Naturally, the experience got me thinking about the thing I am always thinking about: sewing. (really). I already make a cute little single pocket card case/wallet thing that people love to impulse-buy at craft shows, but occasionally I get asked about one with two pockets, that would fold in half. why 19th street? Remembering our 19th street adventures made me think of that critical accessory (nobody carried purses when we went out), and how a handmade version would be pretty cute, and super useful. I also used lightweight fusible interfacing, but that’s also optional, especially if you use something a bit heavier for the outside. the pattern…is really just two rectangles. Time to start sewing! Eyeglass Case Pattern, Part Two. Eyeglass Case Pattern, Part One. Today I'm going to give you instructions for making the pattern and the list of materials you will need.

To draft the pattern you'll need a large piece of paper, freezer paper works well for this. Draw a rectangle 17 inches by 3.75 inches. As you can see above, I have marked fold lines. Second part of this is to make a mark 3/4 of an inch on either side of the bottom and then draw a straight line from the lower fold line to this mark.