
Getting Fabric on Grain. Susan and I were well into her Portrait of a Seamstress interview when she started talking about grain perfection.

“Then there was Billie Hamilton, one of my mentors and my high school sewing teacher. She taught me about grain perfection. By picking out one thread on the cross grain at two points (the process is similar to gathering), folding the fabric in half lengthwise, sewing next to the line with the picked-out thread (cross grain) as well as the selvedge, prewashing, and then ironing or steaming, you can ensure that the fabric is on grain before cutting.” I wanted to shrivel up like a raisin. Why? Have you ever heard of The Bishop Method of Sewing?
In addition to Edna’s TBMOS, there’s another reason why grain is important. So, how does a fabric become off grain? Sewing the Lining into the Cambie Dress. Today, I’ll demonstrate how to sew the lining into the Cambie Dress.

This part of the sewing instructions makes a lot more sense when you’re actually doing it yourself. The next best thing? Watching someone else do it first! So I’ll do it and show you how it’s done, with plenty of pictures and explanations. You can use this method in most lined dress patterns to avoid slipstitching the lining to the zipper. If you love the idea of never slipstitching another lining to a zipper, but you’re unsure if this method will work on a dress pattern that’s not the Cambie Dress, here’s what to do. At this point, you’ll have a whole dress sewn out of your real fabric, and a whole dress sewn out of your lining fabric. Now, we’ll pin our lining to the dress along the zipper. The dress is right side up, lining is right side down.
Line up waistbands and pin. Pin other side. Make things reversible: Sleeves. I've been a bit remiss with these reversible posts, but I thought I'd share the one I had the hardest time figuring out.
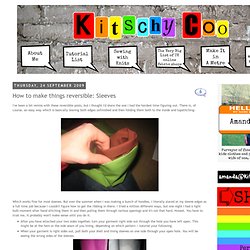
There is, of course, an easy way which is basically leaving both edges unfinished and then folding them both to the inside and topstitching: Which works fine for most sleeves. But over the summer when I was making a bunch of hoodies, I literally stared at my sleeve edges as a full time job because I couldn't figure how to get the ribbing in there. I tried a million different ways, but one night I had a light bulb moment after hand stitching them in and then pulling them through various openings and it's not that hard. Turn of cloth allowance. I was prompted by a couple of questions in the comments on yesterdays post about my pink jacket, to write this post.
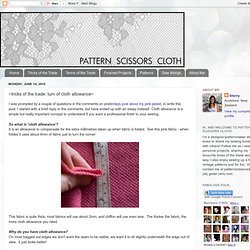
I started with a brief reply in the comments, but have ended up with an essay instead! Cloth allowance is a simple but really important concept to understand if you want a professional finish to your sewing. So what is 'cloth allowance'? It is an allowance to compensate for the extra millimetres taken up when fabric is folded. See this pink fabric - when folded it uses about 4mm of fabric just to turn the corner: This fabric is quite thick, most fabrics will use about 2mm, and chiffon will use even less. Why do you have cloth allowance? For instance - the edge of this pocket flap: the edges of these neckline and armhole facings: inside outside. 4 Serging Techniques. In "Meet Your Serger", Threads #160 (April/May 2012), Pamela Leggett teaches the basics of an overlock machine.
Here, she explains how to get even more out of your serger. Learn how to create simple gathers or lettuce edging with your differential control and how to precisely sew serger corners and curves. Intrecciato Weave with Fabric. How To Make Intrecciato WeaveMaterials: 1.

Quilting weight cotton fabric, or light weight denim, quantity: approximately 5 times the amount call in the pattern. 2. Steam-A-Seam 2 Double Stick Fusible Web-1/4″X40 Yards. The pack comes in 2 rolls, I used 1 roll for this water bottle holder. 3. Aleene’s Tacky Pack – 5PK, I used the permanent fabric glue that is safe to wash.Tools: 1. Clover Bias Tape Maker – 9mm (3/8″). 2. Cut fabric into 3/4″ strips along the vertical grain line. With bottom of the bias tape maker and right side of the fabric facing up, insert strip into the maker. When the folded strip appear at the mouth of the maker, pull it out a little more with fingers. Press the folded strip with warm iron. How to Grade Seam Allowances. Here I am, again, after 3 months away, to fill another tutorial need.
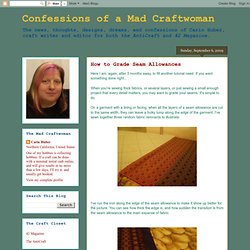
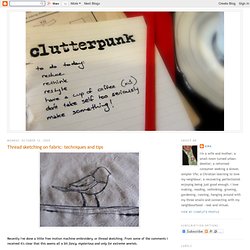
If you want something done right... When you're sewing thick fabrics, or several layers, or just sewing a small enough project that every detail matters, you may want to grade your seams. Thread sketching on fabric. Recently I've done a little free motion machine embroidery, or thread sketching.
From some of the comments I received it's clear that this seems all a bit fancy, mysterious and only for extreme sewists.