
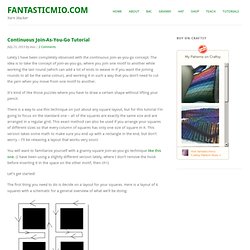
How to Crochet Tunisian Entrelac at WEBS. How to make the Double Treble Left Crochet Crochet Cable for the Woven Crochet Cables Pattern Stitch - Shibaguyz Designz. A to Z in Crochet Crochet Pattern. Continuous Join-As-You-Go Tutorial. Lately I have been completely obsessed with the continuous join-as-you-go concept.
Afghan Sizes. By Linda A handy reference from information collected over the years from the internet, various publications, patterns, first hand knowledge, etc.

The sizes given are intended to just cover the top of the intended item or recipient, plus a couple of inches extra. You'll need to make it larger be adding extra squares on three of the four sides, or go up a size, to allow extra for hanging over the side, tucking in, etc. I've also added a quick reference for the number of knitted or crocheted squares in the most common sizes for each size afghan. Where the number of squares does not work out exactly, the number given will make a slightly larger item than given under Measurements. Note: The bed sizes are based on Canadian measurements.
The Most Common Afghan Sizes and How Many Squares They Take This web site is made in Canada. How to Ball Your Yarn. When I wanted to learn how to ball my yarn some years back I had a really hard time finding a resource online showing me how to do it.
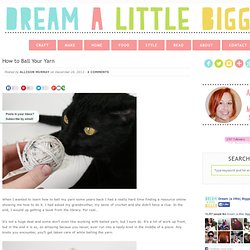
I had asked my grandmother, my sensi of crochet and she didn’t have a clue. In the end, I wound up getting a book from the library. For real… It’s not a huge deal and some don’t even like working with balled yarn, but I sure do. It’s a lot of work up front, but in the end it is so, so amazing becaue you never, ever run into a nasty knot in the middle of a piece. I don’t always ball my yarn. Luckily, balling yarn is quick and easy. Take your yarn and wrap it around your four fingers as shown above.
Remove from your fingers and fold in half. Wrap your yarn around the middle 5 or 6 times.
How to Crochet vertical color stripes horizontally. How to: Seamless Crochet Stripes in the Round. Invisible Join. 1.
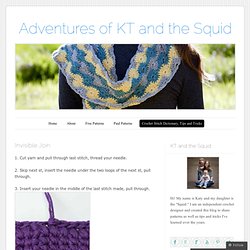
Cut yarn and pull through last stitch, thread your needle. 2. Skip next st, insert the needle under the two loops of the next st, pull through. 3. Insert your needle in the middle of the last stitch made, pull through. Like this: Weaver’s knot tutorial - an important join to know. Crochet Tutorial Series: Magic Circle, Color Change & Invisible Join. Weaving in the Ends. I’ve been asked quite a few times to demonstrate how I weave in my ends, so without further ado here’s my method.

Also remember, inspirational colour palettes can be found everywhere, even via a pair of shoes! The ‘Lindsay’ striped espadrille wedge by Kate Spade boasts a fun, colourful palette to draw inspiration from for this exercise. The best advice I can give when it comes to weaving in the ends of your project is DON’T skimp and snip!
After investing your time and money, ensure to go the extra mile and securely weave in the ends.
Learn How to Change Colors in Crochet Seamlessly. Learn How to Change Colors in Crochet Published on May 12, 2014 by Krista Cagle I realized I am always telling everyone to change colors in my patterns and never have showed you all how.
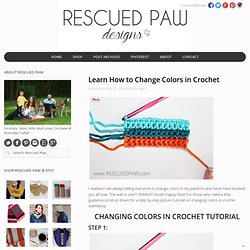
The wait is over!! YEAAAH!! (insert happy face) For those who need a little guidance scroll on down for a step by step picture tutorial on changing colors in crochet seamlessly. Magic Ring. I've been making a lot of circular motifs, and finding the sliding ring/magic loop technique has become my favourite method to start in the round.
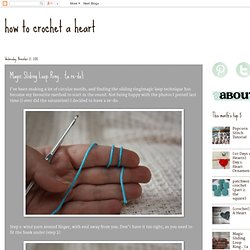
Not being happy with the photos I posted last time (I over did the saturation) I decided to have a re-do. Step 1: wind yarn around finger, with end away from you. Don't have it too tight, as you need to fit the hook under (step 2) Step 3: bring yarn through both loops Step 4: remove from finger Step 5: chain (I'm using US dc, so 3 chains. Step 6: complete 1st row (my pattern is for 23dc + 3ch for 24 stitches) Slip Stitch into top of chain row and you are ready to start 2nd row. Blocking Acrylic Yarn. I work with Acrylic yarn a lot.
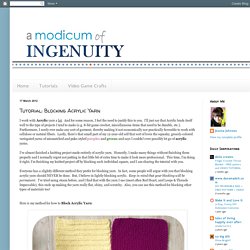
And for some reason, I feel the need to justify this to you. I'll just say that Acrylic lends itself well to the type of projects I tend to make (e.g. 8-bit game crochet, miscellaneous items that need to be durable, etc.). Furthermore, I rarely ever make any sort of garment, thereby making it not economically nor practically favorable to work with cellulose or natural fibers. Lastly, there's that small part of my 12-year-old self that sort of loves the squeaky, grossly-colored variegated yarns of mismatched and puke-styled purples and greens and says I couldn't ever possibly let go of acrylic yarns. I've almost finished a knitting project made entirely of acrylic yarn.
Mending a Granny Square. Last week a friend emailed to ask if I could mend an old crochet blanket her aunt had made 40-50 years ago.
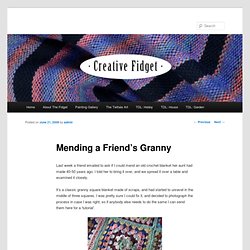
I told her to bring it over, and we spread it over a table and examined it closely. It’s a classic granny square blanket made of scraps, and had started to unravel in the middle of three squares. I was pretty sure I could fix it, and decided to photograph the process in case I was right, so if anybody else needs to do the same I can send them here for a ‘tutorial’.
The first thing I did was put in a ‘safety line’ to stop more unravelling, through the base stitches of the round outside the ones that had unravelled. Then I hunted through the stash and matched as many yarns as I could. After the existing yarn had been removed, I put the replacement yarn on the wool needle and threaded it through where the safey line was, going the opposite way to how you crochet. Single row stripes. Square Knot. Crochet in the Round. Finish work and how to Weave in Ends. It's Friday, it's Friday!
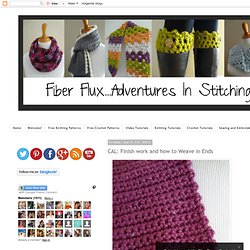
Time to get back to our CAL, I hope you are having as much fun as I am. We have reached the last day of crocheting our cowls together...my how time flies. Next week I will be creating a gallery post on Friday to share with you all of the beautiful photos that have been coming in...so pretty! Please be sure to send us a photo of yours too when you are finished if you haven't already: Today we'll be sharing some ideas on finishing your piece. If you desire, you can block your project. Here's a little tip too...no need for expensive blocking mats, click here and use these instead.Now it's time to seam the cowl and weave in in the ends.
The Magic Adjustable Ring. By Alicia Kachmar – 53 Comments One way of crocheting in the round is to chain 2 and then make a certain number of stitches into the 2nd chain from the hook (you can do so with any kind of crochet stitch–sc, hdc, dc, etc. –but for this tutorial, I’ll be using sc. This tutorial is for both right and left handed people. For left handed pictures, roll your mouse over the image and it will change for you.
Joining with an invisible stitch. Hello! Would you like to know how I join all the seams of my knitting and crochet? You would?! That's great. I hope the following instructions are clear enough, and that they help you. The invisible stitch I am using, is also known as the 'ladder stitch', because the line of yarn joining your work, looks like a ladder, before it has been pulled taught.