

The House of Smiths - Home DIY Blog - Interior Decorating Blog - Decorating on a Budget Blog. Okay folks, are you ready for the Faux Barn Wood Painting tutorial!?...
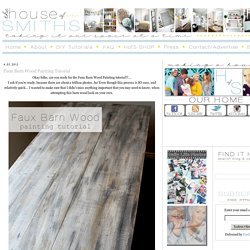
I ask if you're ready, because there are about a trillion photos. ha! Even though this process is SO easy, and relatively quick... Kitchen Kapers: DIY Fruit & Veggie Wash. Thank you for being here!
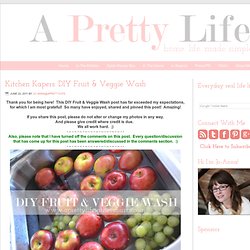
This DIY Fruit & Veggie Wash post has far exceeded my expectations, for which I am most grateful! So many have enjoyed, shared and pinned this post! Amazing! If you share this post, please do not alter or change my photos in any way. And please give credit where credit is due. We all work hard. ;) Also, please note that I have turned off the comments on this post.
Organization blogger home tour… Welcome to day #4 of our Organization blogger home tour event & link party.

Today I am sharing my organized kitchen, mail station, and filing system. Here on my blog, there are tons of other organizing ideas for you to see. Uses for vinegar. Unleash the power of white vinegar―an all-purpose cleaner, brightener, herbicide and more.
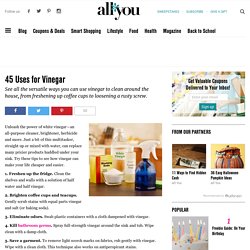
Just a bit of this multitasker, straight up or mixed with water, can replace many pricier products huddled under your sink. Try these tips to see how vinegar can make your life cheaper and easier. 1. Freshen up the fridge. Clean the shelves and walls with a solution of half water and half vinegar. 2. 3. 4. 5. 6. 7. 8. 9.
Recipe: Health Benefits of Lemon Water. Photographer: Linda Wagner I love me a glass of piping hot lemon water with ginger and stevia.

Besides being absolutely delicious, it has a whole BOAT LOAD of health benefits. Tips and Tricks. Ive been working on this post for awhile now, as I find these neat tips and tricks I wanted to keep them all together and be able to share them with all of you lovelies!
I have tried all of these, so I know they work. Just call me Martha Stewart- you know, sans the jail time. Some are from pinterest, some are from my grandma. If I got them from somewhere, click the picture and it will take you to the genius who came up with it :) If there is no picture, then I have no idea where I heard it- or I would cite it! Cut it out!! ......canvas tutorial. I love a wall I can read!
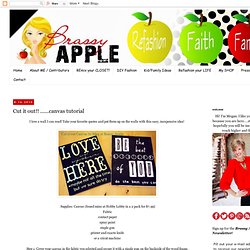
Take your favorite quotes and put them up on the walls with this easy, inexpensive idea! Supplies: Canvas (found mine at Hobby Lobby in a 2 pack for $7.99) Vinegar Uses: Adding Vinegar to Laundry, Day 2. #1 Shrunken Wool ClothesWash shrunken clothing items “in a solution of 1 part white wine vinegarto 2 parts water for 25 minutes.”

After washing the item(s) stretch it back to it’s original size. After stretching it let it “air-dry”. Make Your Own Crackle Finish (for CHEAP!) Home » $1 and Free, cheap crafts, Decor, Headline, supplies 12 May 2010 96,713 views 12 Comments by heather Wow!

I love it when people hack crafts and do specialized techniques with stuff you already have at home. Ann from Make The Best of Things has done just that with her amazing crackle paint technique tutorial. How to repair a shattered eyeshadow. How to repair your shattered eyeshadow.
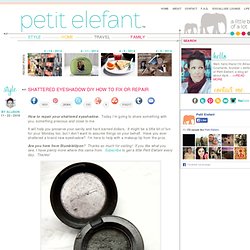
Today I’m going to share something with you, something precious and close to me. Older and wisor: 31 Ways To Wrap Your Crap. You didn't ACTUALLY think that I'd try to cheat y'all out of a day, did you? When I said 31, I meant 31....even if that means that the last post is in November (already???). Today, it's a bunch of stuff that I couldn't fit into any other topic. Or stuff I found AFTER posting about that very idea, and I'm too stubborn (read: lazy) to go back and edit old posts. Just in case you found nothing in the last month that was inspiring - or if you're like me and can never have too many ideas - here are 50 more inspirations photos to get your motor running.
And P.S : Thanks for stickin' with me. The Essential Guide for Modern Parents. Loving this DIY Toilet Paper Art trend that’s going on… (click image to go to source) We have put together a collection of the best Toilet Paper Art and have had the images linked directly to the source. Hope you enjoy! 1. TP Craft from Just A Girl Blog 2. 3. 4. 5. 6. 7. 8. 9. Refashionista - Delia from Delia Creates. Welcome to Day 3 of Refashionista. Today our guest is Delia of Delia Creates. I adore Delia. Her blog feels like entering a comfortable, warm home. It's full of beautiful ideas, gorgeous pictures, and she has two adorable boys! (She's also got a little girl on the way.) Washer Panache. You're a Star!
Decorate Paper Star Style... you will need... fold squares into triangles, corner to corner measure in from both sides approximately 2.5", 5", 7" cut 3 triangles...almost... DIY Gold Staples in a Pinch! While working on my latest Save The Dates, I was in desperate need of gold staples but couldn’t find any locally and didn’t have time to order them. I improvised with a gold permanent pen and violá instant gold staples! While staples come in a plethora of colors now a days, it’s fun to make your own. Google Maps Envelopes. Bridal Shower Centerpiece Ideas. Do You Know How to Boil an Egg? A few years ago, a friend called me, to ask what I thought might be the stupidest question I’d ever heard. 12 Creative Ideas that Will Change Your Life. 2.bp.blogspot.com/-AN1Gi94LldI/ThN7gfh3MlI/AAAAAAAADi8/3-DMlWoxC5o/s1600/laundry%2Bstain%2Bcheat%2Bsheet.jpg. How to Hang a Photo Collage. Bottles Full of Light.
The other day, I wrote about attempting to drill through glass and I finished up the project this weekend. Nautical Rope Bracelet ∙ How To by Operation Overhaul on Cut Out. Apple Dip & Tips!! - EventTrender. April Fool's. How to: Fix your broken powder makeup. 26 Tips and Tricks To Simplify Life. Look to inspire. 101 Simple Handmade Gift Tutorials. Homemade Serenity. DIY Patio Lights. Cool Ideas. First home project. Starscape fibre optic star ceiling. Bedroom and Bathroom Decorating: Bathroom Organization Tips - Martha Stewart. Cool Ideas. Song Lyric Wall Art / D.I.Y. Project. Cool Ideas. Surprising Cleaning New Uses - Real Simple.
Living with less, but only the best. 50 Amazingly Helpful Time-Tested Tips for the Kitchen. DIY: Necklace Holder. Weekend Project #1 - Terrariums for Pinterest Challenge. Felt and Lace Petal Pillow. Fake Febreeze.
5 Reasons To Drink Lemon Water In The Morning. Skin Brightening Toner. Make Your Own Eye Makeup Remover and Reusable Pads. The acts of grace: diy: busy wallet. Digital Scrapbooking and Crafting Blog. 52284045643909335_m9VT1V8c.jpg (300×225) More Design Please - MoreDesignPlease. Tips, Tips, and More Tips. The 2010 Esplin Christmas Card. (tutorial) extender slip. No, It’s Not Arbitrary and Does Make Sense: Teaching the English Punctuation System.
A Hanging How-To. Daffodil Design - Calgary Web Design: {printables} colorful label template. How To Peel, Cut, Core, and Dice: 20 Tips & Techniques for Fruit and Vegetable Prep. Got EGGS? Blissful and Domestic: Cut Your Grocery Bill in Half: Tips and Tricks. No Knot, No Tail. Cool Ideas. Favorite Meal $5 or less. Never Buy A Rotten Avocado Again. Freezable Foods — yup, you can freeze all of this! Emergency Meal Kit Challenge! A Cozy Winter Engagement Shoot. Craft Page: How to make Non Toxic Natural Craft supplies and materials for kids. Healthy, eco friendly, green paste, dyes, glue, glitter, clay, paper,paint, play dough, more. Picture+frame3.jpg. How to Escape from Zip Ties. Natural ant killer - Guide to the most efficient natural ant killer. Delighted Momma. How to Type Symbols Using the ALT Key: 5 steps (with pictures) 35 Lifechanging Ways To Use Everyday Objects.
Amazingly Effective, Nontoxic Fly Repellant. Real Simple - Recipes, Organizing, Beauty, Fashion, Holidays. New Uses for Things in the Bathroom. 20 of my favorite free fonts! 37 Recipes How To Make Gifts In A Jar. {Ella Claire}: My Top 16 Favorite {FREE} Fonts. Signature Scrapbooks Blog. How to break in your shoes in less than 2 minutes. 52 Uses for Coconut Oil - The Simple, The Strange, and The Downright Odd! - Delicious Obsessions. One more Moore: Spring is here! Green Cleaning: 10 Simple Habits. 12 Homemade Simmer Pot/Stove Potpourri Recipes...Would make great gift too! End of the Tour...2012 Bachman's Spring Ideas House. 10 Amazing Home Decor Blogs. CECY j -Splendid Living- Creating the Spirit of Your Home.
Vintage Jar Hurricanes. 5 awesomely autumnal simmer pot recipes to get you in the mood for fall. DIY Natural Room Scents. The Beauty Department: Your Daily Dose of Pretty. Paint chip calendar. 52 Weeks Project. Pencil Eraser Stamp Tutorial + Printable Manila Tag Freebie.