
Washer Necklace Tutorial. How to Make Clothing Buttons from Shrink Plastic… This tutorial is an old one of mine that’s too good not to share again.

Since posting the first time, I’ve had lots of questions about these buttons which will hopefully be answered in this revised post. Equipment Some handy notes: 1. The buttons. Single hole, hole punch (like this one here). 2. 3. Okay.. lets get started! Tracing tips: You can use either coloured pencils or permanent pens. Words must be writted backwards in order to be readable. Shrinking the buttons: To shrink the buttons, you can use an oven or a heat gun (the kind used for embellishing). After the buttons have twisted and twirled, and are LYING FLAT, it’s time to take them out. Note: If the skrinking is taking too long, you may need to turn your oven up. Here’s a short little stop-motion to make sure you’ve got the gist of how easy this is! Shrink Paper {here} Circle Punch {here}
Button Monogram. This is a really COLORFUL & creative way to display your child’s initial.
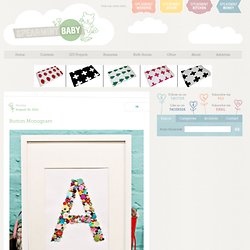
Super easy for sewers & crafters who have lots of extra buttons laying around. Gosh I LOVE buttons… Supplies needed: - Printer (to print out your letter) or a large letter stencil - Scissors - Cardstock (large enough to fit your frame) - Pen or Pencil - Adhesive, Scotch Tape Runner allows you to reposition buttons - Paper Piercer - Buttons and Brads - Frame without glass or shadowbox (this one is from IKEA) Click here for step-by-step directions to the entire project. Embroidery + Metal? Here's something I've been noodling around with lately - embroidered metal discs!

Wait - what? I bought a bag of these perforated beading discs a while back, intending to make some beaded pieces a la Miriam Haskell. Only I never quite got around to those, and eventually a different light bulb went on over my head. I could use the holes as embroidery guides! The resulting discs are so cute and easy to make, and lend themselves beautifully to lots of crafts. Like this simple cuff bracelet! The stitchery part is dead simple. Just leave a few inches of thread hanging from the back when you start stitching. Then you just follow the holes, making stitches in different colors and patterns. At the end of the strand, tie the ends of the floss into a double knot. The only thing to watch out for as you stitch is the fact that, for some reason, the outermost row of holes in the disc is not in a symmetrical pattern. Here, I glued a row of them to a paint-chip card. Cute, eh? How to Make Your Own Cupcake Stand I am writing this post in response to a reader’s question.
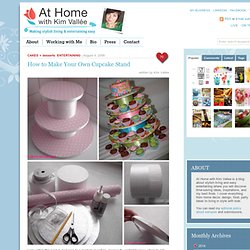
Jessica B. wanted to know where to get this type of cupcake stand. I usually ask my cupcake baker to make it. Simply Vintagegirl Blog » Blog Archive » A Homemade Christmas – #1 – Practical Perpetual Calendar. 23 October 2008 Welcome to the first A Homemade Christmas!
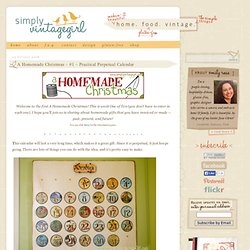
This is week One of Ten (you don’t have to enter in each one). I hope you’ll join us in sharing about homemade gifts that you have received or made — past, present, and future! You can click here for the Introductory post. This calendar will last a very long time, which makes it a great gift. It has a bit of a vintage look to it. Each date is put together with decoupage glue (we use Mod Podge) with the scrapbook paper in the background, and the numbers stuck down on top of that. To make the holes, I took a piece of vellum and cut it out the same size and the background paper. I laid the vellum template on top of each finished date, and marked (with a permanent) the spot where the hole was to be. My wonderful daddy put holes in the tin lids, and cut out the months. The months are actually cut-outs from the sides of large tin cans (you can slightly see the ripples in the middle).