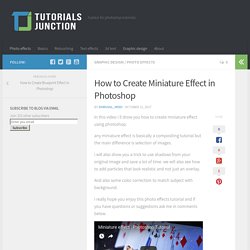

Photoshop Tutorials. How to Create Miniature Effect in Photoshop. In this video i ll show you how to create miniature effect using photoshop. any miniature effect is basically a compositing tutorial but the main difference is selection of images. i will also show you a trick to use shadows from your original image and save a lot of time. we will also see how to add particles that look realistic and not just an overlay.

And also some color correction to match subject with background. I really hope you enjoy this photo effects tutorial and if you have questions or suggestions ask me in comments below. Subscribe to Tutorials junction: FOLLOWInstagram: Model: Backgrond: Snow Texture: (Visited 2,422 times, 108 visits today) They Uncover A Historic Photo. But When They Put It In Photoshop, Something Magical Happens : Worth Sharing It. Photo Copyright © Rumble Do you remember film cameras?

50 Awesome Photo Effect Tutorials. How to Create an Endless Picture Within a Picture Illusion in Adobe Photoshop. How to Realistically Change Hair and Fur Color in Adobe Photoshop. New Design Course: How to Use the PixelSquid Plugin for Photoshop. How to Create a Moonlight Scene Photo Manipulation With Adobe Photoshop. How to Create a Fantasy Snail Photo Manipulation With Adobe Photoshop.
Quick Tip: Expanding on the Style-Inspired Double Exposure Effect. How to Paint a Bold, Glowing, Colorful Portrait in Adobe Photoshop. 15+ Internet's Most Used Photo Touching Tutorials. Applications like Instagram, and other photo touching tools have swept the Internet.

Everyone here wants to make his photos idea by editing it. Of course no one wants to change the avatar but making it more presentable isn’t bad thing to desire. 40+ Great Tutorials to Learn Photo Enhancement in Photoshop. 20 Tutorials For Creating HDR Images. Advanced Colorization Techniques. Photoshop Effects: recreate the look of a medium format portrait. When I first got in to photography, which wasn't quite 100 years ago, there were three reasonably clear groups of camera user.

The happy snappers used compacts, the enthusiasts used SLRs and the professionals used medium, or large, format. If you were a really 'serious' amateur, and every club had at least one of these Yodas, you might have got yourself a medium format system, using 6x4.5cm, 6x6cm or even 6x7cm frames of 120 roll film. If you were a professional wedding or landscape photographer you wouldn't have dreamt of using a 35mm SLR, for credibility reasons as much as for quality, and a happy snapper wouldn't have known which end of a 35mm SLR or medium format camera to look through. Not much of that has meant a great deal in the last eight or so years, and the lines between what is professional equipment and what is amateur are exceedingly blurred.
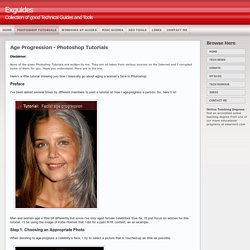
Old format, old hat In the meantime, many of us have forgotten what medium format means and what medium format can do. Photoshop Tutorials - Age Progression. Disclaimer: None of the given Photoshop Tutorials are written by me.

They are all taken from various sources on the Internet and I compiled some of them for you. Hope you understand. More are in the line. Remove a Person From a Photo With Photoshop CS5's Content Aware Feature. With the launch of the new Adobe Suite of programs comes the long awaited Adobe Photoshop CS5.

Packed with new features to speed up your workflow it truly is the most advanced edition of Photoshop to date. One of the new features we will be looking at today is called Content Aware. Skin Retouching in Photoshop. This tutorial will help you learn how to speed up skin retouching and polish photos in Photoshop using basic techniques.

Original Photo Step 1 Duplicate the background image and rename it to Layer 1. Step 2 Go to Filter > Other > High Pass and set the Radius to around 4.5 pixels. Step 3 Change the Blending Options for Layer 1 from Normal to Soft Light and uncheck the eye to make Layer 1 invisible for the next step. Step 4. Eye Sharpening - Photoshop Tutorial.
With this tutorial you can create amazing, bright eyes within minutes.

First retouch, adjust levels and do all necessary colour corrections on your image. With a Lasso Tool (L) select the eyes (hold Shift key to add to selection). Hit Ctrl+J to copy selection to a new layer. You can copy the whole layer instead of selecting eyes but applying the filter to the large area like this may take a while on slower computers. Use Smart Sharpen filter on the eyes, the choice of right settings will depend on the size of your file. Add a layer mask to the sharpened layer, then using a white soft brush on 50% bring back paint only iris’ and pupils to expose the sharpened eyes.
Using levels brighten the whole picture and then copy mask from previous layer to select only eyes by holding Alt while dragging the sharpened mask (“layer 1” in the pic) onto the “levels 2” layer. Reduce opacity of the colour layer to make the eyes look more natural. And voilà, the image is ready. Sharpen Your Images With Some Useful Photoshop Techniques. By Jason Row on in Cool Photos Sharpening your images is a bit of a science and there are quite a few aspects that need to be considered.

You can sharpen for printing, for web maybe for display on an iPad. On top of that, different resolution images will need different settings. Combine this with the fact that current incarnations of Photoshop have 5 different sharpen filters, you begin to see its not as simple as pressing sharpen. Perfect masking using a highpass. 1 Open any picture that contains a big shot of a person / celebrity / whatever.

I use a picture of a well known celebrity. 2 Duplicate the background layer 2 times, you should that layer 3 times then. On the top layer use Filter / Gaussian Blur: 18px. Set the layer to 50% transparency in the layers dialog.Then go to Colors / Invert. You should have something similar to my picture now. 3 Click the right mousebutton on the layer in the layers dialog and choose “Merge down”.Colors / Desaturate (average). The go to Colors / Curves and apply a soft S-curve as seen on the image below. 4 Then choose Brightness & Contrast from the same menu. At the end you should have an image containg almost only black an white.
Handy Techniques for Cutting Out Hair in Photoshop. This post was originally published in 2009 The tips and techniques explained may be outdated. How To Add A Cool Tattoo To Your Photo in Photoshop. Ever thought about having a cool tattoo but not sure what it will look like? We’re lucky to be Photoshop friendly, unlike Lil Wayne (I’d put him in Top Ten Ugliest Tats Ever list).
And history has lots of examples of “unfortunate” tattoos. Like Johnny Depp’s “Winona Forever“ tattoo. The Best Ways To Make Your Photos Black & White. If you have an interest in Photography chances are one day you’ll want to convert one of your images to black and white to achieve that atmospheric and intense look. The actual process can be as easy as clicking a button, but what are the best ways to make your photos black and white in Photoshop? In this post I’ll cover some of the popular techniques and describe which methods give the best results. First, let’s take a look at some of the common mistakes people make when trying to turn their photos to black and white. Desaturate Image > Adjustments > Desaturate or sliding the Saturation level to zero in the Hue/Saturation options are two methods that quickly achieve a black and white effect, but this method is far from ideal. How To Give Your Photos a Dark Processed Lomo Effect.
This post was originally published in 2010 The tips and techniques explained may be outdated. Follow this step by step post processing guide to give your photos a dark lomo style effect with high contrast, blue tones and vignette burns. The effect is based on the popular lomographic technique and is similar to the processing effect used in many fashion shots and advertisement designs.
Produce a portrait inspired by Billy and Hells. This is a simple workflow loosely inspired by the film-processing techniques of Berlin-based photographers Billy and Hells. Ideally you would start with a RAW image file and create two versions: a high-contrast black-and-white version with heavy shadows and defined highlights; and a much flatter colour version with smoother, cleaner tones.
These are then combined in Photoshop, resulting in an image that seems to simultaneously possess the qualities of both a black-and-white and a colour image. With your image split in this way, you can then perform more sophisticated tonal processes on the black-and-white layer in isolation, while easily retaining your perfect, flat colours.
You can catch up with Billy and Hells’ portfolio here. 01 First load your RAW image file into Camera RAW. 02 Load up the RAW image file again: we’re going to create the black-and-white version. 20 Very Useful Photography Tips And Tricks. The summer is here so now is the perfect time to make a lot of photos. 52 Creative Photo Editing Photoshop Tutorials.