
Wooden Gems. Try This: Wooden Gems Today's tutorial will set you back a couple of bucks and ten minutes, and in the end, you'll have a handful of little gemstones ready for whatever projects your imagination can scheme up.
Read on for the easy step-by-step and few ideas for how to put these little beauties to use. MATERIALS: wooden rectangles, pencil, fine tip paint brush, craft paints in colors of your choosing, black, and white ONE: Begin by sketching the facet lines as shown. They don't have to be perfect. TWO: Mix up six shades of the color of your choosing using black and white paint. THREE: Use the fine tip brush to carefully paint inside your sketched facet lines. Try out some other colors and use them in all sorts of ways...jewelry, keychains, napkin rings. The Crafty Scientist: Painted Mason Jars. I haven't had much time for crafting recently, but before some of the chaos started, the boyfriend and I were working on re-doing my little crafty space so I wanted pretty storage containers for my newly done craft area!
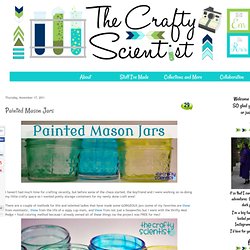
There are a couple of methods for this and talented ladies that have made some GORGEOUS jars (some of my favorites are these from momtastic, these from the life of a sippy cup mom, and these from not just a housewife) but I went with the thrifty Mod Podge + food coloring method because I already owned all of these things (so the project was FREE for me)! Glass (mason) jarsFood coloringPaint brushMod Podge (Glossy)Newspaper to cover your work space! Disposable cup for mixing After you gather your supplies, you want to mix up your Mod Podge and food coloring. I played around a bit and used maybe a tablespoon of Mod Podge and then put two drops of the neon green into the Mod Podge and stirred it up in my Solo cup (yup, I'm sophisticated like that).
Painted glass tabletop. I try to get my hands on every material I can think of, and sadly, that means I can never make a quick trip to the hardware store.

Even when I plan to rush in and grab a packet of bolts or a can of paint, I always leave three hours later with those things, plus a sample of random plastic tubing and tons of half-formed ideas. But when this project from Kara Paslay landed in my inbox, I ran to the store, bought the supplies, and wasted no time making one of these tabletops myself. This project is so easy to re-create; even the intricate triangle design that Kara has made requires mainly patience and a steady hand. I think this would make a wonderful project for outdoors; since the painting is on the underside of the glass, it can be protected from the elements and easily cleaned. It’s great that you can customize the design however you please, but Kara’s bright, summery geometric pattern was too beautiful for me to pass up. Have a DIY project you’d like to share? Materials Instructions 1. Illuminating Reuse: 15 Recycled Lights and Lamps.
Egg cartons, Legos, ballpoint pens, blenders and plastic spoons: these are just a few of the items that have been transformed into awesome light fixtures by creative DIYers.

Why buy new lighting or lamps when you could have a stunning chandelier or lamp that puts junk to good use? These 15 examples of brilliant eco-illumination show just how stylish and fun recycled materials can be – from solar-powered lights and lamp-bookcase two-in-ones to integrated green mouse pad lamps and do-it-yourself bent wood lamps. Cardboard Fairy Lights (images via: Esprit Cabane) How to cut glass. I posted a picture about 1 week ago on Instagram, Facebook and Twitter of me cutting glass using just string.

I got LOT’S of requests for a tutorial on how I DID THIS! So here it is. FINALLY! You will be able to learn how to cut glass. I want to warn you. It’s best to triple your yarn because it will burn longer! Flesbloempot. Glazen potjes. Paint Swirl Vases. Hello all, thanks for all the nice compliments on the courtyard project!
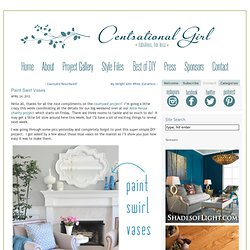
I’m going a little crazy this week coordinating all the details for our big weekend over at our Alma House charity project which starts on Friday. There are three rooms to tackle and so much to do! It may get a little bit slow around here this week, but I’ll have a lot of exciting things to reveal next week. I was going through some pics yesterday and completely forgot to post this super simple DIY project.
I got asked by a few about those blue vases on the mantel so I’ll show you just how easy it was to make them. It involves two things: a glass vessel and some craft paint. The vases were inspired by a kid craft project- my daughter’s Girl Scout troop made some paint swirl ornaments before the Christmas break and the idea stuck with me. I started with some simple vases found at a craft store – look for the more sculptural ones, then stop over in the paint aisle and choose a few colors of acrylic craft paint. Zeepwhisky. Gemarmerd drinkglas.