
Making of Loft. Hey everybody and welcome to my making of of my latest work "Loft".
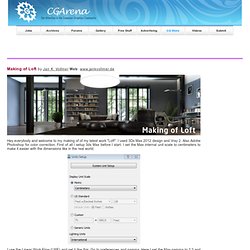
I used 3Ds Max 2012 design and Vray 2. Also Adobe Photoshop for color correction. First of all I setup 3ds Max before I start. I set the Max internal unit scale to centimeters to make it easier with the dimensions like in the real world. I use the Linear Work Flow (LWF) and set it like this. The LOFT itself I created with box modeling. I also added a smaller ceiling for a later indirect light. Floor Generator To create a nice and realistic looking wooden floor I used the great script from CG Source ( Also I used the Wood Floor textures from CG Source for the texturing.
Tutoriel Guirlande. Prochain tuto : Recréer le Coming Next du Grand Journal ! HomeAll / BlogProchain tuto : Recréer le Coming Next du Grand Journal !
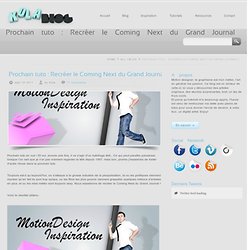
Sept 16 2011 by Kola 11 Comments Prochain tuto en vue ! Et oui, encore une fois, il va s’agir d’un habillage télé… Ce qui peut paraître paradoxal, lorsque l’on sait que je n’ai pas vraiment regarder la télé depuis 1997, mais bon, promis j’essaierais de traiter d’autre chose dans le prochain tuto. 16 septembre 2011 12 h 41 min je wait ça Répondre 16 septembre 2011 13 h 23 min Sacré découverte que je viens de faire… Mr kola, ce tuto donne l’eau a la bouche !
Motion designer, le graphisme est mon métier, l’art en général ma passion. En savoir + Twitter feed loading Chose promise, chose due, aujourd’hui j̵ « Attends… quoi? Fragments of Iceland from Lea et Nicolas Features Copyright 2011 Kola Blog. Making of 3D Virtual Beer. The Watch Part 3. How to create a Kids Room with 3ds Max.
Hi everyone, this is another tutorial about interior design.
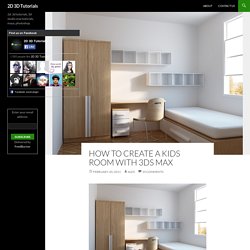
From this tutorial you will learn how to create a Room for kids. We will not be creating to many details, only the important parts as you see above. At bottom of tutorial you will find link to download sample of this tutorial in .max, .3ds, .obj formats. Let”s move on. Step 1: We will start this tutorial by modeling the Chair. Step 2: In the Modify tab check the box for Enable in Renderer and Viewport, change the Type to Radial, the Thickness between 1.0cm and 1.5cm and change the number of Side to 12. Step 3: From the Modifier List add an FFD 2x2x2 modifier.
Step 4: Holding down SHIFT and using the Select and Move tool make a Clone of the object. Step 5: From Create, Geometry create a Plane with the Width and Length depending on how far apart are the to legs from each other. Step 7: Select the same edge, not the one resulted from extrude, and Chamfer it with an amount of 3.0cm and 2 Segments. Step 14: In the Top viewport. The art of 3D artist Andre Kutscherauer.
Making of - StkZ Portfolio. Making Of 'Dwarf Hammerer' by Danny McGrath. Making of realistic kitchen – 3ds max and vray. Kitchen 1 is a part of bigger project consisting of 31 kitchen interiors of different styles.
Modelling was done with 3d Studio Max 2009 and rendered with Vray 1.5SP5. In this tutorial we show You the process of making a classic kitchen, beggining with component modelling through applying textures and ending with lighting and Vray setup. Modelling. Interior. Begin with the floor which is nothing extraordinary and already at this point put on textures and map.
Give MapScaler modifier to the drawn line and apply a material prepared earlier. Copy the lines which create the floor. With the line options (right panel) define the height and width of the walls. Convert the object to Editable Poly and using basic functions build the interior. Interview with Patryk Habryn. Q.
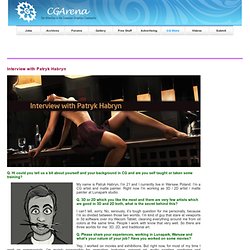
Hi could you tell us a bit about yourself and your background in CG and are you self taught or taken some training? My name is Patryk Habryn, I’m 21 and I currently live in Warsaw, Poland. I’m a CG artist and matte painter. Right now I’m working as 3D / 2D artist / matte painter at Lunapark studio. Q. 3D or 2D which you like the most and there are very few artists which are good in 3D and 2D both, what is the secret behind this? Presenting a Brand Using 3Ds Max – Day 1. When designing an identity and brand materials for a client, good presentation is crucial!
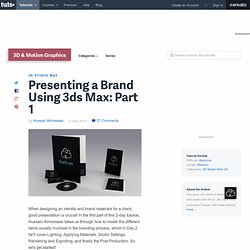
In the first part of this 2-day tutorial, Hussain Almossawi takes us through how to model the different items usually involved in the branding process, whilst in Day 2 he'll cover Lighting, Applying Materials, Studio Settings, Rendering and Exporting, and finally the Post Production. So let's get started! Step 1 First visualize how your scene will look, based on the different stationary items that it will have within it. It's always best that your scene-setting have somewhat of a circular arrangement rather then being stacked in a straight line, as it gives it more depth and as such is likely to be more appealing to your client.
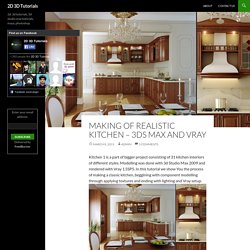
Making a Tractor in 3d max. Topics Covered : 1.
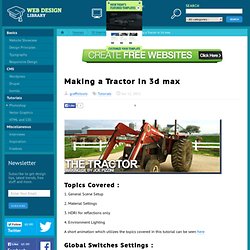
General Scene Setup 2. Material Settings 3. 4. A short animation which utilizes the topics covered in this tutorial can be seen here Global Switches Settings : - Default Lights are off - Everything else is basically default settings Irradiance Map Settings : - I set the preset to custom and used the settings shown on the left Note: I like to enable Show calc phase just so I can see the Irradiance map calculation Global Illumination Settings : - Global Illumination is Enabled - Irradiance map for Primary GI engine with a multiplier of 1.0 -Quasi-Monte-Carlo for Secondary Bounces with a multiplier of 1.0 - Post processing settings are all default.