
! Useful Techniques For Bag Making. How To Sew A Circular Bottom Neatly. Round bottom is a nice feature not only for bag bottom but also for a cylindrical pouches and bags. Here is how! Step 1. Make a card board template for a half circle. Make sure that you do this very neatly. Fold the fabric in half, secure it with pins. Zippered Inner Bag Pocket. **UPDATE** If you'd like this tutorial (or any of my others) in PDF format click here.

Note: to view the PDF tutorial, you will need the latest Adobe Viewer program. Get the latest version of the viewer absolutely free by clicking on the button below: Here is a tutrorial for zippered pockets inside bags. They look smart, they prevent your valuables from going 'walkies', they make essentials such as lippy and your mirror easy to get at, and a girl can never have too many pockets in her bag! This one is for you Katie :) A zippered pocket in one of the lining pieces of my bag-to-be. Here's how I put it together Shopping list (as if you were buying from a shop, if not using stash fabrics. How To Sew An Inner Zipper Pocket. I have tried several ways to sew in internal zipper pockets.
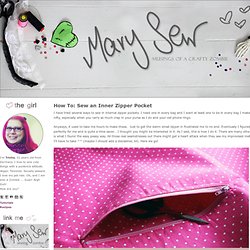
I need one in every bag and I want at least one to be in every bag I make for my shop. They are so nifty, especially when you carry as much crap in your purse as I do and your cell phone rings. Anyways, it used to take me hours to make these. Just to get the damn small zipper in frustrated me to no end. Eventually I figured out a way that works perfectly for me and is quite a time saver. . You need: a zipper (obviously ^^).fabric you want to use as your bags lining.fusible interfacing (Vlieseline).sewing machine, thread, scissors, the usual sewing utensils.
The first step is optional. Measure your zipper and mark where to sew it in. Cut where you just marked your fabric. Fold over and press So, now I could serge the raw edges with a zig zag (or even take it to the serger) but, urgs, such tiny openings are a pain in the ass to serge. Add another strip of fusible interfacing to the other side.
Adding A Hard Bottom To Your Bags. I love a hard bottom on a bag...I think it adds a touch of polish not to mention helps it be more stable and durable.

This tutorial is how I add a hard bottom to a simple tote bag. I have been doing it this way for awhile and I think its one of the simplest ways out there. For this tutorial I am assuming that you know how to make a simple bag. While this tutorial is easy to follow you do need to know how to make a basic bag to follow along. If you do not know how to make a basic bag Creative Little Daisy has a great tutorial on one. If you follow a basic bag pattern for a square bottom..you know that you need to cut a square out of the corners of your bag front and back like the picture below....for this bag I used a 2 inch square Line up your front and back pieces and sew across the bottom.
Fusible Interfacing. More about interfacing: Woven vs.
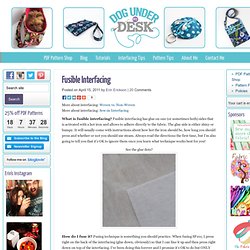
Non-Woven More about interfacing: Sew-in Interfacing What is fusible interfacing? Fusible interfacing has glue on one (or sometimes both) sides that is activated with a hot iron and allows to adhere directly to the fabric. The glue side is either shiny or bumpy. It will usually come with instructions about how hot the iron should be, how long you should press and whether or not you should use steam.
See the glue dots? How do I fuse it? Why use fusible interfacing? I use fusible interfacing on almost every project, usually inside and out. If I need more thickness than just two layers of fusible (outside and lining) I will typically add batting, fleece or sew-in interfacing. Which interfacing should I choose? Common Types of Fusible interfacing Non-woven fusible interfacing – This is the paper kind of interfacing, rather than the fabric (woven) kind.