
Cool Notepad Trick - Hirlpoo West. This neat trick came across on an internal alias.

DIY: Wine Bottle Light. November 3rd, 2009 This past spring Daniel and I went on a road trip from San Francisco to the Grand Canyon.

Along the way we stopped at Chateau Julien for a wine tasting. I wanted to do something with the empty bottle instead of throwing it in the recycling bin. How to Disable ink level for cartridges PG-40, PG-50, CL-41, CL-51, CL-52 « Computer tutorial.
How to Setup a Dedicated Web Server for Free. All great websites have a great server behind them.

In this tutorial, I'll show you how to set up a dedicated web server (with Apache, MySQL, and PHP) using that old computer you have lying around the house and some free software. In this tutorial, we are aiming to accomplish several things: We're going to install the Ubuntu Server operating system. I commonly use Ubuntu because of its ease of use and simple administration. It also has a rather large and extremely active community behind it, which makes getting support a breeze.We're going to install an OpenSSH server. Boot From A USB Flash/Pen/Key Drive. Use a Beer Can to Boost Your Wi-Fi Signal. Image from WikihowWhat do college students use more than internet and beer?
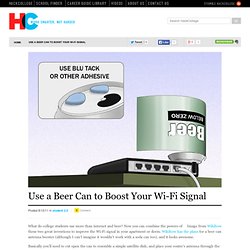
Now you can combine the powers of these two great inventions to improve the Wi-Fi signal in your apartment or dorm. Wikihow has the plans for a beer can antenna booster (although I can’t imagine it wouldn’t work with a soda can too), and it looks awesome. Basically you’ll need to cut open the can to resemble a simple satellite dish, and place your router’s antenna through the hole in the top. The design is undoubtedly directional, and probably wouldn’t work very well if you were lucky enough to place your router in the middle of an apartment.
Magnetic stripe card spoofer. Before going any further, read the document I've attached to this step, "A Day in the Life of a Flux Reversal" by Count Zero.
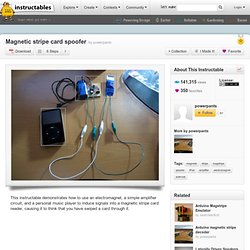
This document is pretty much the bible on how magnetic stripes work, and you need to understand how data is encoded on to them and the basic formatting of the tracks on a given magnetic stripe card. Wave Bubble. Two Wavebubbles.

Left is an earlier revision with the top removed and with external antennas. Right is v1.0 with internal antennas, fit into a pack of cigarettes. This website details the design and construction Wave Bubble: a self-tuning, wide-bandwidth portable RF jammer. The device is lightweight and small for easy camouflaging: it is the size of a pack of cigarettes. An internal lithium-ion battery provides up to 2 hours of jamming (two bands, such as cell) or 4 hours (single band, such as cordless phone, GPS, WiFi, bluetooth, etc). BGMicro.com - Electronics, Parts, Kits, Components, Projects, Gadgets, DIY. Trainsetelectronics.com. PG 40 and CL 41 canon cartridge reseting. I tried holding cancel and the solution given above but it doesn't seem to work for me.
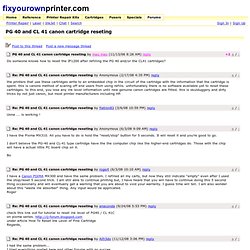
I have a Canon MX310, and I recently got a refilled colour cartridge, to find the driver doesn't just say it's empty, it says it doesn't recognise the cartridge, when the model is exactly right (CL-41 FINE). The error I get now is: "CHECK INK U051 BLK COL" then changing to "CHECK INK U051 COL" when it realises the black one is fine, as it was installed new, and is just nearly empty. This is as far as I got into the steps you suggested:1. Disconnect the power cable.2. Hold down "On/Off" button.3. Pressing cancel twice gives "Factory Mode 1", which runs a few rollers, but doesn't say Idle after a good minute or so, and doesn't seem to repond to anything. Pressing cancel THREE times switches on "Factory Mode 2", which gives the following options: SCAN AGINGAsks how many times, options 1 5 10 15 20 endlessTried 1, seems to run the scanner along once and says complete.? Electronics Tutorial. Circuit - Circuits designed by David A. Johnson, P.E.
Make a Joule thief. In the November 1999 issue of EPE (Everyday Practical Electronics), a small and intriguing circuit was published in the Ingenuity Unlimited section by Z.
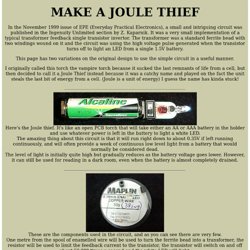
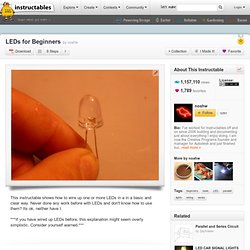
Kaparnik. It was a very small implementation of a typical transformer feedback single transistor invertor. The transformer was a standard ferrite bead with two windings wound on it and the circuit was using the high voltage pulse generated when the transistor turns off to light an LED from a single 1.5V battery. LEDs for Beginners. So I wasn't completely honest - I have used LEDs once or twice before for simple applications, but I never really knew what I was doing, and since so many projects on instructables use LEDs, I thought I might as well teach myself and post about it too.
TicTac flashlight. Resistor calculator for leds from MetkuMods.