
*Tadaam !: DIY / Tuto : Cabas pliable et son étui. Je suis désormais bien équipée en cabas pliables après plusieurs réalisations dans diverses couleurs, mais j'avais envie de partager avec vous le tuto de mon modèle, d'autant qu'on me l'a redemandé il y a peu de temps...
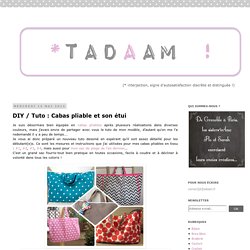
Je vous ai donc préparé un nouveau tuto dessiné en espérant qu'il soit assez détaillé pour les débutant(e)s. Ce sont les mesures et instructions que j'ai utilisées pour mes cabas pliables en tissu : #1, #2, #3, #4, mais aussi pour mon sac de plage de l'an dernier... 88253072.pdf. Mini Art Wrap Tutorial. Welcome to the first of the patterns/tutorials that I’m writing for my 12 Patterns in 12 Months project. If you are a regular reader, this might not quite be what you were expecting, but this is February’s project ;-). The pattern for January is still in the pipeline and will hopefully arrive before January 2014… These little wraps measure 5.5″ x 7″ (18cm x 14cm) folded, and 10″ x 16.5″ (25cm x 41cm) unfolded.
There is room inside for a small notebook/sketch pad (A6 size) and 16 full size pencils/pens (2 to each pocket). Please feel free to use this pattern in any way that you wish, but I would very much appreciate a link back to this tutorial, or at least to my blog, if you are going to make art wraps for sale – many thanks! The fabrics used for the flowery art wrap in this tutorial are from my wonderful sponsors: My Fabric House. Project Requirements Cutting List Outer: The outer part of the wrap is made up of 3 sections, as you can see from the picture below. Fournitures. Tuto cartable - Violette Pâquerette. Et un tuto cartable pour fêter dignement la rentrée, un !!!
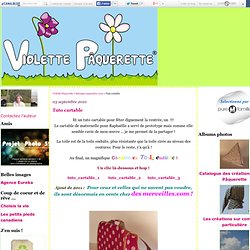
Le cartable de maternelle pour Raphaëlle a servi de prototype mais comme elle semble ravie de mon œuvre ... je me permet de la partager ! La toile est de la toile enduite, plus résistante que la toile cirée au niveau des coutures. Pour le reste, y'a qu'à ! Au final, un magnifique cartable en To ile endui te ! TutoMiniValisette - document-15210.pdf.
牛仔裤改造-嘀咕网 - 收集高清唯美图片. TUTO POCHETTE A SUSPENDRE - document-15212.pdf. TUTO VALISETTE 1+2+3 - document-15218.pdf. TutoMiniValisette - document-15210.pdf. TutoCabasMultipoches - TutoCabasMultipoches.pdf. ★ Le tuto de mon organisateur de sac. Attention, voici venu le post le plus long jamais écrit sur ce blog...
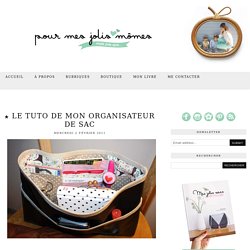
J'ai bossé dur, fait des dizaines de photos et pris plein de mesures pour vous livrer, enfin, le petit tuto promis il y a quelques semaines. Mais avant tout, j'attire votre attention sur le fait que ce tutoriel est mis à disposition selon les termes de la Licence Creative Commons : Citer l'auteur - Pas d'Utilisation Commerciale - Partage à l'Identique Il est interdit de vendre des organisateurs de sac cousus d'après mon modèlesur marchés, plateformes de vente de créations (Etsy, Dawanda, etc), pages facebook et e-shops.Merci de respecter mon travail ! Le weekender concepteur Week-end « Featured: Lex Trip Bag So this weekend will have you jetting off to the coast for sun & surf?

For a weekend excursion you need a quick trip bag. Forget the luggage (too bulky); you need a versatile tote made specifically to carry all your belongings from wallet to swimtrunks for a quick weekend getaway. Here is a fun choice in a cotton waxcloth outer with leatherette base and trim, perfect for the do-it-yourselfer, similar to the Lex Trip Bag from PROPERTY OF. Dimensions: approximately 18″ x 8 x 17″ [45cm x 20.5cm x 43cm]. You will need: 6 pop rivets1 metal slider, 2″ dia [50mm]2 latch hooks, 1″dia [25mm]2 d-rings, 1″dia [25mm]1 square ring, 2″ dia [50mm]2 dome snap set, 5/8″ dia [15mm]1 heavy metal zipper, 25″ [64cm] long *1-2/3 yds. [1.5m] of nylon webbing, 2″ [50mm] wideheavy-duty thread1 yd. [0.9 m] of upholstery weight fabric, 54″ [137 cm] wide1/3 yd [0.25 m] of polyurethane leatherette, 39″ [100 cm] wide. TUTO VALISETTE 1+2+3 - document-15218.pdf.
Camera carrier insert tutorial. A few months a go I showed you a preview of the camera carrier insert I sewed.
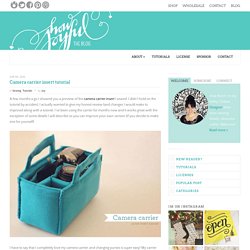
I didn’t hold on the tutorial by accident, I actually wanted to give my honest review (and changes I would make to improve) along with a tutorial. I’ve been using the carrier for months now and it works great with the exception of some details I will describe so you can improve your own version (if you decide to make one for yourself) I have to say that I completely love my camera carrier, and changing purses is super easy!
My carrier fits in all my purses, in some more tight than others, so when I need to carry more than just my camera I simply choose a bigger handbag, works beautifully! The problems I’ve had so far with my carrier are the following: So now to the materials and instructions, because you should make one for you too! MATERIALS: For the main body you will need: [ Click on Images to enlarge] Sac.