
Compliant Mechanisms. Print Quality Troubleshooting Guide. Key design considerations for 3D Printing. A list of things to keep in mind when designing a model for 3D printing - regardless of the technology that you will be printing with.
Introduction Different 3D printing processes have different capabilities and different design restrictions. In this article we will talk about key design considerations that apply to all 3D printing processes. For process specific guidelines click here. We will assume you already have some knowledge about 3D designing and modeling. Keep this infographic near you while designing and use it as a quick reference: Digital vs.
The most important thing to remember while designing for 3D printing is the fact that your digital design will become a physical object. Anything can be "drawn" in 3D on a digital canvas, but not everything can be 3D printed. Each 3D printing process has its own limitations. How to design Snap-fit Joints for 3D Printing. This guide discusses the benefits of 3D printing snap-fits and gives design and material recommendations.
Introduction Snap-fit joints are a quick and easy way of connecting two 3D printed components together using interlocking features. Not only are they a low cost and time saving connection method but they can also reduce the number of parts in an assembly and offer the possibility of rapid assembly and disassembly. 3D Slicer Settings for Beginners - 8 Things You Need to Know. Proper 3D slicer settings can mean the difference between a successful print, and a failed print.
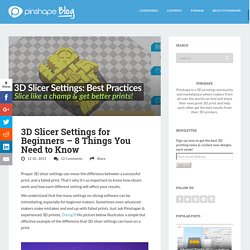
That’s why it’s so important to know how slicers work and how each different setting will affect your results. We understand that the many settings on slicing software can be intimidating, especially for beginner makers. Sometimes even advanced makers make mistakes and end up with failed prints. Just ask Pinshaper & experienced 3D printer, Zheng3! His picture below illustrates a simple but effective example of the difference that 3D slicer settings can have on a print. Part of the problem is that the optimal slicer settings depend on what design you’re printing and what material you’re using, so there is no “one setting fits all” perfect setting. To break it down, let’s go through some of the basic features of a slicer, and talk about how each setting will affect your print.
Learn How to Make Your 3D Prints Truly Transparent. Easy Way to Smooth PLA. 3D Brooklyn feature: Design and 3D Printer Calibration! 4 Things You Need to Know About 3D Printing Resolution. 3D Printing Profiles - 3D Printed Tabletop. How to Smooth PLA 3D Prints: 12 Steps. Most used 3D Printer G-Codes - Commands detailed. 3D Printer G-CODES – The newbie guide!
3 (60%) 5 votes What are the 3D Printer G CODES and why they are important ? Check this guide to learn the most useful commands, and also how to use it! Please, keep in mind that this tutorial designed for Marlin / Repetier firmwares, it is not guaranteed to work with another firmware, What is a 3D Printer G-code? G-code (a.k.a RS-274), which has many variants, is the common name for the most widely used numerical control (NC) programming language. How to send 3D Printer g-codes to the printer? In repetier host, you should first connect the printer, then go to Manual control and write the code on this box: then just press SEND. In Simplify3D, you need to open the tools > Machine control Panel. in the control panel, choose Communication Remember! Adding Screw Threads to 3D Printed Parts – Formlabs. In Downloads , Tutorials At Formlabs, we design lots of functional parts for printing on the Form 2 (our stereolithography, or SLA, 3D printer).
These parts include things like internal prototypes used for R&D, jigs and fixtures that will be used on our manufacturing lines, and parts for design reviews before the final part is injection molded from a material like nylon. No matter the application, we often find ourselves needing to combine multiple parts using screws, and now that we’ve released an improved formulation of our Tough engineering resin, the differences between “looks like” prototypes and functional prototypes are decreasing. This article is a guide to using screws in 3D printed SLA parts. There are many other ways to attach multiple 3D printed parts together, but if you need to repeatedly attach and detach components and want robust mechanical fastening, there's no real replacement for genuine metal threads. No time to read right now? Download a PDF of the article below! Tips for 3D Printing Press-Fit Parts — Workshop.
3D Slicer Settings for Beginners - 8 Things You Need to Know. Post Processing PLA and ABS Prints! - Pinshape Blog. In an ideal world, 3D prints would all come out of our printers ready to go. But, as anyone with a 3D printer knows, this is not always the case, and at some point most of us will find ourselves trying to seamlessly remove supports from our prints without leaving an uneven surface on our prints.
We’ve got some tips on how to avoid the struggle of removing supports and fly-away material to help in post processing PLA and ABS 3D prints. Acetone vapor smoothed parts. Courtesy of Kenny Janssens. 1. The first step in dealing with supports actually comes before you start printing, in your slicer software. 2. Reprapalgarve.com. 6 Simple Steps to 3D Printer Bed Leveling. Bed levelling is an essential part of ensuring a successful print. It’s one of the first things you do when you buy a 3D printer and one of the first things you should look at if you are having trouble with your prints.
You may need to level your print bed several times throughout the course of your printer’s life so don’t get discouraged or frustrated if you feel like you’re doing it over and over again. It’s normal. Even the most experienced makers do spend a lot of time levelling the bed on a new printer so it’s best to think of it as regular required maintenance. View topic - Tip of the Day 8- Scripts tab, G-Code. Introduction:The scripts tab is a really powerful tool in the FFF settings window.
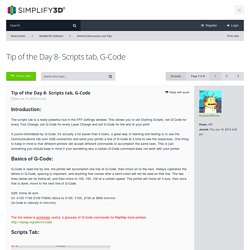
This allows you to set Starting Scripts, set G-Code for every Tool Change, set G-Code for every Layer Change and set G-Code for the end of your print! If you're intimidated by G-Code, it's actually a lot easier than it looks, a great way of learning and testing is to use the Communications tab over USB connection and send your printer a line of G-Code at a time to see the responses. One thing to keep in mind is that different printers will accept different commands to accomplish the same task. Print Quality Troubleshooting Guide. This guide is a great place to start if you are trying to improve the quality of your 3D printed parts.
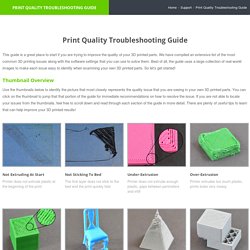
We have compiled an extensive list of the most common 3D printing issues along with the software settings that you can use to solve them. Best of all, the guide uses a large collection of real-world images to make each issue easy to identify when examining your own 3D printed parts. So let’s get started! Thumbnail Overview Use the thumbnails below to identify the picture that most closely represents the quality issue that you are seeing in your own 3D printed parts. List View Each issue will now be listed one-by-one with details about what causes the problem and instructions for troubleshooting it. Not Extruding at Start of Print This issue is a very common one for new 3D printer owners, but thankfully, it is also very easy to resolve!
Extruder was not primed before beginning the print Most extruders have a bad habit of leaking plastic when they are sitting idle at a high temperature. Prusa I3 Fine Calibration & Software part 3 - TrustFm. SECTION 7 - Fine Calibration & Software - Page 3 Section 1 - Wooden frame : part 1 - part 2 - part 3 Section 2 - Y Axis : part 1 - part 2 - part 3 Section 3 - X-Z axis : part 1 - part 2 Section 4 - Extruder : part 1 - part 2 - part 3 Section 5 - Electronics : part 1 - part 2 - part 3 Section 6 - Coarse Calibration & Software : part 1 - part 2 - part 3 Section 7 - Fine Calibration & Software : part 1 - part 2 - [[ part 3 ]] Section 8 - Extras : part 1 - part 2 - part 3 Section 9 - Maintenance & Modding : part 1 - part 2 In this page we will see the Cura slicer.
Cura can be used as a host like Repetier-Host but i prefer using it only as a slicer. You can drag and drop your stl file and then from "File" > "Save GCode" you can generate your gcode file. Let's start configuring Cura for our machine. Esteps per 1 mm filament 0 Amount of steps per mm filament extrusion. Communication settings : Serial port : AUTO Baudrate : AUTO. Ultimaker: 3D Printers.