

GpEasy CMS Output Functions - gpEasy Tutorials. GpEasy CMS uses specific output functions for it's themes.
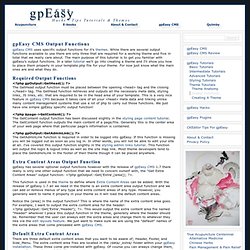
While there are several output functions available to use there are only three that are required for a working theme and five in total that we really care about. The main purpose of this tutorial is to get you familiar with gpEasy's output functions. In a later tutorial we'll go into creating a theme and I'll show you how to place them properly in your template.php file for your theme.
For now just know what the main ones are and what they do. Required Output Functions <? <? <? Extra Content Areas Output Function gpEasy has several optional output functions however with the release of gpEasy CMS 1.7 there really is only one other output function that we need to concern ourself with, the "Get Extra Content Areas" output function: <? This function is used in the theme to define where Extra Content Areas can be added.
Notice the [area] in the output function? Default Extra Content Areas Examples: <? Menu Output Functions. GpEasy Layouts Admin Page - gpEasy Tutorials. The layouts page in gpEasy's admin is the page you utilize to add new themes to gpEasy.
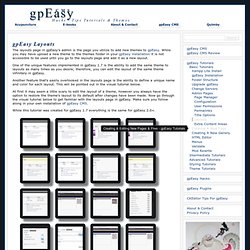
While you may have upload a new theme to the themes folder in your gpEasy installation it is not accessible to be used until you go to the layouts page and add it as a new layout. One of the unique features implemented in gpEasy 1.7 is the ability to add the same theme to layouts as many times as you desire; therefore, you can edit the layout of the same theme infinitely in gpEasy. Another feature that's easily overlooked in the layouts page is the ability to define a unique name and color for each layout. This will be pointed out in the visual tutorial below. At first it may seem a little scary to edit the layout of a theme, however you always have the option to restore the theme's layout to its default after changes have been made. GpEasy CMS Contact Form - gpEasy Tutorials. People often find the contact form a little confusing.
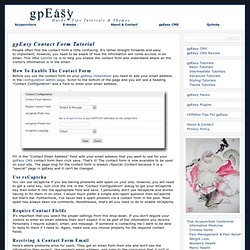
It's rather straight forwards and easy to implement; however, you need to be aware of how the information will come accross in an email. This little tutorial tip is to help you enable the contact form and understand where all the visitor's information is in the email. How To Enable The Contact Form Before you use the contact form on your gpEasy installation you need to add your email address in the configuration admin page. Scroll to the bottom of the page and you will see a heading "Contact Configuration" and a field to enter your email address. Fill in the "Contact Email Address" field with your email address that you want to use for your gpEasy CMS contact form then click save. Use reCaptcha. GpEasy Hacks. Note: these hacks are for pre 2.0.
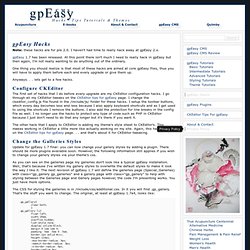
I haven't had time to really hack away at gpEasy 2.x. gpEasy 1.7 has been released. At this point there isn't much I need to really hack in gpEasy but then again, I'm not really wanting to do anything out of the ordinary. One thing you should realize is that most of these hacks are aimed at core gpEasy files, thus you will have to apply them before each and every upgrade or give them up. Anyways. . . lets get to a few hacks. Configure CKEditor The first set of hacks that I do before every upgrade are my CKEditor configuration hacks. The other hack that I apply to CKEditor is adding my theme's style sheet to CKEditor's. Change the Galleries Styles Update for gpEasy 1.7 final: you can now change your gallery styles by adding a plugin.
As you can see on the galleries page my galleries don't look like a typical gpEasy installation. The CSS for styling the galleries is in /include/css/additional.css. Except all shoved together. Create A Custom Galleries Page - gpEasy Tutorials. A question that has come up a few times on the gpEasy forum is, how can I make the Galleries page only display certain gallery pages?
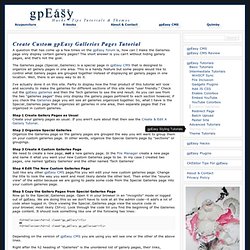
The short answer is you can't without hiding gallery pages, and that's not the goal. The Galleries page (Special_Galleries) is a special page in gpEasy CMS that is designed to organize all gallery pages in one area. This is a handy feature but some people would like to control what Gallery pages are grouped together instead of displaying all gallery pages in one location. Well, there is an easy way to do it. GpEasy Intermediate Tutorials. Add Comments To gpEasy pages - gpEasy Tutorial. Due to: Idiots (spammers) making comments on this page and the new gpEasy "Easy Comments" plugin that now allows you to add comments to any page easily I am removing the comment items from this page.
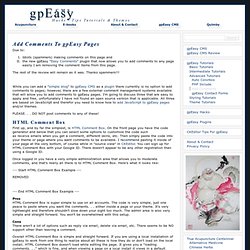
The rest of the review will remain as it was. Thanks spammers!!! GpEasy CMS. What is gpEasy CMS?
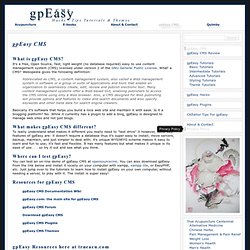
It's a free, Open Source, fast, light weight (no database required) easy to use content management system (CMS) licensed under version 2 of the GNU General Public License. What' a CMS? Webopedia gives the following definition: Abbreviated as CMS, a content management system, also called a Web management system is software or a group or suite of applications and tools that enable an organization to seamlessly create, edit, review and publish electronic text.
How To Add JS & CSS To Pages - gpEasy Tip. This simple tips is to show you how to add JavaScript and styles directly into your gpEasy pages.
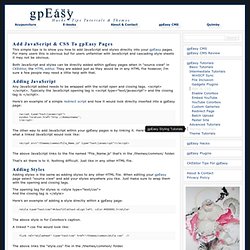
For many users this is obvious but for users unfamiliar with JavaScript and cascading style sheets it may not be obvious. Both JavaScript and styles can be directly added within gpEasy pages when in "source view" in CKEditor, the HTML editor. They are added just as they would be in any HTML file however, I'm sure a few people may need a little help with that. Adding JavaScript Any JavaScript added needs to be wrapped with the script open and closing tags. Here's an example of a simple redirect script and how it would look directly inserted into a gpEasy page: <script type="text/javascript"> window.location.href=' </script> The other way to add JavaScript within your gpEasy pages is by linking it. The above JavaScript links to the file named "File_Name.js" that's in the /themes/common/ folder.
Easy CMS. Easy CMS. Oyejorge/gpEasy-CMS. LumoIT « Themes - gp. Themes - gp. A Free and Easy CMS for Everyone - gp.