
Simple Vector Logo Design. In this tutorial we will explore the idea of creating custom (vector) logos in Photoshop.
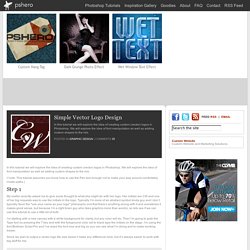
We will explore the idea of font manipulation as well as adding custom shapes to the mix. (*note: This tutorial assumes you know how to use the Pen tool enough not to make your way around comfortably inside paths.) Step 1 My realtor recently asked me to give some thought to what she might do with her logo. Her initials are CW and one of her big requests was to use the initials in the logo. I’m starting with a new canvas with a white background for clarity, but any color will do. Since we plan to output a vector logo file size doesn’t make any difference here, but it’s always easier to work with big stuff for me.
Step 2 Using a pre built font as a starting point makes consistency and style a little easier, though you could create the whole thing with the Pen tool if you feel so inclined. Step 3 To make things even simpler, lets go ahead and lower the Fill opacity for this layer to 0%. Step 4 Step 5. Patriotic Text Using Displacement Masks. Step 1 Lets jump right in and get our document set up.
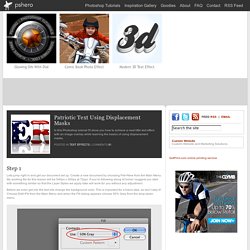
Create a new document by choosing File>New from the Main Menu. My working file for this lesson will be 540px x 300px at 72ppi. If you’re following along at home I suggest you start with something similar so that the Layer Styles we apply later will work for you without any adjustment. Before we even get into the text lets change the background color.
Step 2 Set your foreground color to #CAC9C9 which is a nice light gray the press the T key to switch to the Type tool. Set a nice large font size and type your text onto the stage. Step 3 Next we’re going to add a preliminary series of Layer Styles to our text. Pull up the Layer Styles dialog by Control-Clicking (PC: Right-Clicking) on the Text layer in the layers palette and by choosing Blending Options from the menu. Pay special attention here to all the settings in these styles. Type Shortcuts in Photoshop CC 2014. A few handy shortcuts when working with type in Photoshop CC 2014.
Some I knew about but most I learned from Adobe's Julianne Kost. She's an awesome resource to keep an eye on. Discover them after the jump. 1) Basic Formatting Shortcuts: 2) Changing Font Style If a font “family” (Myriad or Minion for example) has a font “style” (Bold or Italic for example), then the following keyboard shortcuts will change the Font Style. 50 free handwriting fonts. The Shabby Creek Cottage 50 free handwriting fonts April 8, 2013 By Gina Luker 37 Comments Love it?

Share it: Fonts, I just can’t seem to get enough of ’em! Unnamed Melody Smitten Kitten Hobbes Highland Perk Baby Bowser Eight Fifteen Xiomara Penelope Anne Easy Rider Sprinkle Colors Cheerful Script Black Lightning Signerica Emily Lime Masterics Part of Me Safe and Sound Stretching Up High Joy Like Sunshine Through my Windowpane Sweet Home Oklahoma We are in Love One More Night Shadows Into Light.
Fix a scan in photoshop. Blending and Type Tips. How to separate text from the background. Add text to complex surfaces in Photoshop. In this tutorial I’ll show you how to project typography onto a complex surface.
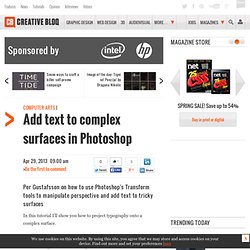
We’ll employ some basic text, give it a little perspective, place it into our image (an abstract composition in this case, but the techniques involved are universally applicable) and apply some effects to add depth and a sense of movement. To avoid complicating the process, we’ll do this all without using Photoshop’s 3D tools. Discover 35 free Photoshop brushes that every creative needs, over at Creative Bloq. 01 First open the background image or create your own – we’re just using a light texture with some clouds here. To give the image some depth and add a focal point, go to Filters> Distort>Pinch, and do this a few times to create some light beams flying out of the centre of the image. 02 To create perspective, mark an abstract shape with the Polygonal Lasso tool, holding Shift to keep all angles at 45 or 90 degrees. Naked Elements - Textures for photographers.
“I just got the Naked Elements package… I LOVE THEM!

… But somehow I’m not surprised” AJ Zeller Photo Earth | Fire | Water | Sky | Parchment A collection of 70+ photo texture overlays from Gavin Seim. Works in Photoshop or any layer based photo editor. Mac or WIN. Scan Line Art At The Resolution You Need. If you’re scanning black-and-white line art for reproduction in print, here are two quick tips that’ll help you get better results: 1.
Scan the line art image at the dpi you’ll be printing it. This is the one time we break our long-standing “don’t-scan-at-too-high-a-resolution” rule—but only when it comes to line art. If you’re going to output your line art on a 600-dpi laser printer, scan it at 600 dpi. If you’re going to output it to high-resolution film negs, scan it at 1,200 dpi (that’s about as high as you’ll need to go). 2. Scan your line art images in Grayscale mode. Eliminating white backgrounds on scanned-in sketches. - Team Photoshop Forum. Eliminating white backgrounds on scanned-in sketches.
How to eliminate the white backgrounds on scanned-in sketches/line art. 1. Open the scanned art work in Photoshop. Make sure that the color mode is set to RGB Color. If the background is a pure white, skip to step 4. 2.