
EM-406A GPS From Scratch - Part 1. Grade: Beginner Don't you hate it.
You find a great tutorial online that's about the exact subject you're interested in, but the prawnhead (general derogatory term) who wrote the article assumed something in step 1 that makes or breaks the whole thing. Without this assumed knowledge you're stuffed. I'm going to work up from the basics to a fully functional Arduino sketch that gets access to all the data from an EM-406A GPS. I aim to not leave anybody behind here but if I do, please send feedback and I'll make edits. Assumptions I'm going to assume you:have an Arduino device, either official or a clone, andhave an EM-406A GPS device and the necessary cables/shields to connect it, andyou've downloaded and installed the Arduino software, andyou are comfortable with at least pasting someone else's code into a sketch and uploading it onto your Arduino device I'm using Arduino software version 1.0.
Starting Off OK, starting with a very basic Arduino device.
Logger. gEDA Project's Homepage. Track your route! (using arduino, microSD card shield, and GPS) A positional control system can be performed using the MediaTek MT3329 GPS. The GPS transmits incoming NMEA (National Marine Electronics Association) sentences at 10Hz to the Arduino Mega. The NMEA sentences are stored as a text file on a microSD NMEA sentences are specified electronically transmitted strings of data, containing global positioning information. For Protei_006, the useful information might include latitude, longitude, course, bearing, speed, time, date, satellite ID’s, checksum, and altitude.
For more information about NMEA sentences and standards, see www.nmea.org/ or. World of Samaria: Arduino Live GPS Tracker - HOWTO. As promised earlier, this post is a complete HOWTO with code on how to use an Antrax GSM/GPRS/GPS Shield with an Arduino for Live Position Tracking.
Note that I am using the Rev 2 of the Antrax GSM/GPRS/GPS shield which has the Telit GE864-QUAD GSM Module controlled via Serial and the Origin ORG1318 GPS Module controlled via SPI interface. Antrax has since then launched a Rev 6 Version which uses the Telit GE865-QUAD GSM module and the Fastrax UP501 GPS module. Objective We will try to get the GPS position and send the data to an HTTP Server to store it which can then be used for various purposes one of which is plotting the current position on Google Maps. SPI Wiring The SPI port on the Arduino Mega is at pin 50-53 as opposed to 10-13 on the Arduino Uno. Hence we need to do some soldering to connect the corresponding SPI pins from the shield to the right ports. Arduino Buying Guide. Let’s face it, there are a lot of different Arduino boards out there.
How do you decide which one you need for your project? With this table, you can not only compare features between all the different Arduino boards we carry, but you can also see why these differences are important. What is an Arduino? Let’s first talk about what an Arduino really is. Arduino is an open-source electronics prototyping platform based on flexible, easy-to-use hardware and software. All Arduino boards have one thing in common: they are programmed through the Arduino IDE.
Why are they different? Some boards are designed to be embedded and have no programming interface (hardware) which you would need to buy separately. 1The miniUSB connector on the Arduino Fio is used for battery charging only. 2The LilyPad Simple Board does have one UART but the pins aren't broken out to pads. Retired Boards Glossary of Terms: Arduino GPS Datalogger. So as of now, you are logging all of the gps data onto a text file named trip.txt in the root of your sd card.
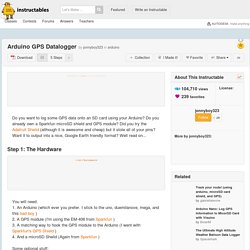
If you disconnect power, then reconnect, it will just append the new data to the end of that file. You are more than welcome to write some code that reads the SD card and says: "if the file exist, make a new one with a different name. " GPS datalogging shield for Arduino. Arduino Tutorial - Getting ready. This lesson won't teach any electronics, really.

Its more for making sure that everything is setup and ready for the future lessons. It will verify the Arduino is working as intended and that the computer you are using is compatible. For this lesson you will need some stuff! Make sure you have this stuff or you will be unable to complete this lesson Take your Arduino out of its protective bag. Diecimila Arduino Or like this: NG Arduino If there's anything missing or really wrong, make sure to contact the store you bought it from. OK, now that you are satisfied that your Arduino looks good, put the rubber bumpers on the bottom of the board.
Depending on which Arduino and which OS you have there are different instructions Now we are ready for the moment of truth, it's time to plug your Arduino in and power it up. The jumper-setting step is only for Diecimila and OLDER arduinos! You'll want it set as shown in the picture above. Make sure your cable is a A-B cable. If not, double check: Arduino - HomePage.