
Photo Manipulation: Surreal Oceanscape In A Bottle. In this tutorial, our Photoshop Maestro is going to fit an entire oceanscape into a tiny little (magic) bottle!!
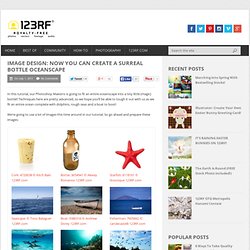
Techniques here are pretty advanced, so we hope you’ll be able to tough it out with us as we fit an entire ocean complete with dolphins, rough seas and a boat to boot! We’re going to use a lot of images this time around in our tutorial. So go ahead and prepare these images: Bottle & Cork: Place the bottle into our workspace, and remove the logo. Tilt the bottle, and drag its blending slider to make the bottle more transluscent.
Change its color by first applying: and then pull out selective color to further adjust the color. Place the cork at the mouth of the bottle. Mask the cork as if it were stuffed inside the bottle. Decrease the brightness by dragging curves. Further darken the areas as shown, as that area comes in contact with water. Water and Ocean surface: Photoshop Color Replacement Tool Tutorial. Written by Steve Patterson.
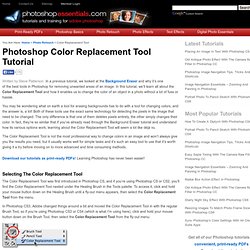
In a previous tutorial, we looked at the Background Eraser and why it’s one of the best tools in Photoshop for removing unwanted areas of an image. In this tutorial, we’ll learn all about the Color Replacement Tool and how it enables us to change the color of an object in a photo without a lot of fuss or hassle. You may be wondering what on earth a tool for erasing backgrounds has to do with a tool for changing colors, and the answer is, a lot!
Both of these tools use the exact same technology for detecting the pixels in the image that need to be changed. The only difference is that one of them deletes pixels entirely, the other simply changes their color. The Color Replacement Tool is not the most professional way to change colors in an image and won’t always give you the results you need, but it usually works well for simple tasks and it’s such an easy tool to use that it’s worth giving it a try before moving on to more advanced and time consuming methods. Pencils, Pixels and the pursuit of Awesomeness. This excerpt from Digital Painting Techniques teaches you how to create a Sandstorm (1 of 5 environments covered in this chapter) in Photoshop. Excerpt by Carlos Cabrera, 3D Total Sand Storm Software used: Photoshop You can download a custom brush (ABR) file to accompany this tutorial from www.focalpress.com/digitalartmasters, along with the base painting (JPG) that Carlos starts from so you can take greatest advantage of this tutorial.
In today’s world of ever-increased specialization, many artists have adopted roles specific to certain areas of expertise. Achieving a Vintage Look Through Color Tones in Photoshop CS. By Guest Contributor Anna Gay Photographers are often striving for a “vintage” look in their photos, and even though there are endless ways of achieving a vintage look, there are a couple of characteristics to keep in mind.

First of all, the color tones in a vintage photo often lean towards either a blue or a red hue, or a cross-processed look. Vintage photos also have an element of noise or grain that can be achieved through textures, and also a certain amount of vignetting around the edges of the photo. Make Your Own Planet in Photoshop! With these simple instructions, you can create your own realistic planet in Photoshop!
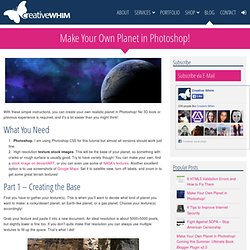
No 3D tools or previous experience is required, and it’s a lot easier than you might think! What You Need Photoshop. I am using Photoshop CS5 for this tutorial but almost all versions should work just fine.High resolution texture stock images. This will be the base of your planet, so something with cracks or rough surface is usually good. Photoshop Crash Course. 50 Photoshop Tricks for a Fast-Paced Work Environment. Are you a designer on a deadline?
If you are, then I’m sure you can recall the last time you thought to yourself, “if I had a little more time, I could…” what? Polish that button? Find a better hero image? Reevaluate that color palette? Take some time to do a little more QA? The truth is, however, that we designers will always be looking for more time to polish the one pixel that got away. Of course, since our go-to design tool in the office is Photoshop, we thought we’d share with you 50 simple Photoshop tricks and shortcuts we love using that can help trim excess spent time in your workflows. Important Note: The following require Photoshop CS5 and a Mac OS X. The Usual Keyboard Shortcut Suspects Memorize these shortcuts. 1. 2. 3. 4. 5.Keyboard shortcuts for flipping foreground and background (X): Use this to switch between your current foreground and background colors located in your toolbar. 6. 7. 8. 9.
20 PSD Tuts That Will Turn You Into A Photoshop Guru. Many people can use Photoshop, but only a select few can call themselves gurus.

Learn all the methods in the 20 tutorials below and you’ll be well on your way to joining this elite. Rather than focus on tuts for beginners, intermediates or advanced users, we’ve simply chosen ones which produce jaw-dropping effects. All of them are easy to follow, although most do require at least some prior knowledge and experience. 1. Colorful Plexi Text Effect Follow this tutorial to create dazzling, multi-layered, semi-transparent lettering, with a Perspex-like quality. 2. 3D Pixel Stretch Effect.
Banksy Style Graffiti – A Photoshop Stencil Manipulation « RGthinkcreative. I’ve always been a huge fan of graffiti artist Banksy and his thought evoking urban artwork so for this next piece I wanted to create my own Banksy inspired art using Photoshop.
This was a two part project that involved 1) Creating a stencil from a regular photo and 2) Overlaying the stencil in a photorealistic manner. Original Image: Part 1: Spray Paint Stencil Step 1 – Creating a Black & White Image: This step can be done in a number of ways but I prefer to use the Black and White Image adjustment by pressing Alt + Shift + Ctrl + B. This method preserves the color information from the original and will allow us to make some quick adjustments in the next step. Step 2 – Enhancing the Contrast: At this point the image looks flat and washed over, so the next step is to enrich the black and white color balance/contrast. Step 4 – Adjusting the Threshold: Here is where the stencil starts to come together.
*Note, it’s okay if the image looks harsh at this point. Create 8-Bit Style Graphics with Authentic NES, Gameboy, and Sega Colors. While making any image into an 8-Bit style graphic can be a lot of fun, it’s surprisingly easy to go the extra mile and use authentic palettes of popular retro gaming systems like the Gameboy, NES, or Sega Master system.
All you have to do is fire up nearly any version of Photoshop and download a few files to make the process quick and easy. Keep reading. My first How-to on creating 8-Bit graphics is still available, and shows the process in greater depth. If you still remember the steps from before, you’ll be okay without rereading it and just grabbing a few images you find interesting. Making Complex Selections in Photoshop. Tutorial Magazine / photoshop / effects.
Custom Wallpaper Tutorial. It's very simple.
Just follow the steps and you will be fine. Tutorials. Create Cool 8-Bit Style Pixel Art from Ordinary Images. I have to be honest.

I love the look of pixelated graphics! If you’re also a fan of jaggies or old school video game graphics, here is a simple trick to relive a little bit of that low pixel-depth goodness in any version of Photoshop. I start with an iconic image, but use any you prefer. Lisa will be recognizable in any pixel depth, so she’s a good candidate. Press. 950+ Photoshop Tutorials To Keep Your Skillset Updated.
I know how much everyone loves tutorials, I know I love writing them too. 8 Photoshop Tricks I Wish I Knew when I was a Student. Graphics Photoshop is one of the (if not THE) most well known software used in the design industry when it comes to manipulating images and pixels. As a web designer I had some Photoshop lessons at school but that was 2 years ago. Today the software has evolved, more options are available, and I also learn a few tricks while practicing. 111 Awesome Creative Photoshop Tutorials Can Make You Designer. 50 The Most Spectacular Photoshop Tutorials of 2009. In our previous posts we showed you the most interesting tutorials by a particular topic. For example 10 Best Typography Tutorials or 15 Best Smoke Tutorials. In connection with the end of the year we decided to remember the most spectacular and the most interesting Photoshop tutorials of 2009, regardless of its topic.
34 Photoshop Tutorials That Will Leave You Looking Like A Pro. Design This time we are bringing you a lot of Photoshop tutorials on all sorts of topics. It's meant to be a good collection for those who aren't quite pro yet, but want to be. From making amazing business cards to bringing a stone statue to life, these take us through hours and hours of practicing those skills. These tutorials are some of the best and varied out there. Retouching a Portrait with Subtlety Using Photoshop. External Tip – 10 Advanced Photoshop Tutorials You Should See.
In this category we want to give you an advice to other great sites, where you can get a lot of very useful information, inspirations and materials. Here I collected 10 great Photoshop tutorials, which can help you to expand your skills. Create a Devastating Tidal Wave in Photoshop. Laurie McCanna's complete list of Photoshop tutorials. How to Create a Watercolor Portrait in 3 Simple Steps.