Autre
> Nichkwichim
POYEL: Do-able DIY Homework Stations. Annie’s with us today and she’s got an especially timely Project Organize Your ENTIRE Life post for us: do-able homework stations. My kiddo aren’t in full time school yet but I’m eyeing these setups never-the-less. After all, it’s never too early to give you littles a quiet space to practice reading, writing, or just being creative. As summer draws to a close, our focus shifts from the beach to back to school; teachers, lessons, classrooms, and homework. With kids of all ages now trucking home extensive workloads, it’s wise to establish a space inside the home that’s a suitable study environment. Without an efficient place to do homework, children can struggle to focus, can lack the motivation to attend to their work, and can be prone to household distractions (They can also, in reaction to insufficient workspaces, develop exceedingly strange study practices which will raise eyebrows for the remainder of their existence. 1. 2. 3. 4. 5. 6. 7. 8. 9. 10.
P.S.
Pinterest. Most favorited all-time | craftgawker - page 9. 礼物盒~…_来自罗书丹的图片分享. 堆糖网 分类 首页 热门 最新 良品购 特卖惠 家居生活 美食菜谱 手工DIY 时尚搭配 美妆造型 婚纱婚礼 设计 古风 插画绘画 壁纸 头像 文字句子 旅行 摄影 人文艺术 影音书 人物明星 动画漫画 植物多肉 生活百科 搞笑萌宠 搜索含 的内容 搜索含 的商品 搜索含 的专辑 搜索含 的糖友 新浪微博腾讯 QQ 淘宝腾讯微博豆瓣 关联账号登录: 登录 注册 罗书丹 收集到 装饰美 专辑中 ,通过糖友 蜷缩的_miao 2013-01-05 19:19:43 礼物盒~ 关注 查看完整专辑4271 来自: 我的首页 新浪微博-随时随地分享身边的新… 查看来源 收集 腾讯微博 豆瓣 人人网 赞0 评论 3 添加评论...
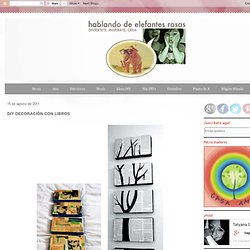
评论 瑞凌201207-01 是有在賣的嗎? 瑞凌201206-30 這個是賣的還是自己弄? 要怎么弄吖? 你可能感兴趣 还被收集在 > 标签 还没有标签 活动 哇塞! 截止日期:2014年04月23日 标签集帮助中心关于我们加入我们免责声明堆糖收集工具 ©Copyright by 堆糖 2010-2013 duitang.com, all rights reserved 备案 沪ICP备10038086号-1 确定要删除? 确定取消. Decoración con libros. Antes Después Sin duda este proyecto diy ha sido de mis favoritos hasta ahora, fue fácil, divertido y me encanta como quedó. Fue una renovación exitosa. La idea surgió de Ready Made y de Blue Cricket Design, echa un vistazo a estas paginas, tienen artículos muy interesantes. Dicho esto, comencemos con el tutorial. Material: 5 Cuadros viejos o bastidores de madera (los míos eran de 30 x 12 cm pero el tamaño puede variar conforme tus necesidades y/o espacio)Un libro que ya no sirva, también pueden utilizar partituras o fotocopiasUn marcador negroPintura Vinílica de color negro, de preferencia en aerosol.TijerasPegamento blancoUn pincelUn recipiente de plástico Instrucciones: 1. 2. 3. 4.
¡Suerte! Atrévete a hacer tu propia creación y no te olvides de compartirla con nosotros a través de redes sociales.
Notebook paper fabric tutorial. I've made a lot of stuff with this method and it's really fun to do. Also it's a lot easier then it looks. I've made a Kindle Cover An Ipad Cover and Zipper Pouches There are so many cool things to do with this and I would love to see more. Start with a rectangle of white material (about the size of a piece of paper, or whichever size you want) Set your sewing machine needle clear to the left position and use blue thread.
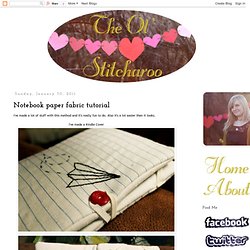
Sew one straight line on the top of the fabric, horizontally, just like a piece of paper. for the next line put it just under of the first line, lining up the first line with the right of your sewing machine foot to keep it all lined up in straight lines. Now you have something that should look like this... Next change your thread to red and do one line down the side about 1 1/2 inches from the edge, completely perpendicular to the blue lines Aaaand it's finished!!!! I always embroider on it. I would love to see more finished projects with this meathod.
-Brenna. NOTE-able-a-TEE Printable Fabric Tutorial. Pitch Cold {Freezer Paper Stenciling}
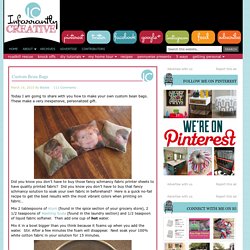
Custom Bean Bags. BESbswyBESbswy Receive Weekly Updates On Everything Creative Powered by OptinMonster. Idée déco DU JOUR: POUR LA SALLE DE GARÇONS. Oi queridas e queridos! Tudo bem? Como passaram o final de semana (oops ainda é domingo hehehe), mas a gente já começa a se preparar para o ritmo acelerado da nova semana,né?
Quer ver algo criativo e que as mamães e papais arteiros de plantão vão curtir para o quarto das crianças? É super fácil e legal: um espelho emoldurado com miniaturas e brinquedinhos. Depois de colá-los com cola (Araldite, por ex.), basta pintar com um spray (Colorgin, por ex.) e voilá! Foto cortesia: ceocooleclecticoriginal.com Até amanhã! Beijos, beijos e falem comigo, tá?
Instructables, tutos divers. Scienceamusante.net. 100 Handmade Gift Tutorials. How to make Magnetic Fluid (ferro fluid)
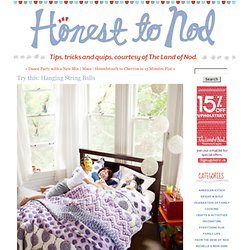
Hanging String Balls. Whattya need? BalloonStringScissorsGlueJar How do I make glue string balls? Step 1: Hang inflated balloon from ceiling. Step 2: Put string and glue in the jar with a hole in the lid. Next, pull string from hole while wrapping around the balloon. Step 3: Wait until dry (try to contain yourself). Created by Dane Holweger. Building Machines From Paperclips. Several months ago I awoke one morning with an idea for a project. I had gone to bed thinking about a presentation I am going to make to a group of middle and high school technology teachers in a couple of months. I wanted to come up with a simple and inexpensive projects they could use to teach their students some aspect of technology and hopefully inspire their creativity. During the night I dreamed of making machines out of paperclips and this project was born.
As for the cost of this project - the wood and paperclips cost me 37 cents. I already had several projects I was working on at the time so I thought about the idea for a couple of months before I actually sat down with a box of paperclips and started trying to make a machine. For educators this project is a great way to teach students the physics of mechanical machines including cranks, levers, fulcrum points, rotary and linear motion all while stirring their curiosity and developing their mechanical aptitude. Biochemtronics. 41 Easy Things To Do With Mason Jars. DIY String Art. Hi guys! Dina here from Honey & Fitz back with another tutorial. This time I’m showing you how to make some string art for your little one’s room! Rather than deal with hammers and cutting wood, I decided to do this project using cork tiles. Not only are they easy to find and inexpensive, they’re also very light weight so you don’t have to worry about them falling off the wall and hurting anyone.
Here are the supplies you’ll need: Cork tiles // Linoleum Nails // 3M Hanging Strips // Contact Cement Stack the cork tiles on top of each other and use your contact cement to glue them together. I really wanted the look of a white background for my string art so I decided to paint the cork. Once the paint has dried, flip your cork tile over and apply your hanging strips.
Create your template using whatever font you like. When you’ve traced the entire template, carefully remove the paper. Tie your string in a double knot onto your first nail now, and start weaving in a back and forth fashion.
MAGIC Decal Transfer Tutorial. Some of you may remember, a little while back I posted a tutorial for DIY waterslide decals. Among other things, I mentioned how awesome they are for creating custom embellishments without the need for any fancy-pants equipment. Yep, waterslide decal paper is a truly fab product, though as great as it is, there is one drawback – although it’s somewhat tough it’s not especially durable. So, whilst it’s perfect for ornamental purposes, it’s not ideal for more practical applications…until now that is! Magic decal coating paper is a product designed to be used in conjunction with standard decal paper to make the finished transfers super durable – yes, even dishwasher resistant!
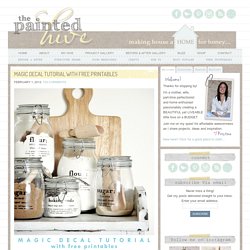
If you’re already familiar with magic decal coating paper then please excuse my tardy excitement, though for everyone else who is just getting to the party now too, feel free to start throwing the streamers! 1 Image to transfer. Use anything you like. 2 Printer. You can use either a laser or an inkjet printer. 6 Scissors.
Je mémorise... et je sais écrire des mots (F. Picot) - Les derniers articles. Par maikresse72 le 21 Juillet 2012 à 18:09 23/06/2013 -> Mise à jour de TOUS les fichiers Ce2. Dans cet article, vous trouverez des documents destinés à l'utilisation de la méthode d'orthographe "Je mémorise... et je sais écrire des mots" de Mme Françoise Picot. Je ne saurais que vous recommander d'acheter ses ouvrages et même de la contacter via son blog (lea.fr) si vous avez des questions... La liste des mots à savoir pour l'année par semaine : Un fichier de traces écrites: La programmation: Les exercices: les corrigés (par nath83) les corrigés (par nath83) les corrigés (par nath83) les corrigés (par nath83) BONUS!!
Les corrigés (par lili08) Merci à Nath83 qui a effectué les corrigés et repris la mise en forme. Il suffit de cliquer sur "les corrigés" pour télécharger les fichiers ;)
Panier en papier. Preparar un contenedor para regalar algo hecho a mano y con cariño es más fácil de lo que parece. Estas cestitas de craft que se montan en tres minutos son el perfecto ejemplo de ello.
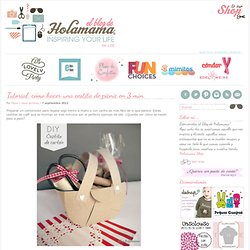
¿Queréis ver cómo se hacen paso a paso? ¡Siempre andamos a la caza y captura de ideas para hacer cosas sencillas, baratas y divertidas! Hoy hemos preparado un sencillo tutorial para hacer en casa unas cestitas que seguro os van a gustar. Vaís a necesitar unas cuantas herramientas, una buena mesa para trabajar y sobre todo una buena cartulina craft tamaño DinA4 .
Con una regla marcad la cartulina como véis en la imagen. Las medidas dependerán del tamaño que necesitéis para vuestras cestas y no hay una pauta fija. Coged las patillas laterales e id montándolas en abanico como véis en la imagen… A continuación repetís la operación por el otro lado y rematáis subiendo el triángulo. Para tapar la grapa cortad un círculo con un troquel.
Le blog de Bienvenue à ma Table – Véritable recette des boulets à la Liègeoise. Pour cuisiner avec des passionnés, rien de plus simple, allez les rencontrer à leurs tables ! J’ai appris à faire cette recette, fleuron de la gastronomie locale Liègeoise (Belgique) avec Joelle, lors de mon repas chez l’habitant. Si vous allez à Liège déguster ce mets sucré salé, vous trouverez facilement les Boulets frites à la carte de toutes les brasseries.
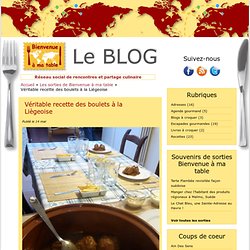
Ingrédients pour les boulets (4 à 6 personnes) : - 600 à 800 gr de viande hachée (50 % de porc 50 % de boeuf), - 3 tranches de pain de mie (sans la croûte et trempées dans du lait), - 3 à 5 cuillères à soupe de chapelure (ou biscotte), - 50 gr de farine, - 100 gr de beurre, - 2 échalotes, - 2 oignons, - 1/2 noix de Muscade, - 2 jaunes d’œuf, - sel, poivre.
Ingrédients pour la sauce : - 1 litre de bière brune de table, - 3 cuillères à soupe de raisins secs, - Une cuillère à soupe de Sirop de Liège, - Farine (ou Maïzena) selon la consistance de votre sauce choisie, Préparation : 20 à 30 mnCuisson : 60 mn Émincer 2 oignons et 2 échalotes. Santé !
Diy faux taxidermy....
Surprise DIY. You knew i was going to make one.
They are all over pinterest....
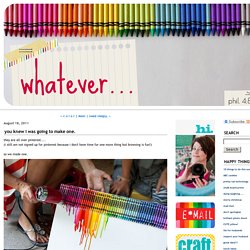
(i still am not signed up for pinterest because i don't have time for one more thing but browsing is fun!) So we made one. i took a box of 64 crayons and took out the blacks and browns.i used another small box and doubled up on the good colors i liked and hot glued them to the top of our canvas. then we turned our blow dryer to hot on high. not long after you set the hair dryer by the crayons they get shiny and then the wax starts to melt!
And it dries really quickly too. seriously. what could be happier than this?? GREAT project. loved it today is the first FULL day with ALL my kids in ALL day school.yeah...i am smiling as i type that. it's good. it's quiet. i am rockin' it. removing wallpaper.....making code for craft weekend stuff.....doing my hair....going to lunch..... it's all good. hooray for school!
Daily Cleaning 101 - Step 7 "Your Schedule"
The Homes I Have Made: Magnetic Menu Board - Part II. Hello, Hello! On Monday, I showed you my Magnetic Menu Board and explained how it works! If you missed it, you can read it here! As promised, I am back today to show you how I made it! I started here: My materials included: A magnetic and dry-erase calendar (this one is from Target for ~$16)2 packages of magnetic sheets (you can find these anywhere from Walmart to Amazon...these are from Staples and are glossy, which give the magnets a nice and professional look!)
6 books filled with clear plastic page protectors (mine are from the Y100 Store in Okinawa - yes, I stocked up before I left years ago! Yup...that's all you'll need to make this beauty! Let me show you how I did it! Unfortunately, the first step is the most "not fun" and time consuming! Before this project, I was already printing (or copying) recipes (from emails, online, or cookbooks) that make it into our regular rotation and then store them in handy books. PoultrySeafoodBeef/PorkVegetarianSides/SaladsDesserts Have a great weekend,
The Homes I Have Made: Magnetic Menu Board - Part 1. Apprêt scellant maison (Mod Podge), recette de matériel éducatif.
Kitchen Craft: Soap Clouds! {And homemade kiddie tub soaps}
How To Mix Chalkboard Paint in Any Color. That Was a What_!_ Another Tire Saved From the Landfill. How To Make Fabric Softener Sheet. Polly's Picks: 45 BEST Home Organizational & Household Tips Tricks & Tutorials - Mrs. Polly Rogers | Decorate, Make, Create! | Mrs. Polly Rogers | Decorate, Make, Create!
Reader Space: Our Fifth {Organized} House.