
25 Ways to Decorate a Plain Tote Bag. DIY iron-on typographic tote bag. I enjoy an attractive script typeface now and then, so I've made a little printable featuring Wisdom Script.
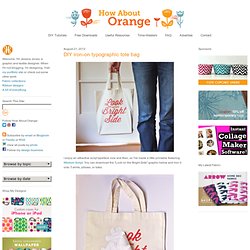
You can download the "Look on the Bright Side" graphic below and iron it onto T-shirts, pillows, or totes. To make this tote bag, download the mirror-image design here. It's flipped so that the design will read correctly on the finished fabric. Print the backwards PDF onto iron-on transfer paper. (I used HP Iron-on Transfers for light-colored fabrics.) Place the design face down onto fabric and iron over it slowly using the cotton setting, no steam, for a minute or two.
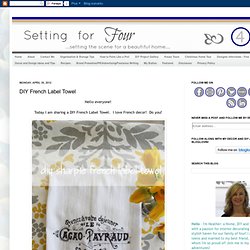
Designs will be machine washable after 24 hours. I know, I know! If you'd like to download the normal, un-flipped design, click here. Setting for Four: DIY French Label Towel. Hello everyone!
Mini Boxy Makeup Bag. Co. Tote to Backpack DIY. Co. We always try to bring reusable totes to the grocery store or market, but we just aren’t big fans of the ones you get at the checkout counter.

So instead of being resolved to carrying any old market tote, we decided to make our own using only four supplies! Materials: - Canvas tote - Spray dye - Painter’s tape - Stencil Instructions: 1. Sketch a few designs, then decide on your favorite and start taping. 2. Cover up the areas you don’t want dyed with scrap paper. 3. Now let’s dive in! DIY backpack. Supplies: 1 yard of durable fabric I used faux leather for the bottom... 1/2 a yard for the liner. drawstring, anything for closure I always have my hands full with my little boys on each hand.

I love backpacks and wanted to create one that would be functional and fit my style. You will need to piece the front/back part together by taping them. Press seams of pocket 1/4 inch. Sew the top 1/4 inch over. place the pocket in the middle of the front piece. Top stitch around leaving top flap open. You can make your own straps or purchase it from the fabric/craft store. 2 yards should be enough.
For the straps I cut 2 strips 3in. by 28in. long and sewed them right sides together. Fold an end of the strap over an inch and sew a square evenly on the back panel. Sew the front and back panels right sides together. Sew the bottom circular piece right sides together starting at any point. Create a liner by cutting another front and back piece and 1 bottom. Pin around the edge... Dip Dye a Spring Skirt I Heart Nap Time.
Hey there!

It’s Stef again, from Girl. Inspired. Today I’m showing you how to make your very own ombre skirt using fabric dye! It is so easy to do, you’re going to be dreaming up all kinds of things to dunk in a bucket of dye!! Supplies: Collect & Carry: DIY: Geometric Painted Tote Bags. This week we've been talking all about getting out of town and going on an adventure.
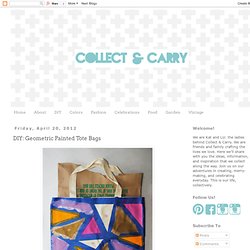
Well it just so happens that I will be headed to the beach this afternoon with a group of my girlfriends for a quick getaway. In honor of our beach adventure I wanted to create a quick and easy diy that we could all use to carry our towels, drinks, sunglasss, and whatever else down to the water. So I got some simple canvas bags, used blue painters tape to lay out some geometric designs and started painting! The acrylic craft paint on the canvas dried in no time, just be sure to put some paper or a paper bag inside so your tote doesn't stick to itself from the wet paint.
Triangles, stripes, chevron, or any geometric pattern is perfect for this project. Dip Dyed Canvas Totes. It’s been a while since our last DIY so I thought I’d share this fun and easy dip dyed canvas tote DIY.
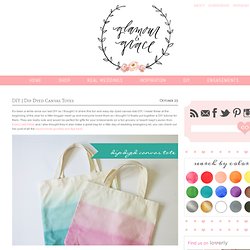
I made these at the beginning of the year for a little blogger meet up and everyone loved them so I thought I’d finally put together a DIY tutorial for them. They are really cute and would be perfect for gifts for your bridesmaids (or a fun grocery or beach bag)! Lauren from Every Last Detail and I also thought they’d also make a great bag for a little day-of wedding emergency kit, you can check out her post of all the must-include goodies and tips here. DIY tote bag. Sign up to the Megan Nielsen Patterns Newsletter and get access to our library of FREE sewing patterns!
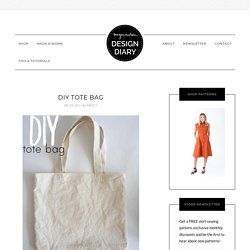
Store Newsletter Get access to our library of FREE sewing patterns, exclusive monthly discounts and be the first to hear about new patterns! Dip Dye Clothing DIY – Do It Yourself Dip Dye. This week we’re sharing some of the blog’s greatest hits!
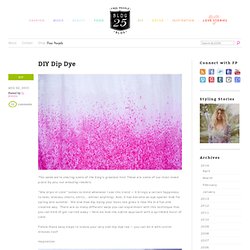
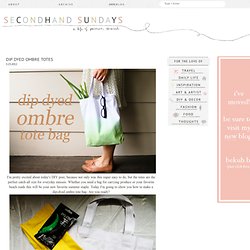
These are some of our most loved posts by you, our amazing readers. “She drips in color” comes to mind whenever I see this trend — it brings a certain happiness to tees, dresses, shorts, shirts… almost anything! Dip Dyed Ombre Totes. I'm pretty excited about today's DIY post, because not only was this super easy to do, but the totes are the perfect catch-all size for everyday messes.
Chevron Ombre Tote DIY - SewCaroline. THIS is a fun one… If you know me, I love trends. This DIY incorporates TWO current trends :: chevron & ombré supplies needed:~1 yard of white fabric1/8 yard of 4 or 5 different shades of turquoise fabrics (or whatever other color you choose!) Strapping~1/2 yard of fusible fleece start by cutting 3″ squares. 6 each of the blue hues (I ended up only using 4 of the 5 shown above) & 24 of the white. On each of your white squares, take a pencil and mark a line from one corner to the other. place one white square with one blue square, right sides together & pin.on either side of the line, sew a 1/4” seam*. continue this for all of the squares. When they are all finished, cut down the line you drew.Take each of the squares and press the seams towards the darker fabric.When they’re all pressed, line them up like this :: sew each “across” row together.when all of the across rows are sewn, line up the seams and sew the “down” rows together.Press out all of your seam & iron to a piece of fusible fleece.