
HomeTroller Zee Home Automation Controller. Home Controls - Smart Home Automation, Lighting, Security and Home Theater. Home Automation Equipment. Home Automation, X10, Remote Control, Lighting, Wireless Security, IP Cameras. Home Automation Systems Store. Aeon Labs DSC19103 Aeotec Z-Wave Micro Illuminator In-Wall Light Dimmer, G2. Turn your existing light switch into a remote controlled switch with the Aeon Labs Aeotec Z-Wave Micro Illuminator In-Wall Light Dimmer, G2. Designed to fit neatly in the wall behind your switch, the Z-Wave Micro Illuminator is completely hidden from view. Just grab a Z-Wave controller, point, and click for remote control of your switched light! Adds Z-Wave wireless control to an existing switchFits behind most in-wall appliance switchesBuilt-in meter monitors energy consumptionWireless range up to 50 feet from controller The Micro Illuminator receives on/off commands for the light as an individual module or as part of a scene.
It also accepts dim/brighten commands when used with dimmable bulbs. As part of Aeon Labs' Generation 2 series, the G2 Z-Wave Micro Illuminator is smaller and more reliable than the original model. Built-In Energy Meter Simple, Universal Installation The switch uses your existing wires, whether the wiring is simple or complex. Affordable DIY Home Automation, Home & Personal Security. Home Automation Equipment. Z-wave in wall controllers. It has long been thought that a house becomes a home when we make it reflect who we are, when we personalise it, when we fill it with objects we treasure.
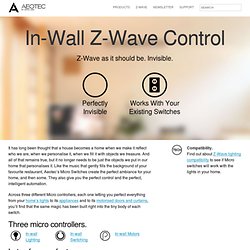
And all of that remains true, but it no longer needs to be just the objects we put in our home that personalises it. Like the music that gently fills the background of your favourite restaurant, Aeotec’s Micro Switches create the perfect ambiance for your home, and then some. They also give you the perfect control and the perfect, intelligent automation. Across three different Micro controllers, each one letting you perfect everything from your home’s lights to its appliances and to its motorised doors and curtains, you’ll find that the same magic has been built right into the tiny body of each switch. Three micro controllers. Lots of macro features. Suits any home. Remote control. Smartphone control. Z-Wave Home Automation. Creators of Z-Wave products. Z wave in wall relay. Products. Products. Articles - Articles. How to monitor the status of your appliances using current sensors - Home Automation - Articles - Articles.
A number of people on the forum recently purchased the Mamac CT-800 switches posted here.
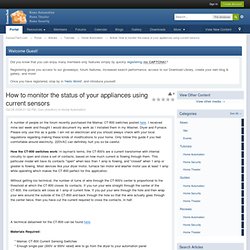
I received mine last week and thought I would document my work as I installed them in my Washer, Dryer and Furnace. Please only use this as a guide. I am not an electrician and you should always check with your local regulations regarding making these kinds of modifications to your home. Only follow this guide if you feel comfortable around electricity. 220VAC can definitely hurt you so be careful. How the CT-800 switches work: In layman's terms, the CT-800's are a current transformer with internal circuitry to open and close a set of contacts, based on how much current is flowing through them.
Without getting too technical, the number of turns of wire through the CT-800's center is proportional to the threshold at which the CT-800 closes its contacts. A technical datasheet for the CT-800 can be found here..Materials Required: Take a look at the back of your dryer. AC Current Sensor/DC Current Sensor/Current Switch/Current Transducer/Current Transformer/Current Sensing. Create Your Own J.A.R.V.I.S. Using Jasper. Cumulus low-cost home automation solution debuts on Indiegogo.
Z-Wave find my iPhone via Vizia 4 Scene Controller. Control a relay from anywhere using the Raspberry Pi. If you found this article after doing a search on Google, welcome!
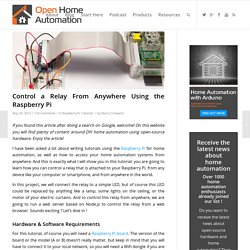
On this website you will find plenty of content around DIY home automation using open-source hardware. Enjoy the article! I have been asked a lot about writing tutorials using the Raspberry Pi for home automation, as well as how to access your home automation systems from anywhere. And this is exactly what I will show you in this tutorial: you are going to learn how you can control a relay that is attached to your Raspberry Pi, from any device like your computer or smartphone, and from anywhere in the world. In this project, we will connect the relay to a simple LED, but of course this LED could be replaced by anything like a lamp, some lights on the ceiling, or the motor of your electric curtains. Hardware & Software Requirements For this tutorial, of course you will need a Raspberry Pi board. This is the list of the components that have been used in this tutorial: Then, you will need to install the gpio-admin package.
ZigBee vs Z-Wave vs Insteon: Home automation protocols explained. OpenHAB - empowering the smart home. Home Automation. How to pick a wireless solution for your home automation project ? More and more open-source projects in home automation these days are “connected” in some way.
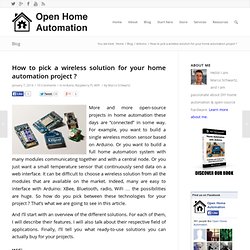
For example, you want to build a single wireless motion sensor based on Arduino. Or you want to build a full home automation system with many modules communicating together and with a central node. Or you just want a small temperature sensor that continuously send data on a web interface. It can be difficult to choose a wireless solution from all the modules that are available on the market. Indeed, many are easy to interface with Arduino: XBee, Bluetooth, radio, WiFi … the possibilities are huge. And I’ll start with an overview of the different solutions. WiFi If you are a frequent reader of this blog, you know for sure that I am using WiFi for several home automation projects. The other cool thing about WiFi is that you can connect a project directly to a web service like Xively, thus connecting your project to the Internet of Things.