
Documentary Photography and Photojournalism: Still Images of a World in Motion. 7 ways to capture what you actually see. 4.
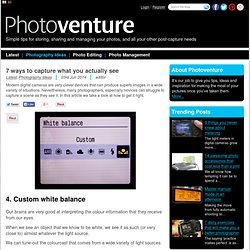
Custom white balance Our brains are very good at interpreting the colour information that they receive from our eyes. When we see an object that we know to be white, we see it as such (or very close to) almost whatever the light source. We can tune-out the colourcast that comes from a wide variety of light sources. A camera’s automatic white balance system is designed to replicate this ability, and although most systems do a pretty decent job in natural light, many struggle in artificial lighting conditions.
This can result in images with a green cast when shooting under fluorescent light, for example and a deep orange in candle light. Digital cameras have a number of white balance settings in addition to Auto that are designed to correct the colourcast created by specific light sources. Simply Beautiful Photographs, Tips on Using Palette and Color, Gallery – National Geographic. DIY - Create Your Own Bokeh. Bokeh is an adaptation from a a Japanese word meaning blur.

In photography this term is used to describe the quality of the areas in the picture which are not in focus. When referring to Bokeh, we can distinguish some of it characteristics: – Is the light/dark gradient smooth or sharp? – What shape will a small dot of light take what it is in the Bokeh area? (mirror lenses for example, create a bagel like Bokeh) We can play with those two variants to create a special Bokeh. You will need : One large aperture lens (a Canon 50mm F1.8 (B&H) is used here, but Nikon 50mm 1.8 (B&H) will also do, and the superb Nikon 50mm 1.4 (B&H) will work even better)One sheet of black paperboard 1. 2. 3. Here are two shots to demonstrate this technique – one with a bare lens and the other with the hearted hood. Here are the parameters for the example shown above: Lens – Canon 50mm F1.8“Lens hood” Diameter: 70mm (2.75 inch)Hole diameter: 15mm (0.6inch)
22 Things You Can Do Today to Change Your Photography Forever. Would you pin this on Pinterest? Photographers these days spend so much time on the Internet learning good things about photography that they never make the time to do the things that would be really great for their photography. I’ve compiled a list of 21 things in this article that you can do today that would completely change your photography forever. THIS is how you learn photography! If you like these tips, I hope you’ll consider learning photography with me in one of my 6 online photography classes. Action #1: Learn every function your camera is capable of performing (2 hours) You know what I mean… not just aperture, shutter speed, and focus. How to Create Breathtaking Architectural Photographs. You don’t have to be a career photographer to create dramatic and breathtaking architectural photographs.

With a little practice the weekend photographer can learn to create eye-popping images that look as though they had been captured by a professional. You needn’t have the latest, greatest or most expensive equipment. The most important aspect of photography – what sets the great photographs apart from the good photographs – is how the subject matter is seen and captured onto film or onto the page. Backlighting Tutorial. By Guest Contributor Lidia Boicu.

Tutorial: Editing a newborn. I get asked if I have any tips for editing newborns quite a bit, so here is what I do to make those adorable little ones into a beautiful portrait :) First I will have to say that for newborn pictures it is all about the lighting, even lighting will give you a more even skin tone and you will have less editing to do.
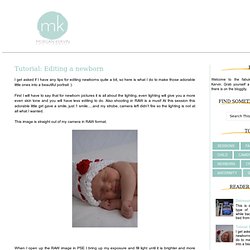
Also shooting in RAW is a must! At this session this adorable little girl gave a smile, just 1 smile.....and my strobe, camera left didn't fire so the lighting is not at all what I wanted. This image is straight out of my camera in RAW format. When I open up the RAW image in PSE I bring up my exposure and fill light until it is brighter and more evenly lit. Of course next I run CoffeeShop baby powder room :) It is fantastic!
Then I use the gaussian blur at a pretty high amount so that it is nice and even. The result from the soft skin layer after adjusting the opacity. Next the lighten skin layer, you can see the areas I brushed over, avoiding the detail spots again. 8 Effects Every Photographer Should Know About. 10 DIY Photography Projects to Save You Money. For those who don’t know, the DIY Photography equipment niche has gone from strength to strength recently, as more people become interested in photography, but can’t afford all the tasty equipment that comes with it.

As a lover of putting together flatpack furniture (yeah, that’s right), I love DIY photography. They don’t always work out to be the best quality gear, but that’s to be expected when you consider the cost, and they can give you a really good sense of whether you want to invest the branded gear too. This post was inspired by an article I recently saw on David Hobby’s website, The Strobist, where he reviews a product called Bounce-Wall.
Photoshop Elements & Christmas. Lenses. You've probably seen plenty photos taken with wide apertures (we've written about this technique before on Phototuts+).
They are easy to recognise because of the shallow depth-of-field. Normally, these photos are taken with a prime lens. Eye Sharpening – Photoshop Tutorial. With this tutorial you can create amazing, bright eyes within minutes.

First retouch, adjust levels and do all necessary colour corrections on your image. With a Lasso Tool (L) select the eyes (hold Shift key to add to selection). Hit Ctrl+J to copy selection to a new layer. You can copy the whole layer instead of selecting eyes but applying the filter to the large area like this may take a while on slower computers. Use Smart Sharpen filter on the eyes, the choice of right settings will depend on the size of your file. Add a layer mask to the sharpened layer, then using a white soft brush on 50% bring back paint only iris’ and pupils to expose the sharpened eyes. Using levels brighten the whole picture and then copy mask from previous layer to select only eyes by holding Alt while dragging the sharpened mask (“layer 1” in the pic) onto the “levels 2” layer.
Reduce opacity of the colour layer to make the eyes look more natural. And voilà, the image is ready. 75+ Awesome Examples of Conceptual Photography.