
T-Shirt Yarn. How to Sew a Lining for a Pouch or Bag. Learn How to Make A Crocheted Pouch or Bag With a Lining Checkered Crochet Pouch, Photographed With the Zipper Opened to Show off the Lining Photo © Amy Solovay A crocheted pouch or bag is most useful if it has a fabric lining.
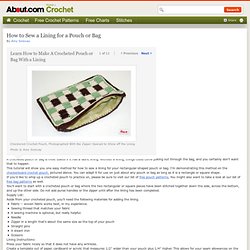
Without a lining, things could come poking out through the bag, and you certainly don't want that to happen. This tutorial will show you one easy method for how to sew a lining for your rectangular-shaped pouch or bag. If you'd like to whip up a crocheted pouch to practice on, please be sure to visit our list of free pouch patterns. You'll want to start with a crocheted pouch or bag where the two rectangular or square pieces have been stitched together down the side, across the bottom, and up the other side.
Supply List: Aside from your crocheted pouch, you'll need the following materials for adding the lining. Fabric -- woven fabric works best, in my experience.Sewing thread that matches your fabricA sewing machine is optional, but really helpful. How to Crochet A Curlicue. Crocheting culicues are one of the most simple and fun things I've made in a while...oh and they are addicting too!
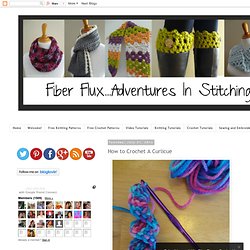
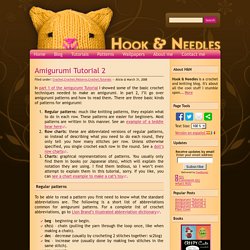
For this I'm using an H hook and some worsted weight yarn I had laying around (here's a hat pattern for you I made a while back with this yarn) To begin, make a chain as long as you would like your curlicue to be plus 3 chains (the one shown here is 20+3), Then make one dc in the 4th chain from the hook, In the same chain, make another dc... Now make 3 dc in each chain until you get to the end (here is how it looks about halfway through), See the curlicue starting to emerge? Love it! Hook and Needles: Knitting and Crochet Blog (cool stuff, techniques, and things I find) This tutorial is for all of you knitters who wish to learn how to make amigurumis. In the first part of this tutorial I’ll go over the basic crochet techniques you need to master. I know most people are visual learners, so I’m using a lot of videos (they may take some time to load). Step 1: How to hold your yarn (make a chain too) If you are a thrower (hold your yarn in your right hand), you’ll have to learn to hold your yarn on the left.
It will feel awkward, but with time it will become easier. Step 2: Single crochet, increasing and decreasing Most amigurumis are done in spirals of single crochets. Hook and Needles: Knitting and Crochet Blog (cool stuff, techniques, and things I find) In the first amigurumi tutorial I went over the basic crochet techniques needed to make amigurumis.

In the second installment, I explained the most common types of patterns, and how to read them. In this final amigurumi tutorial I’ll cover some additional techniques often used when making amigurumis. Hook and Needles: Knitting and Crochet Blog (cool stuff, techniques, and things I find) In part 1 of the Amigurumi Tutorial I showed some of the basic crochet techniques needed to make an amigurumi.
In part 2, I’ll go over amigurumi patterns and how to read them. There are three basic kinds of patterns for amigurumi: Regular patterns: much like knitting patterns, they explain what to do in each row. These patterns are easier for beginners. Most patterns are written in this manner. Regular patterns To be able to read a pattern you first need to know what the standard abbreviations are. Beg – beginning or begin.ch(s) – chain (pulling the yarn through the loop once, like when making a chain).dec – decrease (usually by crocheting 2 stitches together: sc2tog)inc – increase one (usually done by making two stitches in the same stitch).rep – repeat.rnd(s) – roundsc – single crochet.sc2tog – single crochet 2 stitches together (a decrease).2 sc in next sc – 2 single crochet in the next single crochet (an increase).sk – skip a stitch (another way to decrease)st(s) – stitches Row Charts.
Crochet Fingers and a Thumb - Amigurumi To Go! Amigurumi hair tutorial « Owly. I wanted to share how I make the hair for my amigurumi.
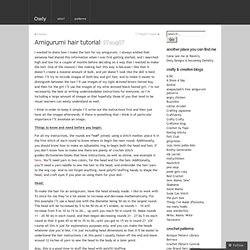
I always wished that someone had shared this information when I was first getting started, and I searched high and low for a couple of months before deciding on a way that I wanted to make the hair. One of the reasons I like making hair this way is because I like that it doesn’t create a massive amount of bulk, and yet doesn’t look like the doll is bald either. I’ll try to include images of both boy and girl hair, and to make it easier to distinguish between the two I’ll use images of my light skinned brown haired boy, and then for the girl I’ll use the images of my olive skinned black haired girl.
I’m not necessarily the best at writing understandable instructions for everyone, so I’m including a large amount of images so that hopefully those of you that tend to be visual learners can easily understand as well.