
DIY String Art. Hi guys! Dina here from Honey & Fitz back with another tutorial. This time I’m showing you how to make some string art for your little one’s room! Rather than deal with hammers and cutting wood, I decided to do this project using cork tiles. Not only are they easy to find and inexpensive, they’re also very light weight so you don’t have to worry about them falling off the wall and hurting anyone. Here are the supplies you’ll need: Happy Flower Decoration. This is a pattern/tutorial to show you how to make this Happy Flower wall hanging.
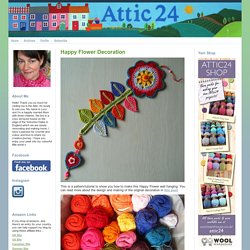
You can read more about the design and making of the original decoration in this post. I'm using a cotton yarn to make this decoration, it's Rowan Handknit Cotton, a fairly robust DK weight yarn which I work on a 4mm hook. I love using this yarn for decorative projects as although it is soft and lovely to work with, the resulting crochet tends to be quite stiff and holds it's shape well.
Plus aren't the colours scrummy?! Before we begin, a little summary of the basic stitches. Sl st [slip stitch] :: insert hook, yarn over, pull the loop back through the stitch, then through the loop on your hook. dc [double crochet] :: insert hook, yarn over, pull the loop back through the stitch (two loops on hook), yarn over and pull through both loops on hook (note :: this is equivalent to the US sc stitch) Hand Stitching, part 1 - LA.
One of my favorite crafts is hand stitching-- it's fun, addictive, expressive and relaxing :) Over the next few weeks, I'm going to share easy ways to make your own patterns for hand stitching along with some tips and ideas :) These are some samples of my past projects-- I like to draw patterns freehand and use my handwriting.

However, sometimes I adapt clipart type images to make a more complicated pattern, like the sewing machine or I just stitch the outline of an image I love, like the Goonies "Hey You Guys" silhouette :) I use a Back Stitch for all my hand stitching because it's very versatile and I like the look but you can use any combination of stitches for your projects... there's lots of fun ones! Today, we're going to start with handwriting & transferring your pattern :) - StumbleUpon. If you’ve been following my blog, you know how I made 60 of these painted frames with song lyrics for our wedding decorations /favors… Well, a lot of wedding guests loved them and took one home, but we had a ton left at the end of the night, which we boxed back up and took home with us… So we now have 30 of them hanging on our big white living room wall!
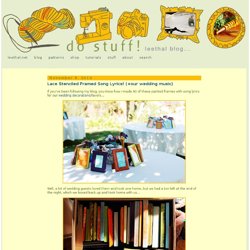
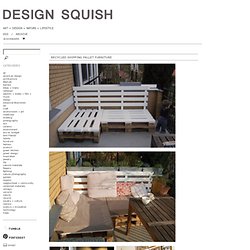
Yay!! There are several duplicate lyrics, some of which I already changed out to engagement photos, but once we get our wedding photos I’ll switch out some more lyrics with photos (but just a few, because we love the look of the lyrics!) : Do it Yourself Upside Down Tomoato Planter. RECYCLED SHIPPING PALLET FURNITURE - recycled, eco, sustainable, design, redesign, reused, lifestyle, diy, eco on budget, sustainable lifestyle, do-it-yourself, creative environmental options, craft, organics, gardening, planting.
Above: Chairs by StudioMama CATEGORIES: (32) Comments.
Craft Ideas - Easy Crafts for Kids, DIY Crafts and Knitting Patterns - Womans Day - StumbleUpon. Etched Portion Control Wine Glass. OK, confession: I’m on Weight-Watchers.
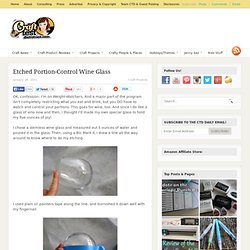
And a major part of the program isn’t completely restricting what you eat and drink, but you DO have to watch and control your portions. This goes for wine, too. And since I do like a glass of vino now and then, I thought I’d made my own special glass to hold my five ounces of joy! I chose a stemless wine glass and measured out 5 ounces of water and poured it in the glass. DIY Planter Box Centerpiece - StumbleUpon. Hey friends!

After finishing my mirrors in the dining room, my table started to look naked! So… I dressed her up today. This is a super easy project and I LOVE the results! This is the wood I used for the project… 2 – 1x6x4 whitewood boards. { Ambrosia Girl } - StumbleUpon. Hi there!
It’s felt like forever since I’ve last blogged, and has felt like an eternity since I’ve done anything crafty and nifty. Since my morning sickness has gone into full speed (yes, we’re expecting our third this fall!) I haven’t felt like myself. But nothing like inspiration to wake one out of a reverie — or nightmare, in my constantly sick state. Centsational Girl & Blog Archive & DIY: Paint Stick Sunburst Mirror - StumbleUpon. My friends, if there ever was a bandwagon, this carefree DIYer is jumping right on it.
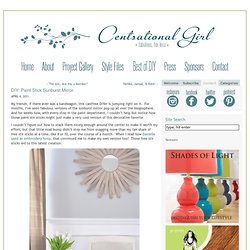
For months, I’ve seen fabulous versions of the sunburst mirror pop up all over the blogosphere. And for weeks now, with every stop in the paint department, I couldn’t help but notice how those paint stir sticks might just make a very cool version of this decorative favorite. I couldn’t figure out how to stack them nicely enough around the center to make it worth my effort, but that little road bump didn’t stop me from snagging more than my fair share of free stir sticks at a time, like 8 or 10, over the course of a month. Bird and Text Collage Wall Art.
[ Close Privacy Policy ] Privacy Policy / Your California Privacy Rights Revised and posted as of March 4, 2013 Prime Publishing, LLC ("Company," "we" or "us") reserves the right to revise this Privacy Policy at any time simply by posting such revision, so we encourage you to review it periodically.
In order to track any changes to this Privacy Policy, we will include a historical reference at the top of this document. Make a Lunch Box from a Milk Jug - StumbleUpon. TUTORIAL: Coffee Stirrer DIY Wall Art - makeanddogirl.com - StumbleUpon. Last week, I posted a preview of the simple, inexpensive wall art my mom and I created.
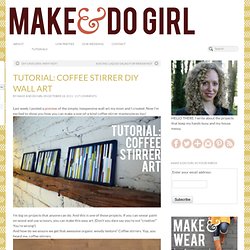
Now I’m excited to show you how you can make a one-of-a-kind coffee stirrer masterpieces too! I’m big on projects that anyone can do. And this is one of those projects. If you can smear paint on wood and use scissors, you can make this easy art. FABRIC COVERED MAT- HOW TO. Well, awhile back I promised I would show you how to create some of my favorite craft items... This one happens to be one of the items that my sisiter-in-law and I used to sell at craft shows. These simple fabric covered mats add big impact to a framed picture. This tutorial is for creating a 8x10 mat that holds a 5x7 picture. a rectangular piece of cotton fabric approx. 11x13 in. or a bit bigger (it doesn't have to be cut perfectly)a 8x10 mat - you can either purchase a pre-cut mat or cut your own out of mat boardspray glue -nothing beats 3M Super 77 found at Hobby Lobby or hardware storesa scissor - one you don't mind getting glue ona sheet rocking knife with a thin blade... an x-acto knife/craft knife will work, tooMod-podgesmall foam brush 1.With all your supplies laid out and ready to go, spray the back side of the fabric and the front of the mat with a generous coat of spray glue (outside). 2.Lay your glue covered fabric on a table, glue side up. 5.
- StumbleUpon. 08.09.09 | by Erik Anderson Whether it’s product branding, package design or projects for ourselves, we’re pleased when we find a solution that’s very effective and creative, while keeping resources to a minimum. This idea is very inexpensive idea and it’s a great way to recycle a wine bottle. See how this simple idea inspired this brand and wine bottle design. It’s been a record year for mosquitoes here in Indianapolis, Indiana and I’d been wanting to add some Tiki-esque torches to the patio to combat the little buggers, and add a little ambiance. Quick Arts and Craft Ideas. This photo originally appeared in FamilyFun Magazine Total Time weekend projects Ages all-ages Regardless of the season, this easy-to-make feeder will be appreciated by your neighborhood birds. It features seed treats to provide them extra energy--particularly suitable during the colder months of the year. Loose Leaf Tea? Make Your Own Tea Bags!
Like many of you, I LOVE loose leaf tea. However, I'm always looking for cute and creative solutions to use my tea. These D.I.Y. tea bags are super cute. Your source of daily updated funny pictures and gifs. - StumbleUpon. Display Tip - DIY: Modern Paper Vases. After a whirlwind long weekend, another Bridal Fashion Week has come and gone. Want to see all the new dresses? Head right here. More concerned with catching up on the highlights? No problem—scroll down for the gowns that kept us talking long after the models exited the catwalk. 1. The Sweetest Occasion - StumbleUpon. Hey! Look What I Made!: Lace Phone Case.
Craftaholics Anonymous™ Learn how to turn old t-shirts into pom poms! T-shirt Pom Poms are so much more durable than tissue paper ones. T-shirt latch hook rug tutorial. Make It and Love It - StumbleUpon. Have you ever done any glass etching? Paper Flower Key Holder / Mark Montano. Difficulty Rating: Beginner Tags. Print Hula Hoop Rug Page.