
Tips y trucos para ilustrar en ILLUSTRATOR – Coreditec. Ilustrar en illustrator es toda una aventura, utilizar todos sus impresionantes recursos de forma adecuada permite lograr gráficos impresionante, illustrator es el software mas utilizado en la industria del diseño, y es el favorito por los diseñadores, publicistas e ilustradores, por eso debes aprender illustrator Estos vídeos nos ofrecen unos practicos tips para manejo de ILLUSTRATOR 10 Trucos para Ilustración Digital Estilos y técnicas para ilustrar en digital Tutorial como vectorizar un boceto en illustrator y tableta wacom.

Tips y trucos para ilustrar en ILLUSTRATOR – Coreditec. Create Inspirational 3D Gold Text with Photoshop Extended. Preview of Final Results.

Create a Crisp Metallic Text Effect in Photoshop. In this quick tip tutorial, we will explain how to create a crisp, metallic text effect using just a couple of layer styles in Photoshop.
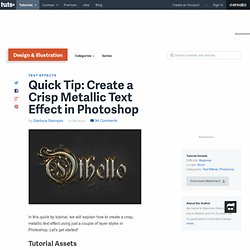
Let's get started! Tutorial Assets The following assets were used during the production of this tutorial. Step 1 Before opening Photoshop, install the font Rothenburg Decorative and these grunge brushes.Open Photoshop and Create a New Document, 1800 x 1300 pixels in RGB mode, 72 DPI and finally then Fill the background with this dark grey color #1f1f1f. How to Design a Geometric Poster in Photoshop - Tutorial - Nov192010 EmailEmail How to create a geometric poster in photoshop Last week I came across a great set of geometric posters.
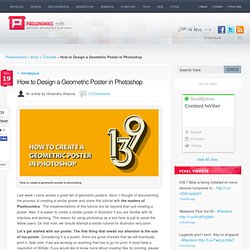
Soon, I thought of documenting the process of creating a similar poster and share this tutorial with the readers of Pixelonomics. The implementations of this tutorial are far beyond than just creating a poster. Let’s get started with our poster. Final Result Here is a preview of what we are trying to create. Dan Denney Front-End Dev at Envy Labs. Texto con Estilo de Acero con Photoshop. Efecto Lomo en tus Fotografías con Photoshop. Francisco nos muestra un nuevo efecto para tus forografías, el Efecto Lomo o Lomografía el cual aumenta algunos tonos y da vida a tus fotografías con Adobe Photoshop.
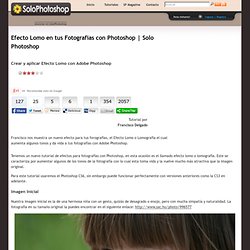
Tenemos un nuevo tutorial de efectos para fotografías con Photoshop, en esta ocasión es el llamado efecto lomo o lomografía. Este se caracteriza por aumentar algunos de los tonos de la fotografía con lo cual esta toma vida y la vuelve mucho más atractiva que la imagen original. Efecto Retro en tus Fotografías con Photoshop. Técnicas Avanzadas de Retoque Fotográfico con Photoshop. Utilizando una fotografía de moda y por supuesto nuestro programa preferido, Photoshop, Oscar Roldan nos muestra paso a paso como realizar 7 técnicas avanzadas de Retoque Fotográfico.
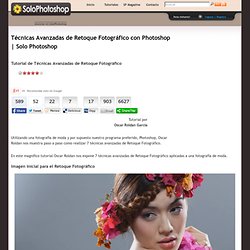
En este magnífico tutorial Oscar Roldan nos expone 7 técnicas avanzadas de Retoque Fotográfico aplicadas a una fotografía de moda. Imagen inicial para el Retoque Fotográfico 1. Introducción. Simular el Efecto Nashville de Instagram con Photoshop CS6.
Creating A Text Montage. May 8th, 2006 by ART-D Posted in Adobe Photoshop, Special Effects This is a technique that you have probably seen before.
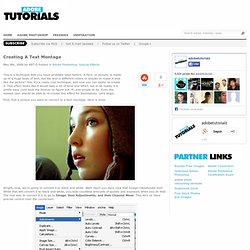
A face, or picture, is made up of a huge body of text, but the text is different colors or shades to make it look like the picture? Yea, it’s a really cool technique, and now you can easily re-create it. This effect looks like it would take a lot of time and effort, but in all reality it is pretty easy (just took me forever to figure out :P) and simple to do. Even the newest user should be able to re-create this effect for themselves. First, find a picture you want to convert to a text montage. Alright, now, we’re going to convert it to black and white.
Alright, a box will pop up once you click Channel Mixer. Alright, now you need the text that will make up the image. How To Give Your Photos a Dark Processed Lomo Effect. This post was originally published in 2010 The tips and techniques explained may be outdated.

Follow this step by step post processing guide to give your photos a dark lomo style effect with high contrast, blue tones and vignette burns. The effect is based on the popular lomographic technique and is similar to the processing effect used in many fashion shots and advertisement designs. Overall this effect does a great job of adding impact to a plain photography with cool colour casts and unusual saturation. View full size photo effect Begin by opening your photograph of choice into Adobe Photoshop. Go to Image > Adjustments > Levels and tweak the tones of the image. At the bottom of the Layers palette, click the Adjustment Layer icon and select Curves. Change the drop down menu to Green and tweak the graph for the green channel to further alter the tones of the image. Finally alter the Blue channel, creating an inverted ‘S’ shape to enhance the blues to give a cool colour cast.
Achieving a Vintage Look Through Color Tones in Photoshop CS. By Guest Contributor Anna Gay Photographers are often striving for a “vintage” look in their photos, and even though there are endless ways of achieving a vintage look, there are a couple of characteristics to keep in mind.

First of all, the color tones in a vintage photo often lean towards either a blue or a red hue, or a cross-processed look. Vintage photos also have an element of noise or grain that can be achieved through textures, and also a certain amount of vignetting around the edges of the photo. In this tutorial, we will look at adjusting color tones and adding vignettes. This photo is the result of adjusting the color curves, adding two vignettes, and a color fill, which we will walk through step-by-step. First, open your photo in Photoshop and make sure your foreground color is set to white in your side tool bar. You will see the above dialogue box. As you can see here, there should be three layers – your Background image, then your two gradient layers. 44 Grunge Photoshop Tutorials. What’s up today?
We’ve actually compiled a whole array of creative grunge tutorials so you can infuse staggering grungy styles into your artworks using Photoshop. Lately the grunge effect is known to be an enormously popular trend in web design, and basically it doesn’t seem to be going anywhere any time soon. So if you want to really wild on your grunge designs, you may now explore different techniques in Photoshop that can give your artwork some textured, aged and uneven looks with rusting metal signs, dirty spots, grunge patterns, scorched borders, or overall distressed accents. By the way, some time ago our good friends from Templates.com blog have published a post with as many as 900 Free Grunge Photoshop Brushes, so if you’re really into the grunge design style you should definitely take a look at these. Now jump into the mix to get mod unkempt appearances!