
How to Create Glass Transparency. Account Suspended. 20 Very Useful Photography Tips And Tricks. The summer is here so now is the perfect time to make a lot of photos.
If you want to look like a professional photographer, then you must enhance your pictures. Take a look at this article because here you will find 20 very cool tutorials which will help you transform an average photo into a work of art. How to Chrome Plate Anything. Photoshop Retouching Tutorials. 8 Photoshop Tricks I Wish I Knew when I was a Student. Graphics Photoshop is one of the (if not THE) most well known software used in the design industry when it comes to manipulating images and pixels.

As a web designer I had some Photoshop lessons at school but that was 2 years ago. Today the software has evolved, more options are available, and I also learn a few tricks while practicing. You will find in this article eight tricks I wish I knew when I was a student (or wish existed in previous Photoshop versions). These are the kind of tricks that could make your workflow faster and your life easier. Easier Illustrator-like Layer Auto-Select As I do a lot of logo / UI design, I won’t hide it, I’m a huge fan of Illustrator. In Photoshop by default you have to go and select what you want to work on in the layer panel, and use a CTRL + click on the element to select it, or right-click somewhere in the working space and you’ll get a list of your layers (good luck if you did not rename them).
Get Better & Quicker Control on Your Current Tool Size. Skin Retouching in Photoshop. This tutorial will help you learn how to speed up skin retouching and polish photos in Photoshop using basic techniques.
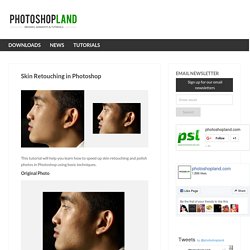
Original Photo Step 1 Duplicate the background image and rename it to Layer 1. Step 2 Go to Filter > Other > High Pass and set the Radius to around 4.5 pixels. Step 3 Change the Blending Options for Layer 1 from Normal to Soft Light and uncheck the eye to make Layer 1 invisible for the next step. Step 4 Duplicate the background image again and rename it to Layer 2. Step 5 As you’ll see the image will be just slightly blurred and smoothen out but not the edges. Photoshop CS4: A Picture Worth a Thousand Words. I love Photoshop techniques that offer all kinds of possibilities for experimentation—and the following tutorial is a perfect example of one of those techniques.
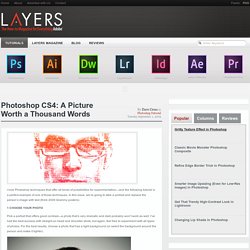
In this issue, we’re going to take a portrait and replace the person’s image with text (think 2009 Grammy posters). Pick a portrait that offers good contrast—a photo that’s very dramatic and dark probably won’t work as well. I’ve had the best success with straight-on head and shoulder shots, but again, feel free to experiment with all types of photos. For the best results, choose a photo that has a light background (or select the background around the person and make it lighter). Create a new document (File>New) in a size that’s smaller than your photo: the specifics don’t really matter.
Switch back to the photograph. Then, press Command-J (PC: Ctrl-J) to copy the selected pixels onto a new layer. Go back to the Select menu and choose Color Range again. Click the Create a New Layer icon at the bottom of the Layers panel. Making Complex Selections in Photoshop - DesignFestival. Making precise selections in Photoshop is an essential skill that every designer needs.

As a print designer, you will find yourself using selections to remove objects from their background to place within ads. As a web designer, you might extract an image and place it on a website with no background. If you are a photographer, you might make a selection to remove blemishes or other unwanted features from an image. You can’t get around it; everyone uses selections, and if you make excellent selections, you’ll end up with excellent work. So, what do you do when you have something that is extremely difficult to select with normal selection tools? Even with the masking and channels, you can’t make a precise selection consistently.
You can try the quick selection tool, which does a great job of making a selection of the bulk of the image, but making a more refined selection is difficult with this method. In comes Refine Mask to the rescue. We can fix this by using the Smart Radius Slider. How To Make a Cool Cinemagraph Image in Photoshop.
No doubt you’ll have heard of the term Cinemagraph since it exploded onto the Internets.
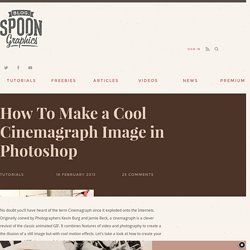
Originally coined by Photographers Kevin Burg and Jamie Beck, a cinemagraph is a clever revival of the classic animated GIF. It combines features of video and photography to create a the illusion of a still image but with cool motion effects. Let’s take a look at how to create your own animated GIF cinemagraph by playing around with Photoshop’s animation tools. Some of the best cinemagraph examples can be found on the creators’ own website.
Their original cinemagraphs from New York Fashion Week capture moments just like an ordinary photograph, but also preserve that living moment in time to re-experience endlessly. As the popularity of the cinemagraph grew we began to see mobile apps such as Cinemagram emerge, which allows the easy creation of amateur cinemagraphs using the device’s built in camera. Use a tripod. Alternatively you could always play around with existing stock video footage.