
How it works: DS18B20 and Arduino - Simon Tushev Website. There are many Arduino sketches on the Web that provide sample code how to work with MAXIM’s (formerly DALLAS) DS18B20\DS18S20 digital temperature sensors.

However, most of them do not describe the process in details. In this article, I’m going to show the gears that make the whole thing work. As you should know, DS18x20 family members are relatively accurate digital temperature sensors. They use MAXIM’s 1-wire bus protocol, which requires only 1 wire for receiving and transmitting data (A ground line is also required).
You can have up to 127 devices on 1-Wire line. By the way: to us all data transfer on 1-wire bus seems to be organized in bytes. To get a temperature measurement, we need to issue CONVERT [44h] command. All that measurements are stored in a so-called scratchpad – a piece of sensor’s RAM. To read a scratchpad, we issue a READ SCRATCHPAD [BEh] command. Then we can get a temperature according to the following formulae: Temp = ((HighByte << 8) + LowByte ) *0.0625 Useful info: Arduino 1-Wire Address Finder. This tutorial has been updated to use version 1.0+ of the Arduino software, and compatible libraries.
Please download the latest version of the Arduino software here: 1-Wire devices, such as the DS18B20 digital temperature sensor, are great to use with Arduino boards because you can connect many of them to a single IO pin. The freely available software libraries and example code make using 1-wire devices simple. There is only one problem we have seen with the examples on the web. If you have more than one device connected to a single pin, say an indoor temperature sensor, as well as an outdoor temperature sensor, how does your Arduino know which is which?
The answer is in the ROM embedded in each 1-wire device. The method that we use here at hacktronics is to connect each sensor, one at a time, to an Arduino and run the sketch provided below. Software used in this tutorial can be downloaded here: Arduino 1-Wire Tutorial. This tutorial has been updated to use version 1.0+ of the Arduino software, and compatible libraries.

Please download the latest version of the Arduino software at this URL: This is a new version of our 1-Wire digital temperature sensor tutorial, now with more temperature sensing! This tutorial will show you how to connect many DS18B20, "1-Wire" temperature sensors to your Arduino board, using only 1 digital IO pin. Software code used in this tutorial can be downloaded here: 1-Wire Slave. There have been a few brief discussions of a 1-Wire slave library.
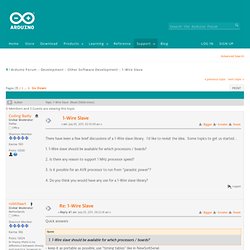
I'd like to revisit the idea. Some topics to get us started... 1. 1-Wire slave should be available for which processors / boards? Awesome. I found this googling "AVR one wire slave". +1 on a 1-Wiire slave lib.My list: Same as your core list (ATTiny45/85, ATTiny2313/4313). 2. Not for my applications, using 8 MHz internal or 16 MHz external. 3. This would be cool, but not essential for my present app as I need sufficient local power to run other things anyway. OneWire Arduino Library, connecting 1-wire devices (DS18S20, etc) to Teensy. OneWire lets you access 1-wire devices made by Maxim/Dallas, such as temperature sensors and ibutton secure memory. For temperature sensors, the DallasTemperature library can be used with this library. Download: OneWire.zip (Version 2.2) OneWire communicates with 1-wire devices.
To act as a 1-wire device, use the OneWireSlave library. Hardware Requirements OneWire requires a single 4.7K pullup resistor, connected between the pin and +5 volts. Basic Usage OneWire myWire(pin) Create the OneWire object, using a specific pin. MyWire.search(addrArray) Search for the next device. MyWire.reset_search() OneWire.